6
Supplies Needed for a Leak Test: • Clean paint brush • Water • Dish washing liquid
1. Make sure all grill Control Panel Knobs are turned to the “Off” position and verify that the LP Gas Cylinder is
tightened securely to the regulator.
2. Mix one part of water with one part of dish washing liquid.
3. Brush mix on Regulator, Propane Cylinder and connection. If “growing” bubbles appear, there is a gas leak.
a. If leak appears at the regulator/cylinder connection, repeat cylinder installation procedure, but do not over-
tighten. (NOTE: Only hand tighten) Repeat Leak Test.
b. If the leak is coming from the Gas Cylinder or if the leak cannot be stopped, remove the cylinder and DO NOT
USE THE GRILL. Call Customer Service at 1-800-251-7558. Be sure to
have the grill model number and
serial number
printed on the black label, located located on the underside of the control panel.
If you need
a replacement part under warranty, a proof of purchase will be necessary
.
How to Perform A Leak Test “FIRST TIME USE” and as required
To reduce the risk of serious bodily injury or death from fire or explosion:
• Perform a leak test before lighting your grill for the first time.
• Perform a leak test if any gas component is changed.
• Perform a leak test a minimum of once a season.
• Perform a leak test after a prolonged period of storage or non-use.
• Perform a leak test on the propane cylinder and exposed connections every time the propane cylinder changed.
• Perform leak tests in a well ventilated area.
• Never use an open flame to test for gas leaks.
• Never smoke near the grill during a leak test.
• Do not perform a leak test on a grill while it is hot or in use.
• Do not use the gas grill if you detect a gas leak that cannot be corrected by using the leak test procedures.
WARNING
!
NOTE:
If the regulator assembly is not working properly and you need a replace-
ment, contact
Customer Service at 1-800-251-7558
or go to
www.aussiegrills.com
.
Be sure to
have the grill model number and serial number
printed on the black label, located on the underside of the
control panel.
If you need a replacement part under warranty, a proof of purchase will be necessary
. You will
be asked to forward your proof of purchase via e-mail or to fax your proof of purchase to 423-639-1055 and reference
your model and serial number.
It is important to register your grill and retain your receipt.
Connecting LP Gas Cylinder
1. Purchase 1lb. LP Gas Cylinder at your local retailer.
2. Turn all Control Knobs to the “Off” position.
3. Remove protective cap from regulator opening. Remove plastic
cap from top of propane cylinder.
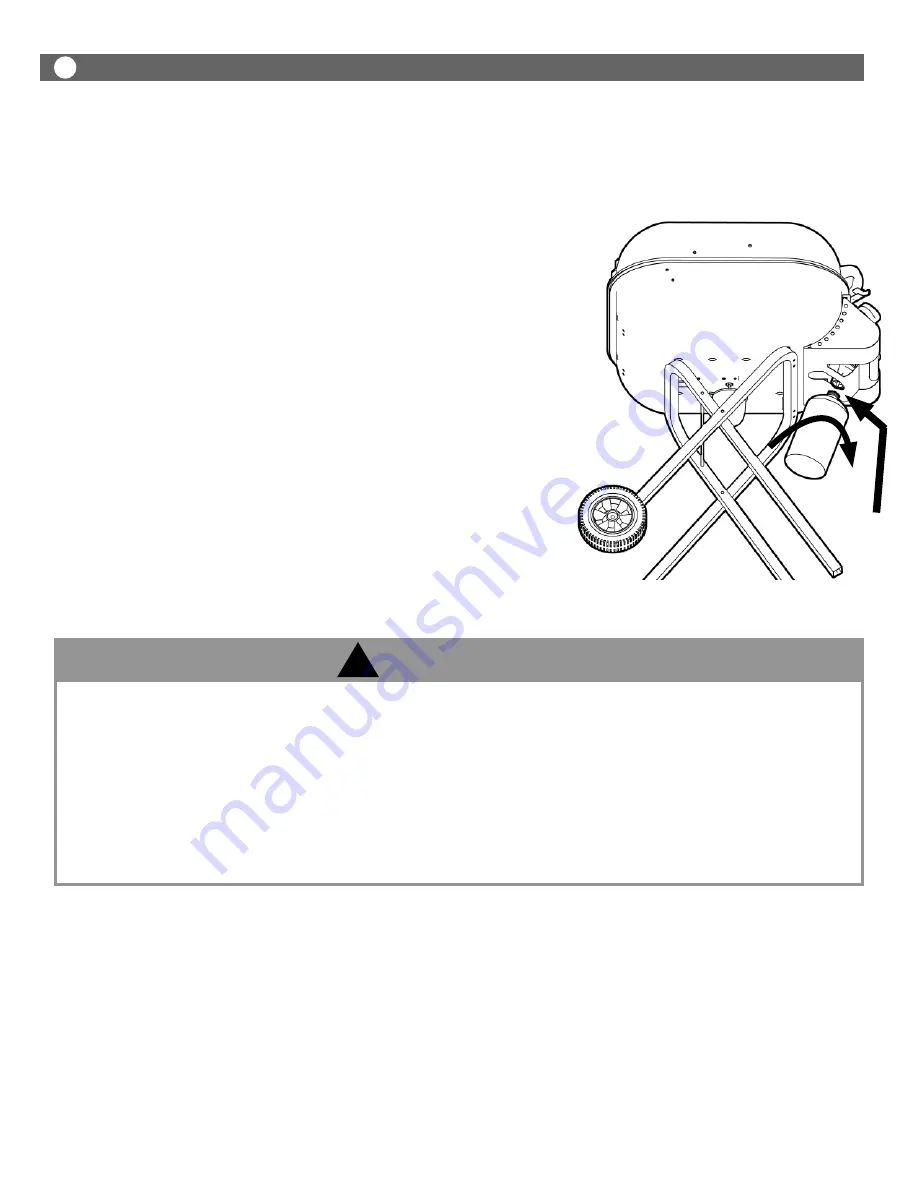
4. Insert the 1lb. LP Gas Cylinder into the threaded hole in the
regulator located on the underside of the control panel. Turn the
cylinder clockwise until firmly seated. Hand tighten only. (Fig. 1)
Disconnecting LP Gas Cylinder
1. Turn all Control Knobs to the “Off” position.
2. Remove the cylinder by turning counterclockwise.
3. Replace the protective cap over the regulator opening. Replace the
plastic cap on the top of propane cylinder for storage if not empty.
4. Store cylinder outdoors and away from grill
Hand-tighten
Cylinder in clockwise
direction
LEAK
TEST
Fig. 1
NOTE: NEVER FOLD UP OR TRANSPORT GRILL WITH CYLINDER ATTACHED.


