4
STEP 1.
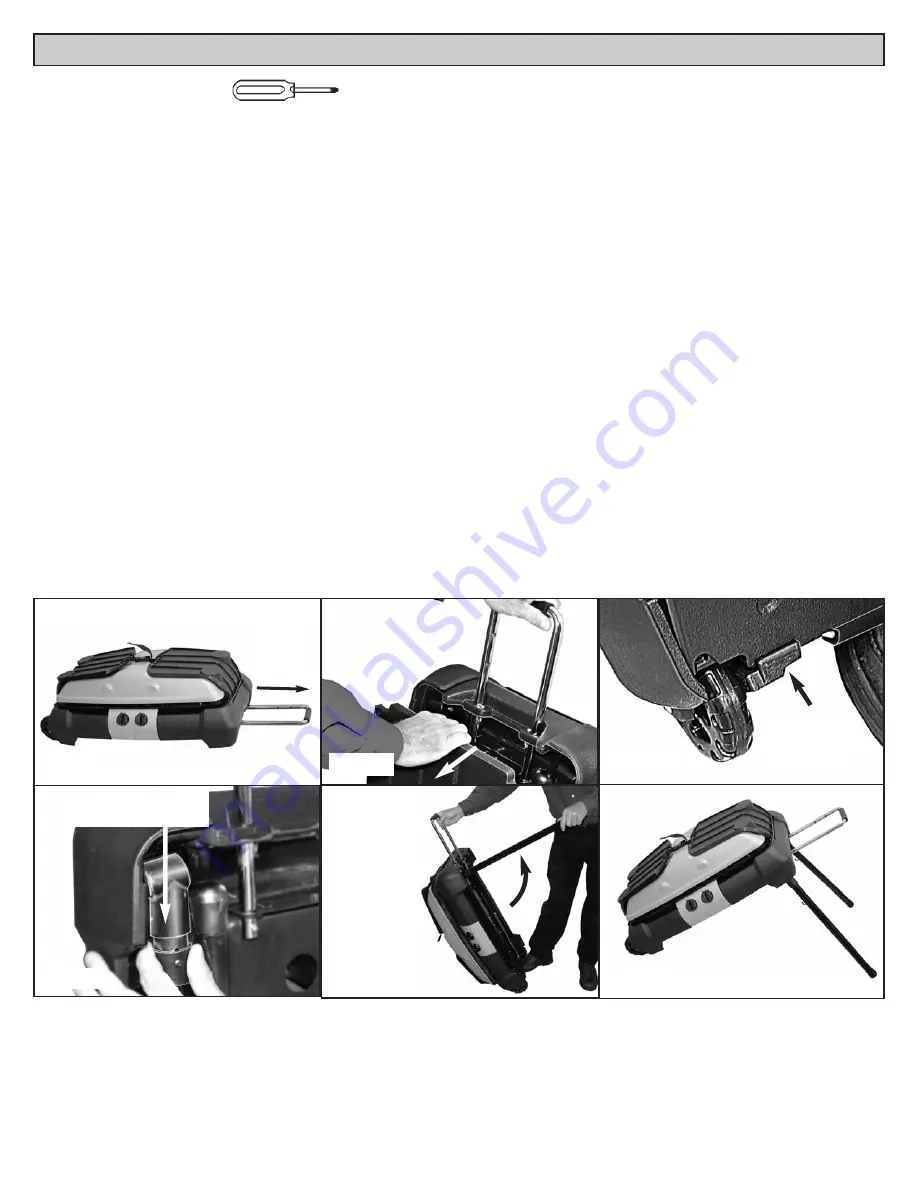
Lay Grill on floor or a level surface. Pull Right Handle Bar all the way out, until it clicks into
place. (
Fig. 1)
(There are three positions).
STEP 2.
Pull grill off the floor while tilting against your foot or lean it against a wall. Pull the leg shelf
away from the Body snap locks at the top.
(Fig. 2)
Lift Leg Shelf out from the bottom Shelf hooks and set
aside.
(Fig. 3)
.
STEP 3.
Pull downward on the spring loaded Locking Ring of the Right front and rear Legs.
(Fig. 4)
Swing the legs out and away from the grill until they lock into place. (
FIG. 5)
STEP 4.
Lean Grill on the right legs.
(Fig. 6)
Lift up other side of the Grill, pull Locking Ring toward end of
leg and open the left side legs. (
FIG. 7)
STEP 5.
Pick up the leg shelf and hang the holes in the corners onto the Hooks on the Right Legs.
(Fig. 8)
Raise left end of Leg Shelf over locking springs until it snaps into place of both legs.
(FIG. 9)
STEP 6.
Squeeze the Strap on top of the Grill to unlock.
(Fig.10)
Pull out the Left handle bar and fold
down the Side Tables.
(Fig. 11)
STEP 7.
Open the Hood. With a Phillips Head Screwdriver, remove the Hood Handle from the inside of
the Hood.
(Fig. 12)
With the same screws, carefully align the Metal Spacers and Handle.
(Fig. 13)
Be
sure the open side of the handle points toward you as you install it. Assemble the Handle on the outside
of the Hood.
(Fig. 14)
TOOLS REQUIRED:
Phillips Screwdriver
Bottom Shelf
Hook
FIG. 3
FIG. 2
FIG. 1
Pull Leg Locking
Ring Down
FIG. 4
Right
Handle
Bar
FIG. 5
Open
Legs
Outward
FIG. 6
ASSEMBLY


