background image

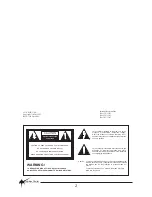
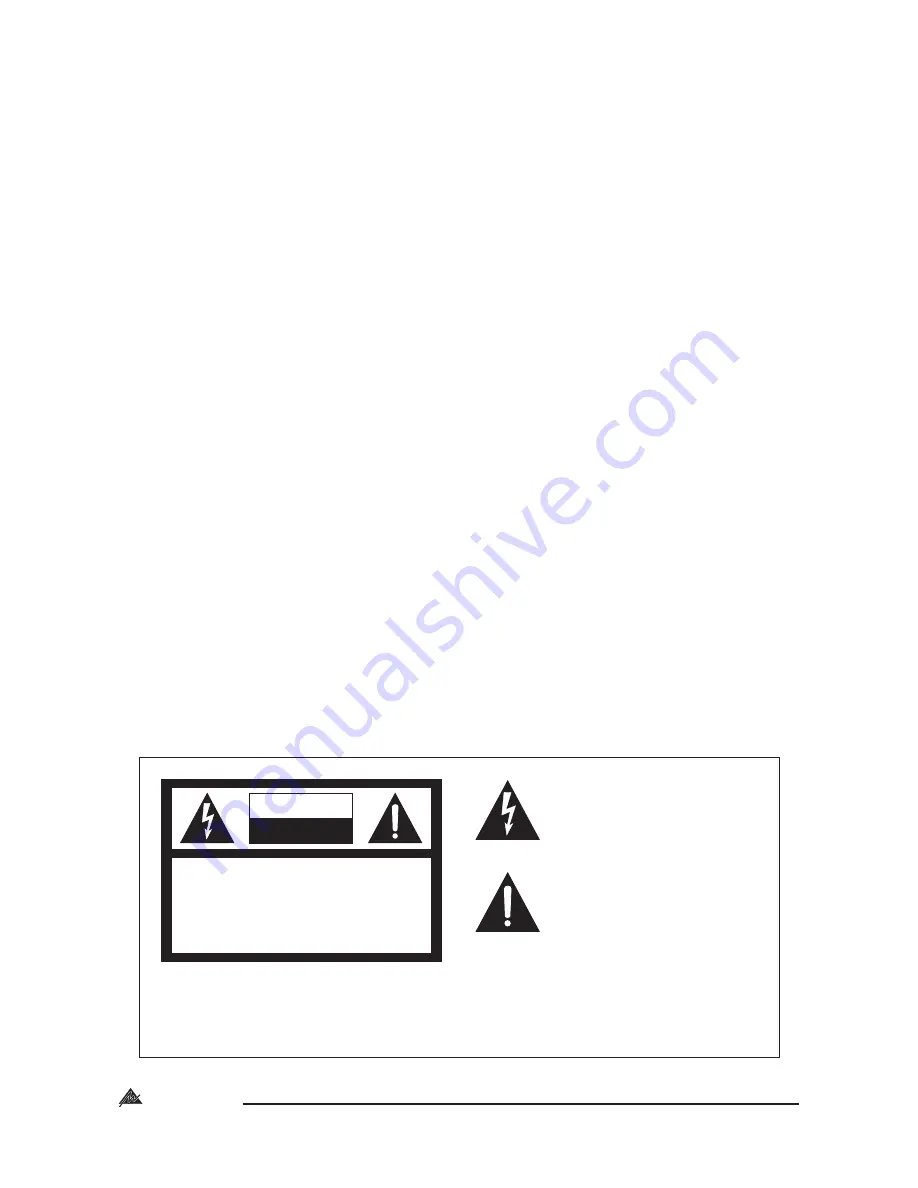
CAUTION

RISK OF ELECTRIC SHOCK

DO NOT OPEN

CAUTION: TO REDUCE THE RISK OF ELECTRIC SHOCK.

DO NOT REMOVE COVER (OR BACK).

NO USER-SERVICEABLE PARTS INSIDE.

REFER SERVICING TO QUALIFIED SERVICE PERSONNEL.

This symbol is intended to alert the user to the
presence of uninsulated “dangerous voltage”
within the product’s enclosure that may be of
sufficient magnitude to constitute a risk of electric

This symbol is intended to alert the user to the
presence of important operation and main-
tenance (servicing) instructions in the literature

To prevent electric shock do not use this (polarized) plug
with an extension cord, receptacle or other outlet unless
the blades can be fully inserted to prevent blade ex-

To prevent electric shock, match wide blade of plug to

shock to persons.

accompanying the appliance.

posure.

wide slot, fully insert.

Caution:

WARNING !

TO REDUCE THE RISK OF FIRE OR ELECTRIC SHOCK.
DO NOT EXPOSE THIS EQUIPMENT TO RAIN OR MOISTURE.

INSTALLATION SERIES

Australian Monitor

2

AUS, EUR, USA
Copyright 3rd Dec 2003
Rev A: 3rd Dec 2003

Internal Revision Info
Rev 1 24/11/03
Rev 2 28/11/03
Rev 3 02/12/03

Summary of Contents for AMIS26

Page 1: ...ures Contractor Friendly Installation Operation Manual INPUT ON INSTALLATION SERIES AMIS26 10dB 10dB 0dB 20dB 0dB 0dB 15dB 15dB 15dB 15dB A B OFF OFF OFF OFF OFF OFF 0dB 0dB 0dB 0dB 0dB 0dB OFF OFF OFF OFF OFF OFF A A A A A A B B B B B B OUTPUT 1 OUTPUT 2 OUTPUT 3 OUTPUT 4 OUTPUT 5 OUTPUT 6 A B ...

Page 2: ...f important operation and main tenance servicing instructions in the literature To prevent electric shock do not use this polarized plug with an extension cord receptacle or other outlet unless the blades can be fully inserted to prevent blade ex To prevent electric shock match wide blade of plug to shock to persons accompanying the appliance posure wide slot fully insert Caution WARNING TO REDUCE...

Page 3: ...CONTENTS Page 1 Introduction 4 2 Front Panel 5 3 Back Panel 6 4 Internal Adjustment 7 5 Block Diagram 9 6 Dimensions 10 7 Specifications 11 INSTALLATION SERIES Australian Monitor 3 ...

Page 4: ...per input Each of the AMIS26 s inputs is individually assignable to any of the 6 outputs via front panel DIP switches Outputs can be balanced or unbalanced and feature up to 30dB of attenuation so they can be run as any combination of line level or mic level outputs Ample label space is provided for both inputs and outputs and the AMIS26 is powered via a supplied 24VDC power supply The AMIS26 prov...

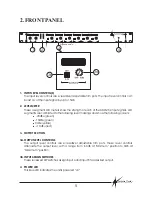
Page 5: ...rkings and show the following colours 20dBu green 10dBu green 0dBu yellow 10dBu red The output level controls are screwdriver adjustable trim pots These level controls attenuate the output level with a range from 60dB at Minimum position to 0dB at Maximum position These recessed DIP switches assign input A and input B to a desired output This blue LED indicates the unit is powered on INPUT ON INST...

Page 6: ... the lid see internal adjustments section page 7 This 2 1mm connector accepts power from the provided 24VDC power supply In some circumstances it may be necessary to ground the unit to eliminate noise in the system This can be done by using this earth stud OUTPUT 6 OUTPUT 5 OUTPUT 4 OUTPUT 3 OUTPUT 2 OUTPUT 1 INPUT B INPUT A EARTH DC INPUT 24VDC ve ENGINEERED BY AUDIO TELEX COMMUNICATIONS PTY LTD ...

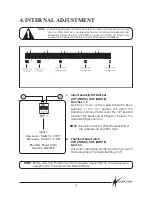
Page 7: ...e AMIS26 and should only be attempted by a qualified technician All internal adjustments are accessible through the lid of the AMIS26 Always turn off the DC power and remove the DC power cord before accessing the inside of the AMIS26 ON 1 2 3 ON 1 2 3 ON 1 2 ON 1 2 ON 1 2 DIP 1 DIP 3 DIP 2 DIP 4 DIP 5 Input 1 Line Level Switch 1 2 OFF Mic Level Switch 1 2 ON Phantom Power 24V Switch 3 ON OFF Line ...

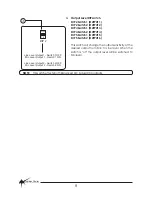
Page 8: ...h 1 OUTPUT 3 DIP 4 Switch 2 OUTPUT 4 DIP 5 Switch 1 OUTPUT 5 DIP 5 Switch 2 OUTPUT 6 This switch will change the output sensitivity of the desired output from Mic to Line level When the switch is on the output level will be switched to Mic level ON 1 2 DIP 2 Line Level Output 1 Switch 1 OFF Mic Level Output 1 Switch 1 ON Line Level Output 2 Switch 2 OFF Mic Level Output 2 Switch 2 ON 3 ...

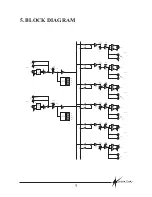
Page 9: ...0dB 0dB 0dB 10dB 10dB 20dB 20dB VU CONTROL VU CONTROL INPUT GAIN INPUT GAIN OUTPUT VOLUME OUTPUT VOLUME OUTPUT VOLUME OUTPUT VOLUME OUTPUT VOLUME OUTPUT VOLUME A A A A A A B B B B B B 30dB 30dB 30dB 30dB 30dB 30dB 0dB 0dB 0dB 0dB 0dB 0dB 0dB 0dB 0dB 0dB 0dB 0dB 0dB 0dB 0dB 0dB 0dB 0dB XLR XLR XLR XLR XLR XLR RCA RCA RCA RCA RCA RCA 0dB 0dB OUTPUT 1 OUTPUT 2 OUTPUT 3 OUTPUT 4 OUTPUT 5 OUTPUT 6 ...

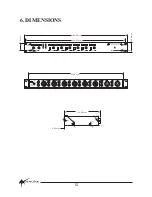
Page 10: ...B B OUTPUT 1 OUTPUT 2 OUTPUT 3 OUTPUT 4 OUTPUT 5 OUTPUT 6 A B 466 00 mm 482 00 mm 44 00 mm 32 00 mm OUTPUT 6 OUTPUT 5 OUTPUT 4 OUTPUT 3 OUTPUT 2 OUTPUT 1 INPUT B INPUT A EARTH DC INPUT 24VDC ve ENGINEERED BY AUDIO TELEX COMMUNICATIONS PTY LTD IN SYDNEY AUSTRALIA XLR 1 Ground 2 Signal 3 Signal RCA XLR OUTPUTS ARE INTERNALLY SWITCHABLE BETWEEN MIC LINE LEVEL RCA INPUTS ARE LINE LEVEL XLR INPUTS ARE ...

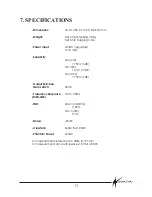
Page 11: ...5lb Shipping 6 6lb 24VDC regulated 12VA max Output Mic Line Frequency Response THD Noise Crosstalk Phantom Power Line XLR 775mV 0dB 28dB All measurements done with levels set In Out at 0dB Mic XLR 10mV 37dB Line RCA 775mV 0dB 10Hz 50kHz Line In XLR RCA 0 02 Mic In XLR 0 1 89dB Better than 80dB 24VDC All measurements referenced to 0dBu 0 775mV Gain switch 0dB 3dB ...

Page 12: ...28 4233 E mail wa audiotelex com au P O Box 512 Albany 1331 Unit B 11 Piermark Drive Albany 1331 Ph 09 415 9426 Fax 09 415 9894 E mail audiotlx nznet gen nz AUSTRALIA and NEW ZEALAND www australianmonitor com au EUROPE ASIA MIDDLE EAST www australianmonitor com au International Sales Private Bag 149 Silverwater NSW 1811 149 Beaconsfield Street Silverwater NSW 2128 Australia Ph 61 2 9647 1411 Fax 6...

Reviews: