36
In other cases, you need to manually link the remote controller to your aircraft.
Perform the following steps to do that.
1. Press the linking button next to the USB port on the right of the aircraft body to
let the aircraft enter the linking state.
2. Turn on the remote controller and launch the Autel Explorer App. Go to the
mission flight page, click the wheel icon on the upper right corner to go to the
settings menu. Click "Remote Controller -> Data Transmission and Image
Transmission Linking -> Start Linking" and wait for several seconds until the
linking is successful.
6. Calibrate the remote controller
If the stick works improperly, we recommend that you calibrate the remote
controller. You can use the Autel Explore App to calibrate the remote controller or
perform the following steps:
1. Turn on the remote controller. Go to App camera page. Then click Setting
(
) -> Remote Controller -> Remote Controller Calibration. Two 米-shaped
and two horizontal bars will appear on the screen, representing the left and right
command sticks and dials, respectively.
2. Stick calibration: Push and hold the stick one by one in eight directions until you
hear a beep each time.
3. Dial calibration: Turn the dial clockwise until you hear a beep and then turn it
counterclockwise until you hear another beep.
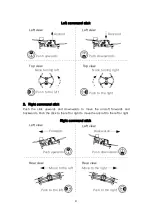
7. Command stick mode
Three command stick modes are provided: mode 1, mode 2, and mode 3. You can
set this in the Autel Explorer App based on your own preferences. By default, "Mode
2" is used by the remote controller. In this mode, you can move the left command
stick to control the elevation and heading of the aircraft and move the right
command stick to control the forward and backward pitch of the aircraft and left or
right orientation.

