background image


11

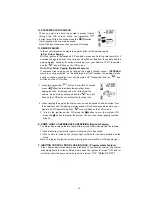
timer program mode. 

Note:

 Maxi mum is 19 hours. 


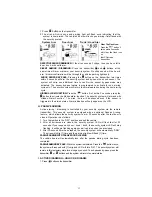
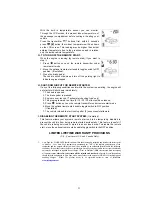
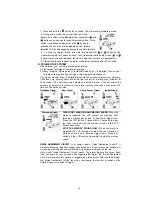
4. Time Set-Up For “Daily Timer Start”: Example to AM 6:30  

1. Press & hold the 

  button for 3 seconds, two-melodies will sound and the 

“Hours” digit will flash for  adjustment. 

  2. Press & hold the 

  button for 2 seconds, the LCD screen will flash the 


/


icons and “Hours” digit for Hour set-up. 

3. Press 

  or 

  button to decrease or increase the hour digit until 

AM


6:00  


  4. Press the 

  button once again then the minute digit will flash. 

5. Press 

  or 

  button to decrease or increase the minutes digit until 

AM 6:30


6.


Press the 

  button for 2 seconds, one-melody will sound  to confirm exit of the 

timer program mode. 


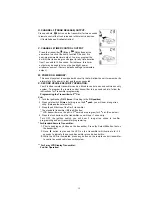
OPERATION:


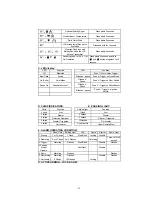
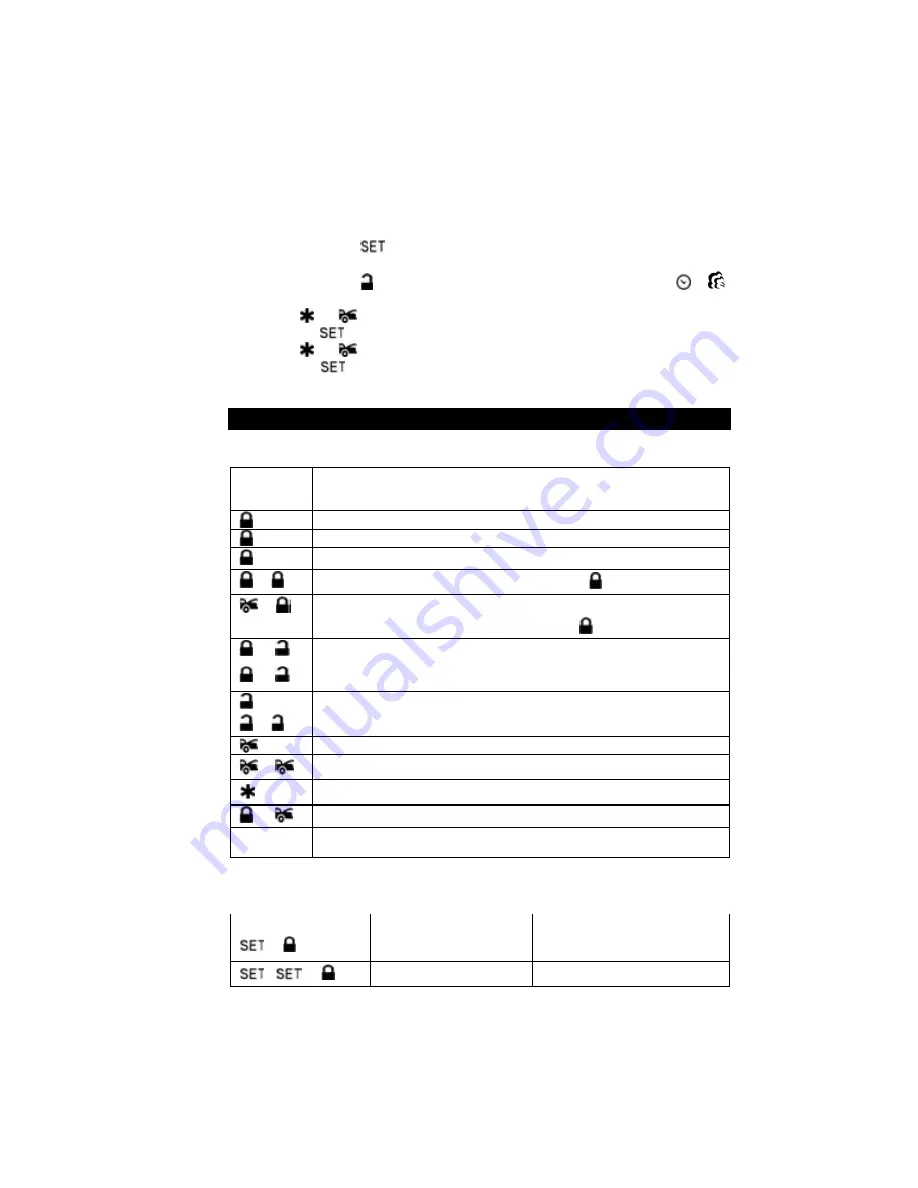
A. 

REMOTE TRANSMITTER OPERATION: 


Transmitter 

Button 

System Function 

Remark 


Lock Doors & Arm System  


Panic function 

Press and Hold for 3 seconds 


Car Locator 

Under armed mode 


-


Arm and Delete The 2 Stage Shock Sensor 

Press 

  twice within 3 seconds 


Arm System and Hidden Alarm Function 

Press within 3 seconds and Hold 

  button for 2 seconds 


Silent Arming / Disarming 

Ignition in "off" position. 


Active Anti Car-Jacking Mode 

Ignition in "on" position press and 

hold for 2 seconds 


Unlock Doors & Disarm System 


-


Two Steps Door Unlock & Disarm System 

Press twice within 3 seconds. 


Trunk Release (Channel 3) 

Press and Hold for 2 seconds 


-


Passive Arming By-pass 

While the system Disarmed. 


Activate or Turn Off The Remote Start 

Press  button once. 


+


Channel # 4 Timer Output (

4

Optional 

II 

Switching code For 2nd Car Operation. 

For regular XT-65 remote 

transmitter Only 


B. LCD DISPLAY TRANSMITTER OPERATION ONLY: 

Transmitter Button 

System Function 

Remark 


-


(C)


System’s Trigger Record 

Check 

Press within 3 seconds 

-


-


(C)


System’s Status Check 

Press within 3 seconds 

Summary of Contents for C3-RS-727A LCD

Page 1: ...SYSTEM With Built in Temperature sensor And Two way Serial Port Data Link Compatible Please see page 23 of this manual for more details OPERATION MANUAL Please register your product at www autopageusa...

Page 2: ...Start 9 9 9 10 10 REMOTE TRANSMITTER OPERATION A REMOTE TRANSMITTER OPERATION 10 B LCD DISPLAY TRANSMITTER OPERATION 11 C LED DISPLAY 11 D CHIRP INDICATOR 11 E PARKING LIGHT 11 F ALARM OPERATION COND...

Page 3: ...smitter 18 18 18 18 REMOTE START OPERATION A TO REMOTE START THE VEHICLE Safe Start Child safety mode 19 B TO OPERATE VEHICLE WHILE RUNNING ON REMOTE START 19 C TEMPORARY STOP FEATURE 19 D TURBO CHARG...

Page 4: ...73LCD This transmitter uses a standard 1 5 volt AAA battery Information on changing the battery can be found on page 5 of this manual XT 65 This transmitter uses one 1 3 volt lithium ion battery CR203...

Page 5: ...he vehicle 6 The vehicle windows must be rolled up 7 Should the unit malfunction disconnect the fuse until the problem is corrected 8 The use and operations of this system is the sole responsibility o...

Page 6: ...sarmed Armed Mode Your vehicle is in armed mode Valet Mode All the function shall be temporarily on hold Remote Transmission You are transmitting the signal to control unit In Range Indicator Your are...

Page 7: ...er Press within 3 seconds 2 second Button Lock enable disable Press w ithin 3 seconds and Hold button for 2 seconds 2 second Melody Vibration Mode Press within 3 seconds and Hold button for 2 seconds...
Page 8: ...s useful when you are in a noisy place and it is difficult to hear the beep sound from the remote control In this mode the remote control vibrates itself if your security system is triggered Press the...

Page 9: ...the LCD screen 2 If user is out of range it has five short bi sounds and the icon will disappear on the LCD screen D CLOCK TIMER SETTING Transmitter Button Description Press Transmitter Button 1 Pres...

Page 10: ...n the Minutes digit flashes for adjusting 5 Press or button to decrease or increase the Minutes digit until PM 6 30 6 Press button once again then icon flashes for alert alarm ON OFF setting 7 Press b...

Page 11: ...System Panic function Press and Hold for 3 seconds Car Locator Under armed mode Arm and Delete The 2 Stage Shock Sensor Press twice within 3 seconds Arm System and Hidden Alarm Function Press within 3...
Page 12: ...flashes Pause Zone 4 Trigger on Shock Sensor 5 flashes pause Zone 5 Trigger on Ignition Switch D CHIRP INDICATORS E PARKING LIGHT Chirp Function Parking light Function 1 chirp Arm 1 flash Arm 2 chirp...

Page 13: ...rity system will arm and with Hidden Alarm Function The siren horn will be silenced even if the sensor is triggered in the armed status Alarm indication will only appear on the LCD H PASSIVE ARMING Ac...

Page 14: ...lly re arm itself in 60 seconds after disarming with remote transmitter Automatic rearm will cancel if any door is opened before the 60 seconds timer has elapsed J DISARMING WITHOUT A TRANSMITTER OVER...

Page 15: ...u to temporarily bypass all alarm function eliminating the need to hand your trans mitter to parking attendants or garage mechanics When the system is in valet mode all alarm functions and remote star...

Page 16: ...s Then it will stop and automatic reset and re arm If the any one of the sensors or detectors is still active the alarm system will sound a maximum of 3 times of 30 seconds cycles Trunk Hood Trigger D...

Page 17: ...MODE a 50 seconds after the system has beer triggered The siren will start chirping for 15 seconds b During this 15 second period of chirping you will be alerted to push the valet switch once to turn...

Page 18: ...he out of car driver paging function It will respond with chirps from the vehicle plus a melody will sound and the icon will flash on the LCD screen to confirm the function is on 2 When tapping the pa...

Page 19: ...nsmitter to a second vehicle follow the instructions for Transmitter programming Programming the Transmitter to 2 nd Car Enter 1 Turn the ignition key ON 3 times Finishing in the ON position 2 Press v...

Page 20: ...OTE START OPERATION A TO REMOTE START THE VEHICLE When you want to start your vehicle 1 Press button once on the transmitter 2 The parking light will activate to indicate the remote start received the...

Page 21: ...EATURE This feature allows the vehicle to remain running after the key has been removed from the ignition This feature is useful for occasions when you wish to exit and lock the vehicle for short peri...

Page 22: ...3 Hours Timer Start Rapidly depresses the button or depresses buttons if you program buttons Start Stop button The parking light will flash 3 times The siren or horn chirps 3 times The vehicle is now...

Page 23: ...tart enable toggle switch to OFF position If installed 7 The vehicle refused to start running after 3 unsuccessful attempts I DISABLING THE REMOTE START SYSTEM If installed This feature allows your sy...

Page 24: ...loyees or agents or anyone else whomsoever resulting directly or indirectly from the use or presence of the equipment or parts Consequential damages of any kind any inability of the purchaser to use t...

Page 25: ...Your RS 727Ais CI3 compatible and will open your world to the true power of two way communication Complete tracking and full cell phone functionality can be added to your system Fo r more information...

Page 26: ...26 Compatible 2 Way Communication to the Power of 3 960 Knox Street Unit B Torrance CA 90502 Tel 310 323 1800 or 800 262 2527 www autopageusa com...

Reviews: