
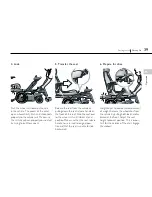
Push the wheel unit towards the rails
in the vehicle. The covers of the clutch
open automatically. Push until it connects
properly to the vehicle rails. Make sure
the units have been properly connected
by trying to pull them apart.
4. Lock
5. Transfer the seat
Release the seat from the vehicle by
pulling down the seat release handle at
the front of the seat. Slide the seat over
to the wheel unit until it locks at end
position. Make sure that the seat release
handle has returned to original posi-
tion and that the seat is unable to slide
backwards!
6. Prepare for drive
Height adjust to compensate movement
of weight. Release the wheelchair from
the vehicle by pulling both lock handles
placed at the front. Adjust the seat
height to lowest position. This is impor-
tant for the balance of the chair. Engage
the motors!
39
Getting seated
Carony Go
EN
O
pe
rat
io
n
Summary of Contents for Carony Go
Page 2: ......
Page 3: ...SV EN DE FR ES IT ...
Page 6: ...6 Carony Go Ta plats i bilsätet Säkerhet Säkerhetsåtgärder ...
Page 7: ...7 Ta plats i bilsätet Carony Go SV Säkerhet ...
Page 28: ...28 Carony Go Getting seated Safety Safety measures ...
Page 29: ...29 Getting seated Carony Go EN Safety ...
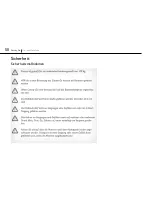
Page 50: ...50 Carony Go Um und Hinsetzen Sicherheit Sicherheitsmaßnahmen ...
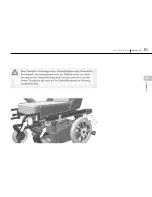
Page 51: ...DE 51 Um und Hinsetzen Carony Go Sicherheit ...
Page 72: ...72 Carony Go Assise dans le véhicule Sécurité Mesures de sécurité ...
Page 73: ...FR 73 Assise dans le véhicule Carony Go Sécurité ...
Page 94: ...94 Carony Go Asientos y accesorios para asientos Seguridad Medidas de seguridad ...
Page 95: ...ES 95 Asientos y accesorios para asientos Carony Go Seguridad ...
Page 116: ...116 Carony Go Soluzioni per seduta Sicurezza Misure di sicurezza ...
Page 117: ...IT 117 Soluzioni per seduta Carony Go Sicurezza ...
Page 137: ......
Page 138: ......














![Dietz Rehab AS[01] User Manual preview](http://thumbs.mh-extra.com/thumbs/dietz-rehab/as-01/as-01_user-manual_2495939-01.webp)


