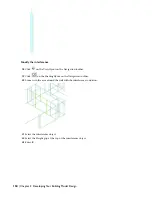
In this exercise, you added wall openings for the hallway leading to the bathrooms and additional cased openings for
the elevator doors. You used dynamic dimensions to place the hallway opening precisely and the offset/center option
to place the openings for the elevator doors. The cased openings are examples of a door style in which the door panel
and swing are turned off. You used door and opening styles that represent the finished door or opening rather than a
generic or standard door or opening. If you create a schedule that reports these openings, the openings report as ''cased
openings,'' adding more precision to your schedule.
Exercise 5:Adding Endcaps to a Wall
You can define different wall endcap styles to control the shape, the width, and depth of starting and ending wall
segments. You typically create a wall endcap style to use with a specific wall style. You create a wall endcap style from
one or more open polylines that correspond to the end condition of a component in the wall style. When necessary,
you can override the wall endcap style assigned in a wall style. When you override the assigned endcap style, you can
select a different endcap style for one or both ends of a wall segment. When you apply the endcap style, the wall
segment is trimmed or extended to the shape of the endcap, and a new wall start point is defined.
This exercise shows how to apply bullnose endcaps to a wall near the entrances to the bathrooms. You apply a predefined
endcap style to the wall by overriding the standard endcap style defined by the wall style. The endcap style you apply,
Tutorial-Bullnose, has been set up for use in this exercise. Using the Style Manager, you can access this style for editing,
or you can create new wall endcap styles.
Add an endcap as an override
1
Open the X-Adding Endcaps drawing.
2
Verify that Osnap is off.
3
Click
on the Zoom flyout on the Navigation toolbar, and zoom in to the area around locations 1 and 2.
4
Select the horizontal wall near location 1, right-click, and click Endcaps
➤
Override Endcap Style.
5
Select a point at the end of the wall near the number 1.
6
In the Select an Endcap Style dialog box, select Tutorial-Bullnose, and click OK.
A bullnose endcap is added to the end of the wall at location 1.
Lesson 3: Refining the Building Core | 117


