Understanding the Tutorial Project
Autodesk Architectural Desktop and the tutorial dataset feature powerful tools to assist you in the creation of projects
and the design of a five-story office building. The office building consists of approximately 25,000 square feet per floor,
a three-story atrium area with an angled staircase, a centralized bank of elevators, and two emergency exit stairwells.
The interior building space also includes a typical central core of conference rooms, bathrooms, and storage rooms, in
addition to open space intended for future cubicle and office layouts. The tutorial covers new features that allow you
to create a project template. The project template has project standard object styles for use in all project drawings and
a project palette with tools specific to the building type. The goal of the tutorial is to have you create a project template
that is reusable for future work on buildings of the same type.
If you have not done so already, you should install the small office building dataset. The first two lessons in this part
of the tutorial involve creation of a project template for an office, an exploration of drafting technique in that you
refine a sketch to produce generic object, then replace the generic objects with styles representing the finished building
components. The third and last lesson of this part shows how to version styles, update the project standard styles and
then populate the project drawings with the latest version of a style from a single source - the project standards. You
also see how a new or revised object style can be uploaded to the project standards from a project drawing, so as to
make it available for project tools and the validation of all project drawings.
Lesson 1: Setting up the Small Office Building Sample Project
As you begin the design development phase of a project, you familiarize yourself with the requirements of the project
as outlined in the design program and conceptual drawings. Often you can begin to identify design objects that will
be repeated throughout the building model, such as specific types of walls, doors, and windows. In Architectural
Desktop, you can create tools that represent your most frequently-used design objects, allowing you to add objects
such as walls, doors, and windows to your drawings quickly and easily.
This lesson introduces you to the key concepts essential to working with projects that are organized and managed in
a project environment. This introduction focuses on the fundamental information you need to be successful as you
begin your work with projects. For in-depth coverage of project-related topics, use the cross-references provided
throughout the lesson. Finally, you create a new project, which forms the basis for future work. You create a project
template, with project standards styles and tools. This is a one-time task that lets you see how you can create templates
for the building types you specialize in. When you have finished the project for use as a template, you can then begin
any similar project with all the required standards configured and project-specific tools readily at hand in project-specific
palettes.
Exercise 1: Exploring Project Drawings
This exercise introduces you to the terms and concepts that are essential to working in a project environment by
exploring the contents and structure of a sample project. This introduction focuses on the fundamental information
you need to be successful as you begin your work with projects. For in-depth coverage of project-related topics, use the
cross-references provided throughout the exercise.
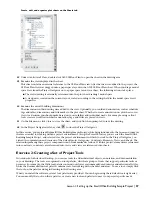
As you explore the sample project, you work with two key components of the project environment: the Project Browser
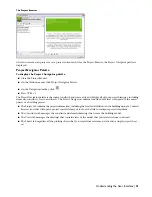
and the Project Navigator. In the Project Browser, you create a new project, or select an existing project in which to
work. In the Project Navigator, you perform all project-specific tasks, such as creating, organizing, and accessing project
drawings. In this exercise, you use the Project Browser to open the Small Office Building Sample Project. You use the
Project Navigator to explore the contents and organization of this project.
The Project Navigator is a palette that remains open during your project session. The Project Navigator gives you access
to the various drawings that make up your building model, and it allows you to control the way in which your building
model is organized into a project.
Conceptually, a project is composed of two parts: the building model and the reports that are generated from the
building model. The building model is made up of two types of drawing files: constructs and elements. Reports are made
up of views and plot sheets, which are also drawing files. This exercise introduces you to these key project components,
as you explore the structure that allows you to effectively organize the building and documentation data that make up
your project.
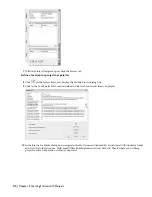
Open the Project Browser
1
On the File menu, click Project Browser or, on the Navigation toolbar, click
.
30 | Chapter 2 Getting Started with Projects

