Attaching Objects with a System Anchor
Use this procedure to attach objects with a system anchor. With system anchors, you can attach building
systems objects to other building systems objects based on their assigned system. The movement of an object
anchored with a system anchor is constrained by the object to which it is anchored. You can change the
position of an anchored object by dragging the object along the entire system run. You can also drag the
anchored objects to other runs assigned to the same system.
To attach an object with a system anchor
1
Click Home tab
➤
Build panel
➤
Tools drop-down
➤
Content Browser
.
2
Select the MEP Stock Tool Catalog.
3
In the Content Browser, on the left navigation bar, select Common
➤
Common Items.
4
Click the i-drop icon on the Systems Anchor tool, and drag the tool onto your drawing.
5
Select the object to be anchored.
6
Select a point on the curve to which to anchor the object, and press
ENTER
.
The object is anchored to the curve at the X position. When the object is placed, the Y and Z
positions are 0.
Attaching Objects with a Reference Anchor
Use this procedure to attach objects with a reference anchor. With reference anchors, you can attach building
systems objects to other building systems objects by reference, or association. The movement of an object
anchored with a reference anchor maintains the association between the objects. When you change the
position of the anchored object, the reference object is moved along with it. A point of connection is always
maintained. Reference anchors are best suited for attaching objects to non-linear objects (like flex duct or
wire) that may change in layout frequently.
To attach an object with a reference anchor
1
Click Home tab
➤
Build panel
➤
Tools drop-down
➤
Content Browser
.
2
Select the MEP Stock Tool Catalog.
3
In the Content Browser, on the left navigation bar, select Common
➤
Common Items.
4
Click the i-drop icon on the Reference Anchor tool, and drag the tool onto your drawing.
5
Select the object to be anchored.
6
Select a point on or near the end of the curve to which to anchor the object, and press
ENTER
.
The object is anchored to the end of the curve.
Rotating Objects Attached with Curve Anchors
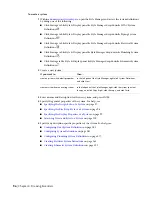
1
Select the object that is attached to a curve, such as the centerline of another object.
2
Rotate the selected object:
Then right-click, and click…
If you want to…
Curve Anchor
➤
Flip X.
flip the object along the X axis
Curve Anchor
➤
Flip Y.
flip the object along the Y axis
Curve Anchor
➤
Flip Z.
flip the object along the Z axis
110 | Chapter 4 Drawing Essentials
Summary of Contents for 235B1-05A761-1301 - AutoCAD MEP 2010
Page 1: ...AutoCAD MEP 2010 User s Guide March 2009 ...
Page 22: ...4 ...
Page 86: ...68 ...
Page 146: ...128 ...
Page 180: ...162 ...
Page 242: ...Modifying the elevation of a duct 224 Chapter 6 Drawing HVAC Systems ...
Page 264: ...246 ...
Page 480: ...462 ...
Page 534: ...516 ...
Page 616: ...598 ...
Page 658: ...640 ...
Page 788: ...770 ...
Page 802: ...784 ...
Page 820: ...802 ...
Page 878: ...860 ...

