Performing Colour Grading
31
minus button (-). To enable layer 11, press 0. To enable layer 12, press the decimal button
(.).
3.
If you are accessing the Grade menu after having created a geometry or key, do one of the
following:
•
Press the IN option button to grade inside the secondary.
•
Press the OUT option button to grade outside the secondary.
4.
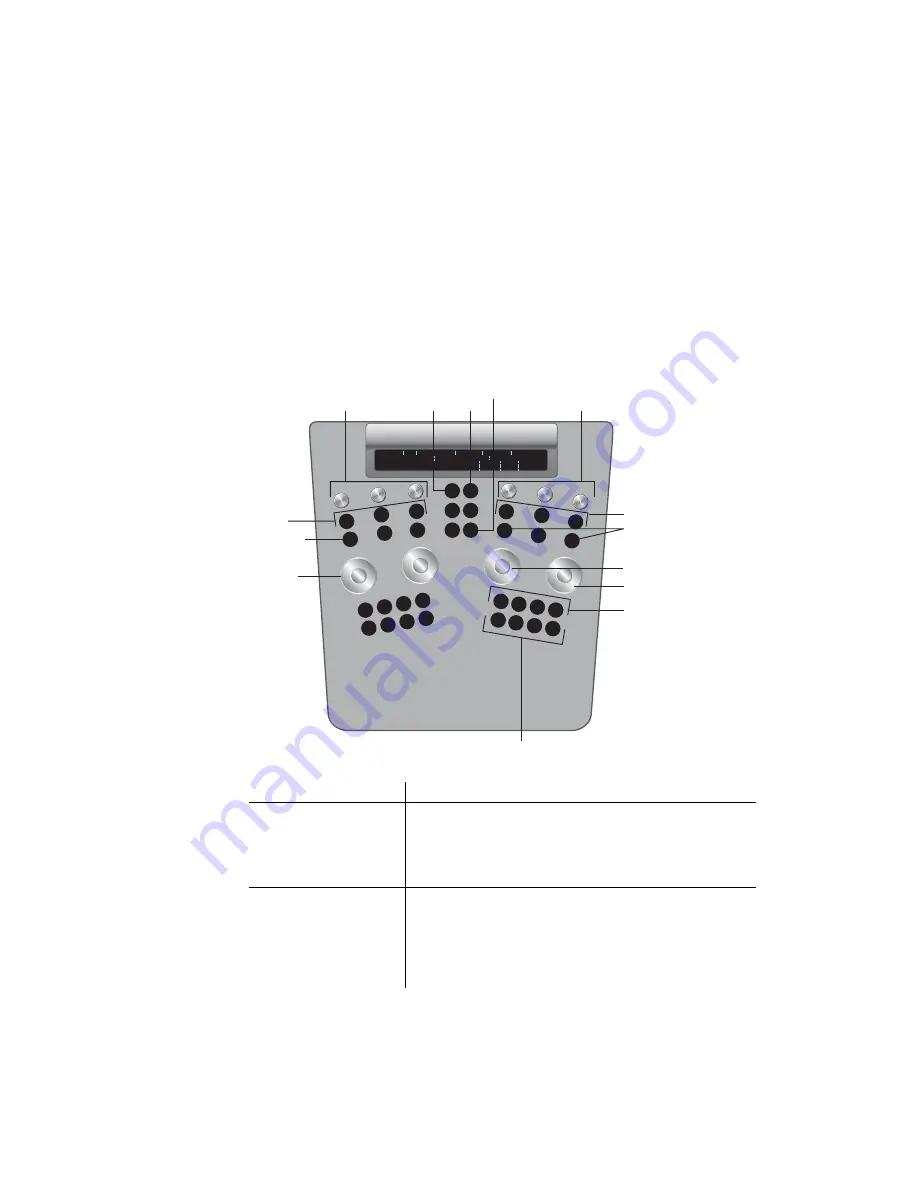
On the Function panel, use the following controls.
Use:
To:
Wheels
Modify overall hue, brightness/contrast, and saturation.
Wheel 1=Hue
Wheel 3=Brightness/contrast
Wheel 4=Saturation
To reset a wheel, press the button above it.
Knobs at top left
Balance brightness or contrast in the RGB channels.
Knob 1=Red brightness/contrast
Knob 2=Green brightness/contrast
Knob 3=Blue brightness/contrast
To toggle knob functionality, press the F1 button in the centre
column. To reset a channel, press the button below it.
High
Hue
Brightness
Saturation
G+ B+
R+
R G B
Sh Mid
Bright
Bright
+
G -
B -
R -
-
Multi
Matte
O/P
Still
ALT
Wipe
Split
Proxy
Reset hue
Decrease printer
light values
Balance brightness/
contrast in RGB channels
RGB
toggle
Increase
printer
light values
S/M/H
toggle
Geom UI
Balance brightness controls for
S/M/H, or cutoff value controls
Hue
Saturation
Brightness/
contrast
Reset bright/
contrast, saturation
Reset RGB
channels
Reset S/M/H or
cutoff values
F1
F2
F3
F4
F5
F6
F7
F8
F1
F1
F2
F3
F4
F5
F6
F1
F2
F3
F4
F5
F6
F2
F3
F4
F5
SHOW
Summary of Contents for CP100
Page 1: ......
Page 4: ......
Page 76: ...The Tangent CP100 Control Surface 2 70 ...
Page 80: ...74 Index ...


