38
GDO-10V2 Toro
™
Owner Installation Instructions
Step 14 Lock
Step 14.1 - Fitting Solenoid Or Magnetic
Locks
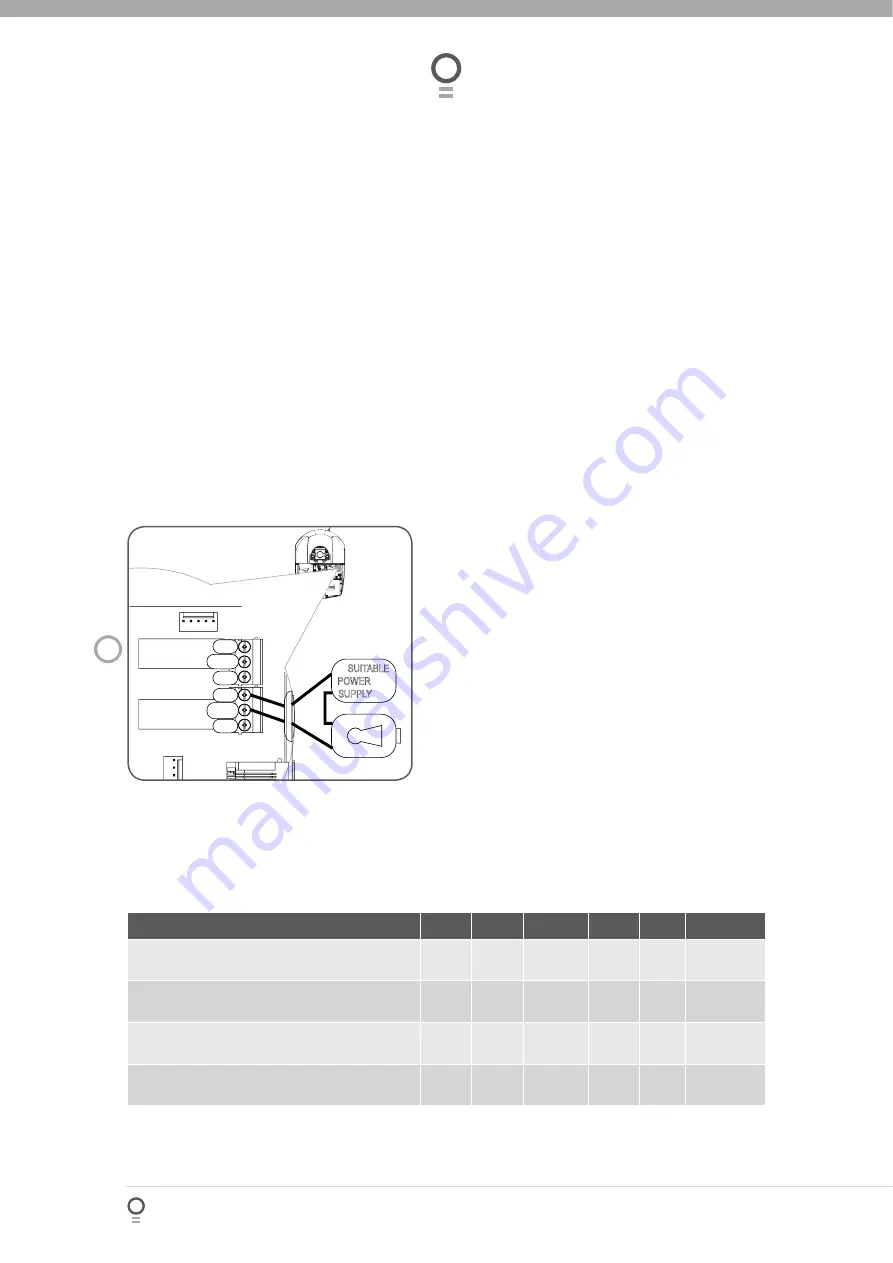
Install the lock mechanism on the door as per the
manufacturers instructions. See
Fig. 62
for the wiring
diagram.
Menu 4. Lock Times
Lock output can be programmed for both hold
and pulse mode. The operation of the lock can be
programmed to activate prior to the door and behave
differently on open cycles to that on close cycles.
Press NEXT or PREV on the wall control unit to
navigate to Menu 4 Lock Times.
Press SET to select the sub menu.
Press NEXT or PREV to navigate through the sub
menu.
Press OPEN to increase or CLOSE to decrease the
time.
Press SET to save the new time.
Press the STOP button two times to exit and test
the locks operation.
1.
2.
3.
4.
5.
6.
62
fi g
Accessories Installation
LIGHT
LOCK
LOCK
NO
NC
COM
NO
NC
COM
SUITABLE
POWER
SUPPLY
Parameter
Min
Max
Default
Step
Unit
Menu No.
OPEN LOCK TIME Set the time the lock is
activated for on open cycles
0.0
Hold
0.0
0.1
Sec
4
CLOSE LOCK TIME Set the time the lock is
activated for on close cycles
0.0
Hold
0.0
0.1
Sec
4
PRE-OPEN LOCK TIME
Time the lock is activated for prior to opening
0.0
25.5
0.0
0.1
Sec
4
PRE-CLOSE LOCK TIME
Time the lock is activated for prior to closing
0.0
25.5
0.0
0.1
Sec
4
Memory Tools
Menu 9.0 Memory Tools
The Memory Tools accessed from within Menu 9 are used to clear the transmitters codes from the openers
memory and clear the controller’s memory. Once selected, the PREV or NEXT buttons can be used to view the
Memory Tool options. To execute the displayed option, simply press SET.
Menu 9.1 Clear Control
This option will clear the door control memory and reload the factory set defaults for parameters such as the
lock time, light time, Auto-Close times etc. It will also clear the travel limits.
Menu 9.2 Clear Tx’ers
This option will clear the transmitter storage memory.


