DL205 Analog Manual, 7th Edition Rev. D
7-5
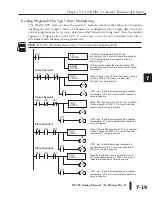
Chapter 7: F2-04THM, 4-Channel Thermocouple Input
1
2
3
4
5
6
7
8
9
10
11
12
13
14
15
B
C
D
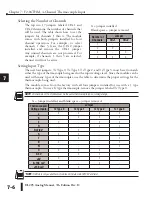
Setting the Module Jumpers
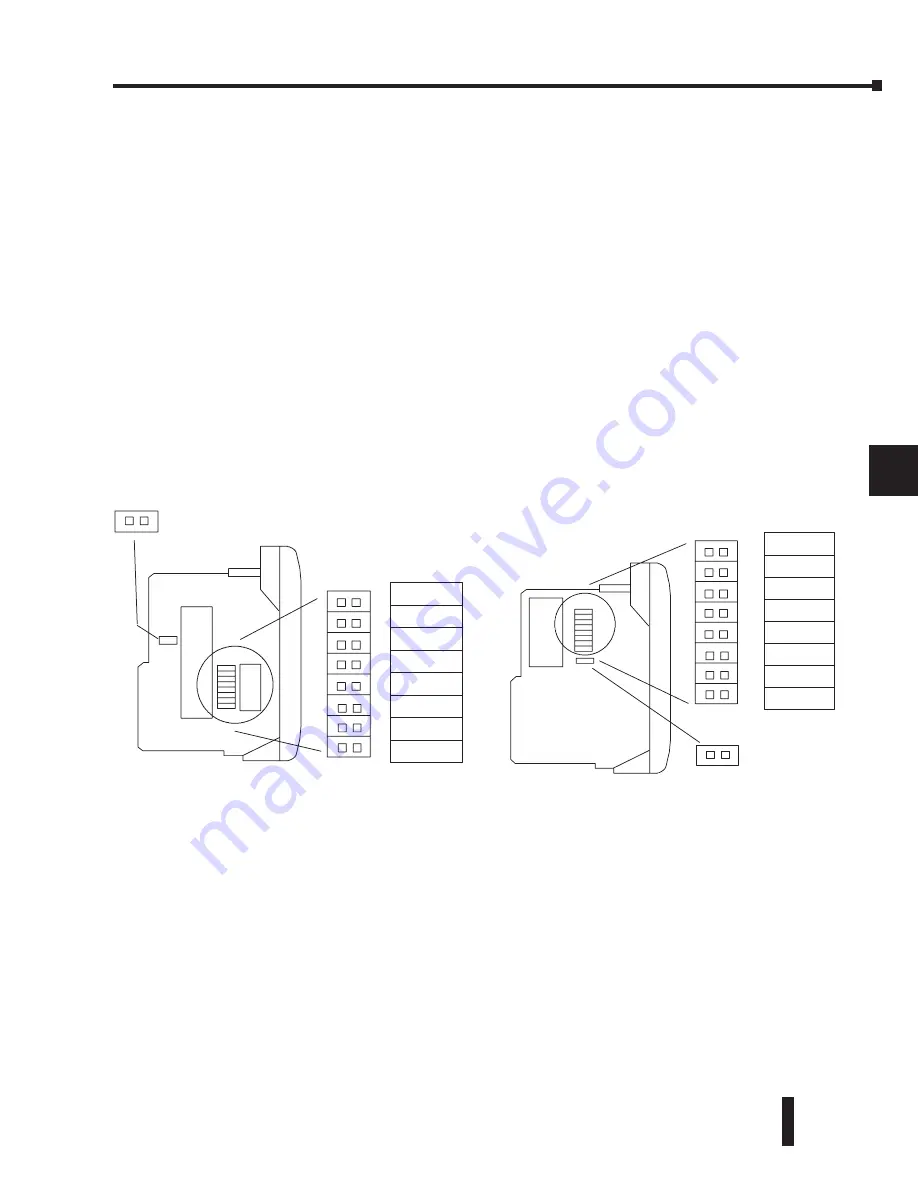
Jumper Locations
Use the figures below to locate the single jumper (J9) and the bank of eight jumpers (J7) on the
PC board. Notice that the PC board was re-designed starting with date code 0806E1 and the
jumper locations changed; the functionality of the jumpers did not change. To prevent losing
a jumper when it is removed, store it in its original location by sliding one of its sockets over
a single pin. The following options can be selected by installing or removing the appropriate
jumpers:
•
Number of channels
•
Input type
•
Conversion unit
•
Calibrate enable
Calibrate Enable
Locate the “Calibrate enable” jumper J9. The jumper comes from the factory with the jumper
removed (the jumper is installed on one of the two pins only). Installing this jumper disables
the thermocouple active burn-out detection circuitry, which enables a thermocouple calibrator
to be attached to the module.
To be certain that the output of the thermocouple calibrator is within the 5V common mode
voltage range of the module, connect the negative side of the differential voltage input channel
to the 0V terminal, then connect the thermocouple calibrator to the differential inputs (for
example, Ch 3+ and Ch 3).
For the voltage input ranges, this jumper is inactive and can be installed or removed with no
effect on voltage input.
1
2
3
4
5
6
7
8
9
10
11
12
13
14
15
C
D
Calibrate enable
J9
J7
Options
J7
Units-1
Units-0
Tc Type 3
Tc Type 2
Tc Type 1
Tc Type 0
CH+2
CH+1
J9
J7
Units-1
Units-0
Tc Type 3
Tc Type 2
Tc Type 1
Tc Type 0
CH+2
CH+1
J7
Options
Calibrate enable
J7
J9
J7
J9
Jumper locations for modules
having date code prior to 0806E1.
Jumper locations for modules
having date code 0806E1 and later.
Summary of Contents for DL205
Page 1: ...DL205 Analog I O Manual Manual Number D2 ANLG M ...
Page 2: ...Notes ...
Page 6: ...Notes ...


