background image

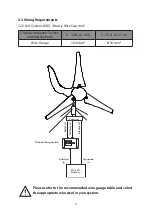
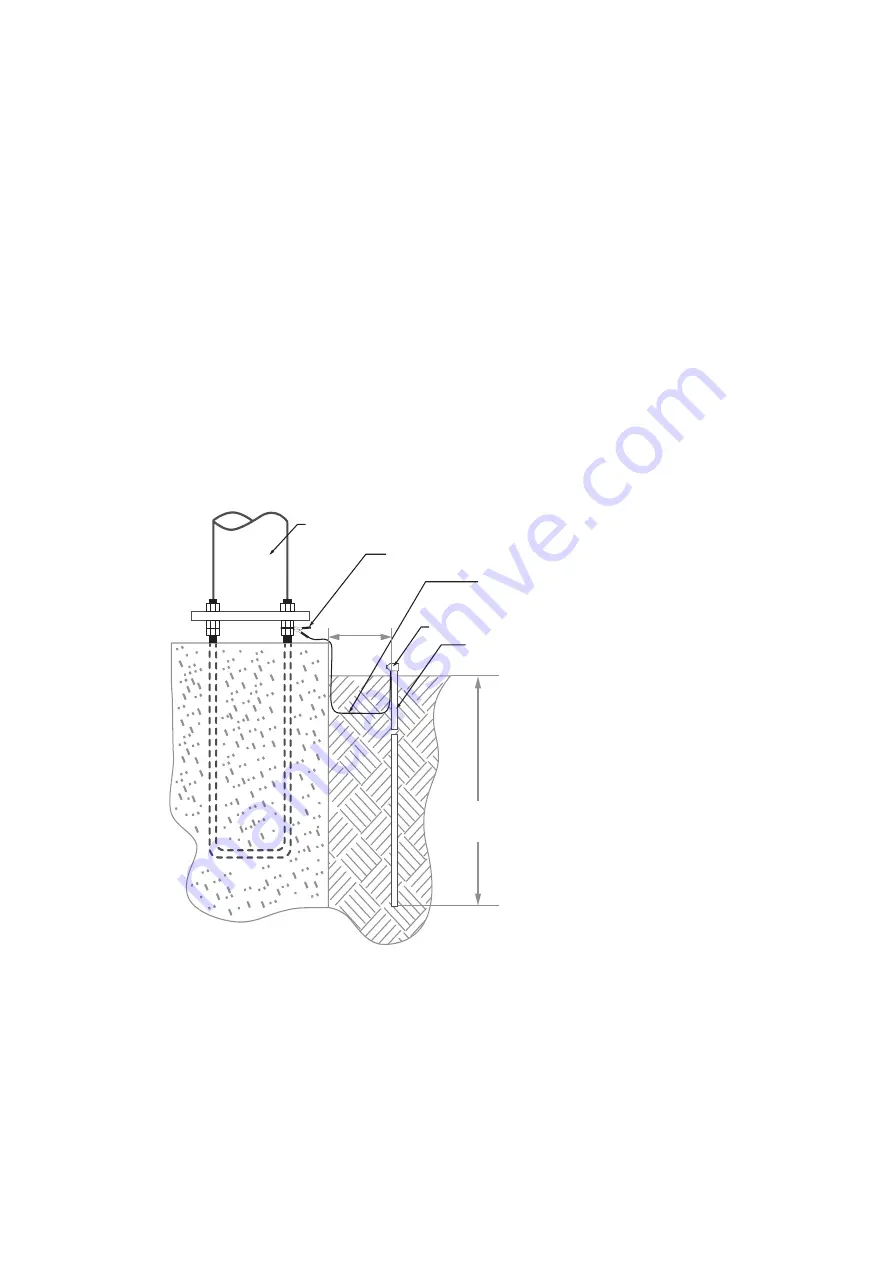
7RZHU

*URXQGLQJ:LUH&ODPS

&DEOH&ODPS

IW

P

IW

P

([LVWLQJ*UDGH

*URXQGLQJ5RG

)RXQGDWLRQ

*URXQGLQJ&RQGXFWRU$:*0LQ

0XVWEHVHFXUHGDQGEXULHGIRU

SURWHFWLRQ

20

(9) Is lightning protection necessary?
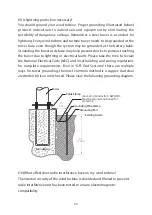
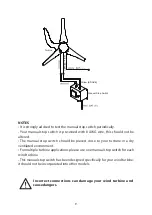
You should ground your wind turbine. Proper grounding (illustrated below) 
protects individuals to individuals and equipment by eliminating the 
possibility of dangerous voltage. Remember a steel tower is a conduit for 
lightning. Every wind turbine and turbine tower needs to be grounded at the 
tower base even though the system may be grounded at the battery bank. 
Grounding the tower at its base may help prevent shocks to persons touching 
the tower due to lightning or electrical faults. Please take the time to review 
the National Electrical Code (NEC) and local building and zoning regulations 
for complete requirements. Even in “Off-Grid Systems” there are multiple 
ways for tower grounding, the most common method is a copper-clad steel 
electrode(s) driven into the soil. Please view the following grounding diagram.

(10) What effect does radio interference have on my wind turbine?
The internal circuitry of the wind turbine is shielded and filtered to prevent 
radio interference and has been tested to ensure electromagnetic 
compatibility.

Summary of Contents for 400 Watt Turbine

Page 1: ...User s Manual 400 Watt Windmill 12V Version 2022 Sep...

Page 2: ......

Page 3: ...iring Requirement 6 3 SYSTEM PROTECTION 7 3 1 Digital controlled MPPT 7 3 2 Manual Stop Switch 8 4 PACKAGING CONTENTS 10 5 INSTALLATION PROCEDURE 11 6 AUTOMAXX BLUETOOTH APP 15 7 MAINTENANCE 17 8 FAQS...

Page 4: ......

Page 5: ...the activation of the manual stop switch 3 Listen to your wind turbine if you hear any mechanical noise maintenance may be required please contact the Products Customer Service 4 After installation d...

Page 6: ...en a result of excessive current flowing through an undersized wire or a weak damaged connection Please consult the wire guide table below Batteries can deliver a dangerous amount of current If any sh...

Page 7: ...10 m radius and human habitation and wildlife within a 66 ft 20 m radius The rooftop may not be the best place for your turbine Here are three reasons a The flow is more turbulent above the rooftop a...

Page 8: ...00 Watt Turbine Rated speed 28 mph 12 5 m s Rated power 400 watts Output Voltage 0 15V Cut in wind speed 6 7 mph 3 m s Survival wind speed 112 mph 50 m s Rotor diameter 4 ft 1 22 m Number of Blades 3...

Page 9: ...d turbine will survive at 112 mph 50 m s when the Manual stop switch is turned on Exceeding this will result in wind turbine failure and collapse 2 2 Performance The following power curve shows the pe...

Page 10: ...DWWHU 6 2 3 Wiring Requirements 12V Volt System AWG Metric Wire Size mm2 Please refer to the recommended wire gauge table and select the appropriate wire size for your system Distance between Turbine...

Page 11: ...ween the wind turbine and the battery pack for optimal performance Always use the largest gauge wires that are practical and affordable Local state and or national electrical codes take precedence ove...

Page 12: ...switch should be released The manual stop switch is pre wired for your convenience with 8 AWG wire and battery terminal connections The wire configuration is explained in the diagram below page 9 Conn...

Page 13: ...lly Your manual stop switch is pre wired with 8 AWG wire this should not be altered The manual stop switch should be placed close to your turbine in a dry ventilated environment For multiple turbine a...

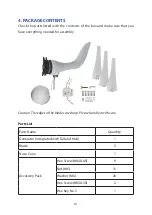
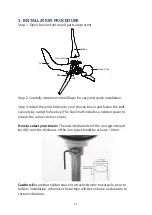
Page 14: ...you have everything needed for assembly Caution The edges of the blades are sharp Please handle it with care Parts List Parts Name Quantity Generator integrated with Tail and Hub 1 Blade 3 Nose Cone...

Page 15: ...tower and fasten the bolt securely by using the hex key The Yaw Shaft includes a rubber spacer to ensure the connection is secure How to select your tower The outside diameter of the iron pipe should...

Page 16: ...12 Step 4 Fasten the blades on the hub with nuts by using the hex key and unilateral open wrench Make sure that all of the bolts are secured with nuts...

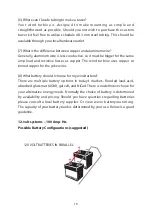
Page 17: ...13 Step 5 Fit the nose cone onto the hub by applying a gentle pressure to ensure a secure fit Step 6 Final product diagram Note The wind turbine pole kit is not included with the unit...

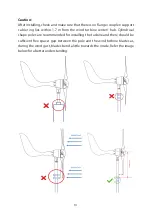
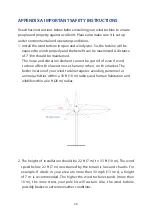
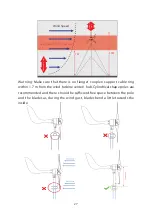
Page 18: ...1 7 m from the wind turbine center hub Cylindrical shape poles are recommended for installing the turbine and there should be sufficient free space gap between the pole and the wind turbine blades as...

Page 19: ...tooth No need to enter the device Bluetooth setting for pairing the wind turbine Open the wind turbine App and the wind turbine in the range will show Tap on the wind turbine to connect Once the app i...

Page 20: ...attery status Full Charging Low Swipe towards the right side the graph will provide the real time voltage available current and power generation by the turbine On the bottom of the page there is a swi...

Page 21: ...ulting in a declined performance Should you notice damage to the blades you must replace all 3 these blades are balanced as sets Check the blade bolts and the hub nut for tightness Check nose cone for...

Page 22: ...earings should have a 10 year life span in 12 mph 6 m s average wind speed sites Bearing life will vary from one application to another however you should expect at least a five year performance in ad...

Page 23: ...er The wind turbine uses copper or tinned copper for the yoke wires 8 What battery should I choose for my wind turbine There are multiple battery options in today s market flooded lead acid absorbed g...

Page 24: ...may be grounded at the battery bank Grounding the tower at its base may help prevent shocks to persons touching the tower due to lightning or electrical faults Please take the time to review the Natio...

Page 25: ...eries 3 With the red and black wires connected the shaft should be more difficult to turn When the wires are disconnected it should spin freely Should this not be true please contact the supplier or m...

Page 26: ...o be valid on repaired or replaced products from the original warranty date Warranty Period The Automaxx warranty valid for the period of one year 365 days after the date of first purchase If proof of...

Page 27: ...gree to transfer the ownership of replaced defective parts accessories and such parts shall automatically become the property of Automaxx and returned to Automaxx for inspection Customer Responsibilit...

Page 28: ...ent without an invoice or RMA number cannot be processed Please include the printout of the investigation form Purchase Invoice with your return 4 We recommend adding tracking and insurance to your re...

Page 29: ...voice is settled International Warranty Warranty only applies in the country of purchase only Abandoned Property After your product has been repaired replaced or if you do not agree to the repair offe...

Page 30: ...t rid of even if wind turbine offers the lowest noise than any others on the market The better location of your wind turbine requires avoiding personnel or animal activities within a 33 ft 10 m radius...

Page 31: ...e sure that there is no flange coupler support cable ring within 1 7 m from the wind turbine center hub Cylindrical shape poles are recommended and there should be sufficient free space between the po...

Page 32: ...stains varies in rooftop constructions Evaluation and stability cannot be guaranteed c The slight noise and vibration still affect sleep for some sensitive people and animals 4 Check the battery healt...

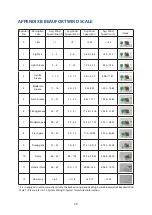
Page 33: ...t air 1 3 2 6 0 55 1 66 1 24 3 73 2 Light breeze 4 6 7 12 1 95 3 33 4 35 7 46 3 Gentle breeze 7 10 13 19 3 61 5 27 8 08 11 81 4 Moderate breeze 11 16 20 30 5 55 8 33 12 43 18 64 5 Fresh breeze 17 21 3...

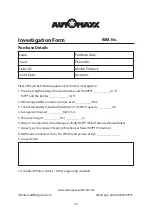
Page 34: ...________ Ah 4 Average wind speed __________Mph m s 5 The tower height __________ ft or __________ m 6 Suspect Components to be damage or faulty MPPT Wind Turbine Manual Brake 7 Issues Type Low power H...

Page 35: ......

Page 36: ......
Reviews:

Related manuals for 400 Watt Turbine