background image


P. 14


Installation 

Guide

 AS-2360TW


Programming a Transmitter 

Before you Proceed 

The Transmitter of the Remote Car Starter is not delivered pre-programmed: it must be 

programmed after the wiring of the Remote Car Starter is completed. The Remote Car 

Starter has the ability to retain up to 4 different Transmitter codes; if a fifth Transmitter is 

code-programmed, the code of the first Transmitter will be lost from memory. 

To erase 

all Transmitter codes from memory, you must perform a reset of the Remote Car 

Starter

 (see 

Resetting the Remote Car Starter

, later in this Guide, for more details). 

The Transmitter Programming Procedure 

1.


Flash the Hood Pin switch (see Table 1)


– The Parking Lights will stay 

ON

 for up to 20 seconds.  

– Before the lights go out, turn the Ignition Key to the 

IGNITION ON (RUN)

 position. 

– Immediately turn the Ignition Key back to the 

OFF

 position.


2.


Press and hold the 

LOCK

 button and keep it down until the 

Parking Lights flash 

5 times

 quickly. 

– The Remote Car Starter has stored the code of the Transmitter into memory.


3.


  To exit: close the Hood. 

Table 1 

To program a Transmitter 

on the second vehicle for Multi-car Operation, you must 

press the 

TRUNK 

button

 (instead of 

LOCK

 or 

UNLOCK

) in step 3 of the Transmitter code-

learning procedure:


Entering Programming Options Mode 

The module is equipped with four custom programming modes that allow the installer to 

custom-fit the system outputs according to installation requirements. The programming 

options are designed to facilitate interfacing with all vehicle types. (See section 

Table of 

Programming Options

 later in this guide.) 

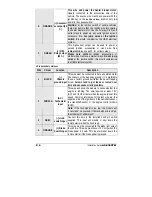
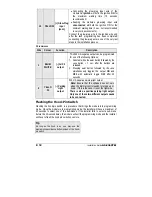
To enter the programming center, follow either procedure (Table 2 or Table 3); please 

note that the second procedure requires the use of the plug-in valet (not included): 


1.


Flash the hood pin switch (see page 12)


– The parking lights will stay 

ON

 for up to 20 seconds.  

– Before the lights go out:


2.


Press and hold the brake pedal, 

   – And press one of the following buttons on the transmitter: 


LOCK


to   access mode 1; 


UNLOCK


to   access mode 2;  


TRUNK


to   access mode 3; 


START/STOP  

to   access mode 4.


The parking lights


will flash


and the horn


will


honk


once (if configured), twice three times or 

four times to confirm entry into a mode.


3.


Release the brake pedal. 

4.


To exit programming centre, simply close the hood. 

Table 2 

Summary of Contents for AS-2360TW

Page 1: ...ces supplied Please note that this guide has been written for properly trained Autostart technicians a certain level of skills and knowledge is therefore assumed Please review the installation guide c...

Page 2: ...7 Horn Honk Timing 19 Tach Programming 19 About Tach Programming 19 Multi speed Tach Programming 20 Automatic Tach Programming 20 Tach Adjustments 21 Testing 21 Closing Up 22 Supplementary Information...

Page 3: ...in the kit 1 Remote starter control unit 1 FM long range transceiver 1 Antenna interconnect cable 1 Multi channel 5 button remote control 1 Six pin 14 AWG harness ignition harness 1 Five pin 18 AWG ha...

Page 4: ...normal operation or obstruct service technicians Always use a grommet when running wires into the engine compartment Never run wires through bare or sharp metal Do not disconnect the battery on vehic...

Page 5: ...A RED 12 V Battery Please note some of the most recent vehicles have no suitable 12 V source at the ignition switch the 12 V wire is too small to supply the necessary current In such cases it is recom...

Page 6: ...re Colour Function Description 1 BLACK Chassis ground input This wire must be connected to bare unpainted metal the chassis or the true body ground It is preferable to use a factory ground bolt rather...

Page 7: ...0 sec 7 10 sec or 4 sec pulse 3 GREEN Unlock output Programmable 500 mA negative output 1 10 sec 7 10 sec 4 sec or double 1 4 sec pulse ON 250 ms OFF 500 ms ON 250 ms 4 WHITE BROWN Rearm output 500 mA...

Page 8: ...ernal starter interrupt relay This wire should be connected to a single pole double throw relay this wire will connect to pin 85 on the relay and pin 86 will be connected to the ignition wire The star...

Page 9: ...sent only if the system was previously locked and armed If secure lock is enabled unlock pulse s will be sent with the disarm pulse a lock pulse and a rearm pulse will be sent when the trunk is closed...

Page 10: ...ng wire make sure they are diode isolated from one another feedback may otherwise occur causing damage to the vehicle This input should be used in vehicles with negative switching door pins or dome li...

Page 11: ...rpose the glow plug input wire of the module must be connected to the glow plug indicator light of the vehicle Caution The module will only accept positive glow plug input signals therefore negative g...

Page 12: ...are released 2 Pressing SHIFT button followed by the LOCK simultaneously toggles the output ON and OFF with automatic toggle OFF after 30 seconds 2 YELLO W Parking Light output 500 mA negative parkin...

Page 13: ...us which will be described later in this guide a Transmitter Programming p 14 b Programming Options p 16 c Honk Horn Timing if available p 19 d Tach Programming p 17 Remember Once the Parking Lights a...

Page 14: ...it close the Hood Table 1 To program a Transmitter on the second vehicle for Multi car Operation you must press the TRUNK button instead of LOCK or UNLOCK in step 3 of the Transmitter code learning pr...

Page 15: ...l stay in the selected programming Mode until the Hood Pin switch or the Brake Pedal is pressed again Therefore take your time to make the proper selection Pressing the Brake Pedal will take you back...

Page 16: ...OPTION 2 DISABLED OPTION 3 ENABLED with starter kill will flash when the starter kill engages This option should be selected ONLY if the starter kill is installed MODE 2 INDICATES DEFAULT SETTING FUNC...

Page 17: ...PTI Horn confirmation when pressing the LOCK button ON 3 OPTION 4 Priority Door Access FUNCT te ION 4 Ex rnal Trigger OPTION 1 Zone 3 disarm rearm Trunk Pin a disarm pulse is sent before the Trunk ope...

Page 18: ...beep LED 2 flashes START STOP disable beep LED 4 flashes TRUNK save modifications LED 3 flashes B x Level 1 Basic Features Level 2 Multi car operatio Level 3 Customized Features hat is programmed as...

Page 19: ...stay on for up to 20 seconds 2 Press and hold the Brake Pedal then simultaneously press the UNLOCK and START buttons on the Transmitter the Horn will honk 5 times 3 Release the Brake Pedal 4 To change...

Page 20: ...t 2 Press and hold the Brake Pedal And simultaneously press the LOCK and UNLOCK buttons on the Transmitter The Parking Lights will flash 4 times Release the Brake Pedal 3 Start up the Engine and allow...

Page 21: ...icle together it is recommended to check that the system operates properly The following testing procedures should be used to verify proper installation and operation of the system Before testing make...

Page 22: ...ne continues to run check the Parking Brake Switch connection Door Pin shutdown circuit Make sure the Remote Car Starter exits Ready Mode when each Door is opened while the vehicle is running under a...

Page 23: ...Jumper may result in serious damage to the vehicle The relay output rating on this unit is 25 A at most Defective OEM solenoid switches can sometimes draw up to 50 or 60 A causing the 30 A Fuse to blo...

Page 24: ...tput from the Remote Car Starter to the Solenoid side of the wire Note In the next two systems a Relay in the vehicle interrupts the start wire between the Ignition switch and the starter motor With t...

Page 25: ...one must prevent the Clutch relay from engaging If the pedal is not pressed when the Ignition Key is turned to the START position the relay energizes and interrupts the start wire If the pedal is pre...

Page 26: ...CK once again 4 seconds after shut down If the vehicle is initially unlocked upon remote START the Remote Car Starter will start the Engine and arm the Starter Kill but the Doors will not be locked or...

Page 27: ...ocess Most of the time you can avoid resetting by fixing the issue directly at the root of the cause 1 Flash the Hood Pin switch see Table 1 Once inside Programming Mode you have 10 seconds to complet...

Page 28: ...will flash the five events stored in memory Table 14 Events playback The first four playback codes are Start Failure Events There is a pause after each event code is played back The system will play b...

Page 29: ...hile the Remote Car Starter was in Valet Mode 2 pause 2 There was an attempt to start the vehicle while the Remote Car Starter was in Home Valet Mode 4 pause 3 The vehicle went out of Ready Mode 12 V...

Page 30: ...mode 30 minutes DIESEL mode FUNCTION 3 Turbo Mode OPTION 1 Turbo Mode ENABLED OPTION 2 Turbo Mode DISABLED OPTION 3 Turbo Mode ENABLED FUNCTION 4 Engine type and Cold Weather Mode OPTION 1 30 sec dela...

Page 31: ...AS 2360TW Programming Options and Wiring Diagram...

Reviews: