background image

P. 4 


User Guide 


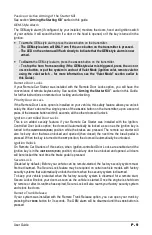
To 

disarm 

the Starter Kill, press the 

UNLOCK

 button on the transmitter. 

- The Starter Kill will automatically rearm itself after 1 minute (by default) or 3 minutes 
(if configured this way) if no door is left opened (if the doors are monitored) and the 
ignition is not turned 

ON


Active Mode: 


To 

arm

 the Starter Kill, press the 

LOCK

 button on the transmitter. 

- The parking lights will flash once.  
- The LED on the antenna will flash slowly. 
- If remote door locks are installed, this will also lock the doors and arm the OEM-style 
alarm. 


To 

disarm 

the Starter Kill, press the 

UNLOCK

 button on the transmitter. 


- The parking lights will flash twice.  


- The LED on the antenna will remain 

OUT


- If remote door locks are installed, this will also unlock the doors. 

Remote-Starting Your Vehicle 

If your vehicle has an 

automatic transmission

, simply press the 

START/STOP

 button to remote start 

or stop your vehicle. Skip the next steps on to “Remote-starting”. 

Setting Your Vehicle into Ready Mode 

If  your  vehicle  has  a 

manual  transmission

  you  must  read  the  following  indications.  In  order  to 

start the vehicle by remote, the unit must first be set to Ready Mode. If the unit is not set to Ready 
Mode, it cannot remote start the vehicle.  

Please note that Ready Mode can be enabled by the remote or the handbrake, depending on 
the  option  that  was  selected  by  your  installer.  Therefore,  you  must  follow  the  appropriate 
procedure between the two described below in order to set your vehicle into Ready Mode. 

Once the system is set to Ready Mode, the vehicle can be remote started and stopped at any time. 
The system will exit Ready Mode if a door, the hood or the trunk is opened, if the brake pedal is 
pressed, if the parking brake is disengaged or if the ignition key is turned to the 

IGNITION ON (RUN)


position. 

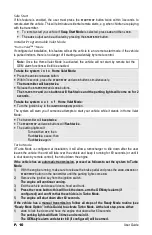
To set the system to Ready Mode: 

If Ready Mode is enabled by remote 

If Ready Mode is enabled by handbrake 

1.


Ensure that all the doors, hood and trunk are closed. Make sure that the gear selector is in the 
neutral position. 

2.


With the engine already running, apply the 
parking brake 

once

 and release the brake 

pedal. 

Make sure to release the brake pedal.


2.


With the engine already running, apply the 
parking brake 

twice

 and release the brake 

pedal. 

Make sure to release the brake pedal. 
The parking lights will flash 3 times 
quickly and remain lit. 
Skip to step 4.


3.


Within 20 sec. of engaging the parking 
brake, press and hold 

LOCK

UNLOCK

 or 

START

/

STOP

 on the transmitter. 

The parking lights will flash 3 times 
quickly and remain lit.


4.


Remove the key: the engine will continue running. 

5.


Exit the vehicle and close all doors, hood and trunk. 

6.


Press for approx. 1 second either: 

Summary of Contents for AS-3372TW-FM

Page 1: ...ser s responsibility to ensure that the gearshift lever is in Park in order to avoid accidents upon remote starting Note Make sure that the automatic vehicle cannot start in Drive 2 It is the user s r...

Page 2: ...mote Trunk Release 9 Safe Start 10 Installer Programmable Valet Mode 10 Home Valet Mode 10 Turbo Mode 10 Engine Run Time 11 Constant While Pressed 11 Horn Chirp Timing 11 Multi car Operation 11 Multi...

Page 3: ...u must ensure that the windshield wipers and headlights switches are OFF Leaving the headlights switch ON on certain types of vehicles could cause them to remain ON even after remote starter shutdown...

Page 4: ...te that Ready Mode can be enabled by the remote or the handbrake depending on the option that was selected by your installer Therefore you must follow the appropriate procedure between the two describ...

Page 5: ...res Idle Mode Convenience feature Idle Mode allows the user to keep the engine running and the doors locked while they stop for example at a convenience store or for a short delivery This feature allo...

Page 6: ...e a Press the UNLOCK and START STOP buttons simultaneously The remote will beep once b Keep pressing the UNLOCK and START STOP buttons simultaneously until the remote beeps once more c Release the UNL...

Page 7: ...mode or this will unlock your doors and deactivate panic mode Furthermore the panic mode can be stopped by activating one of the following three 3 features a Remote valet pressing UNLOCK and START STO...

Page 8: ...tion key to the CRANK position Extended Run Time With the vehicle running under a remote start pressing and holding the START STOP button for more than 3 seconds will reset the run time counter to zer...

Page 9: ...in 6 seconds all the other doors will unlock Ignition controlled Door Locks This is an added security feature If your Remote Car Starter was installed with the Ignition Controlled Door Locks option th...

Page 10: ...art your vehicle while it stands in Home Valet Mode The transmitter will beep twice The START STOP and LOCK buttons will flash twice The parking lights will Turn ON then OFF then Flash twice pause the...

Page 11: ...n 3 seconds will unlock all doors and will send a constant pulse as long as the UNLOCK button is held down maximum of 15 seconds This constant pulse can be configured to activate certain functionaliti...

Page 12: ...at best suits the user Your options are Option 1 Level 1 requires pressing the AUX button 1X Multi car operation Level 2 requires pressing the AUX button 2X Basic features Level 3 requires pressing th...

Page 13: ...doors are locked or unlocked The second sequence of flashes if applicable denotes if the vehicle is in Cold weather mode Home valet mode or Valet mode If there is no second sequence transmission then...

Page 14: ...e transmitter Some of these are The condition of the battery in the transmitter The operating environment for example downtown radio frequency noise airports cellular phone towers Metal any type of me...

Page 15: ...cludes the opening or removal of the plastic covering of the module or the removal or alteration of the barcode label on the plastic covering of the module 2 The product is damaged due to accident fir...

Reviews: