background image

3. Set up the studio

1. Unpack. Remove the covers from the rack case. Remove the rack case from the wheels and set it 
on top of the empty camera case.

2. Connect power. Turn on the master power 
switch and wait for the switcher to start up.

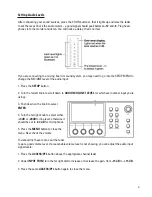
3. Unfold the monitor. Use input #1 for viewing 
the switcher’s multi view screen. The multi 
viewer
 allows you to display multiple video 
inputs and program output simultaneously on the 
monitor. A red frame around one of the boxes 
indicates that input is selected for program or 
“live”/ “hot”.

The monitor’s input #3 displays video & sound directly from the recorder.

4. Connect cables. Keep the cable reels as close to the studio as possible. Unwind the cables from the 
reels first, then connect the ends to the camera and the studio. Avoid running cables across walkways. 
Use gaffer’s tape to secure any cables in areas of traffic.

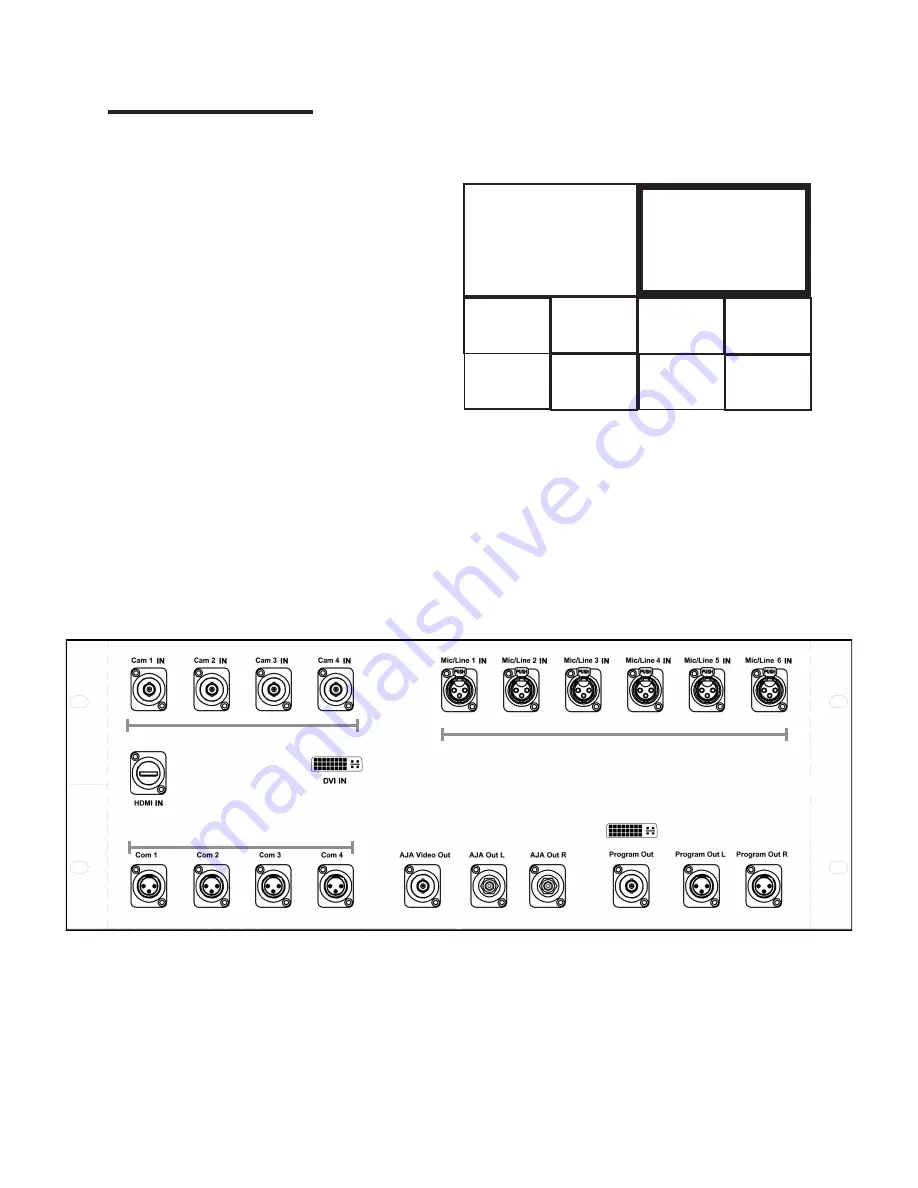
Plug cables into cameras and into rear rack plate. Keep track of which camera is plugged into which 
input number. Connect audio cables to microphones or to sound system mixing board. If connecting to 
a mixing board, make sure to plug the studio into the same power circuit or use a ground lift. 

5. Connect the intercom. 
Connect the XLR cables (bundled with the camera cables) to the appropriate intercom jacks and plug 
the other end into the intercom beltpacks. 
Connect the intercom headsets to the beltpacks. Press and hold down the TALK button to talk, or click 
it twice to keep the mic on. The green light indicates that the mic is on. 

Plug the director’s headset into the front of the ClearCom unit in the rack and push the left TALK button.

5

Audio Inputs

Camera Inputs

Intercom Connections

PREVIEW

PROGRAM

CAM1

CAM2

CAM3

CAM4

PC

Summary of Contents for Portable Studio

Page 1: ...Portable Studio Battle Creek Area Community Television 70 West Michigan Ave Suite 112 Battle Creek MI 49017 269 968 3633 http accessvision tv ...

Page 2: ......

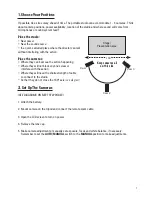
Page 3: ...happening Where they will not block anyone s view or interfere with the action Where they will need the shortest length of cable to connect to the studio So that they do not cross the 180º axis see diagram 2 Set Up The Cameras SEE DIAGRAMS ON NEXT FEW PAGES 1 Attach the battery 2 Mount camera on the tripod and connect the remote zoom cable 3 Open the LCD screen to turn on power 4 Remove the lens c...

Page 4: ...Attaching the battery Remaining battery life is shown as a percentage on the top left corner of the camera screen Press the latches on both sides of the lens cap and remove it Removing the lens cap 2 ...

Page 5: ...Tip Use the ND FILTER only when shooting outside if necessary The iris should not have to be higher than F8 if it is use the ND filter NEVER USE THE ND FILTER INDOORS If ND OFF flashes on the screen turn the ND filter OFF ...

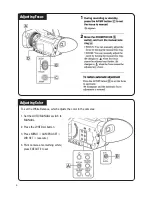
Page 6: ...hite Balance which adjusts the color in the cameras 1 Set the AUTO MANUAL switch to MANUAL 2 Press the WHT BAL button 3 Press MENU CAMERA SET WB SET execute 4 Point camera at something white press EXECUTE to set Adjusting Focus 4 ...

Page 7: ... and the studio Avoid running cables across walkways Use gaffer s tape to secure any cables in areas of traffic Plug cables into cameras and into rear rack plate Keep track of which camera is plugged into which input number Connect audio cables to microphones or to sound system mixing board If connecting to a mixing board make sure to plug the studio into the same power circuit or use a ground lif...

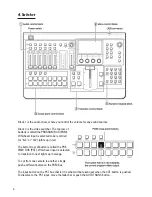
Page 8: ... or live or hot lgihts up in red The bottom row of button is called the PRE VIEW BUS PST Whichever input is selected to transition to next lights up in orange To cut from one camera to another simply push a different button on the PGM bus The input button on the PST bus that is lit is what will be taken next when the CUT button is pushed To dissolve to the PST input move the fader bar or push the ...

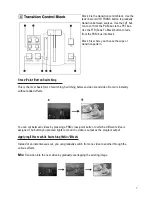
Page 9: ...g This is the most basic form of switching Switching between video A and video B occurs instantly without added effects You can cut between videos by pressing a PGM cross point button to which a different video is assigned The button you pressed lights red and the video is output as the program output Applying Effects while Switching Mix Effect Instead of an instantaneous cut you can gradually swi...

Page 10: ...red the transition is complete and the transition indicator for the opposite direction will light NOTE If both indicators are lit completely raise or lower the fader lever in either direction Effect You can use Wipe NAM non additive mix Slide Squeeze Door Frame In Out Flip Tumble PinP picture in picture Mosaic and Defocus effects For example when transitioning using a wipe the next video for outpu...

Page 11: ...b to scroll down to AUDIO MIC LINE1 LEVEL or whichever number input you re using 3 Push down on the knob to select ENTER 4 Turn the far right knob to select either 4dB or 20dB for line level otherwise it should be set to 44 dB for microphones 5 Press the MENU button to close the menu Now check the volume You should not have to max out the fader to get a good volume level If a reasonable volume lev...

Page 12: ...e used for recording is 500 GB To stop recording Press the Stop button to finish your recording DO NOT remove the hard drive while it is recording To edit Pull the hard drive out of the Hyperdeck and plug it into the dock in the edit room Please be sure the dock s power is on switched OFF before inserting or ejecting the drive Import the files into a project on your editing drive to edit Quit Fina...

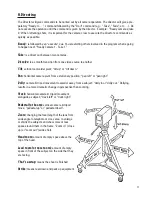
Page 13: ... pivot tilt up or tilt down Pan horizontal camera pivot from a stationary position pan left or pan right Dolly camera tripod movement toward or away from a subject dolly in or dolly out Dollying results in a more dramatic change in perspective than zooming Truck horizontal camera tripod movement alongside a subject truck left or truck right Pedestal or boom vertical camera tripod move pedestal up ...

Page 14: ...director tells you to If you have to do a live camera move do it slowly and as gracefully as possible Execute commands as quickly as possible Keep intercom chatter to a minimum if you have to talk do it quietly Check out rules New members must volunteer assist on one remote production prior to checking out studio A van is available for checkout located in the parking ramp Must have a valid Driver ...

Reviews: