INSTALLING THE DOOR HANDLE:
1. Open the door and carefully pull the door gasket around the area where the handle is to be installed.
2. Carefully remove the two pre-installed decora
Ɵ
ve plugs from the front of the door. Note: some wine coolers do not
have decora
Ɵ
ve plugs installed.
3. Insert each Phillips head screw through the gasket side of the door un
Ɵ
l the screw pass through the door.
4. Align the handle with the screws and
Ɵ
ghten using a Phillips head screwdriver un
Ɵ
l the handle is
Ň
ush against the
door frame. CAUTION: Do not over-
Ɵ
ghten the screws as this may cause damage to the handle or to the stainless
steel door
5. Carefully press the door gasket into its original posi
Ɵ
on.
Tip: To prevent damaging the door gasket, make sure to open the door all the way before pulling the shelves out of
their track.
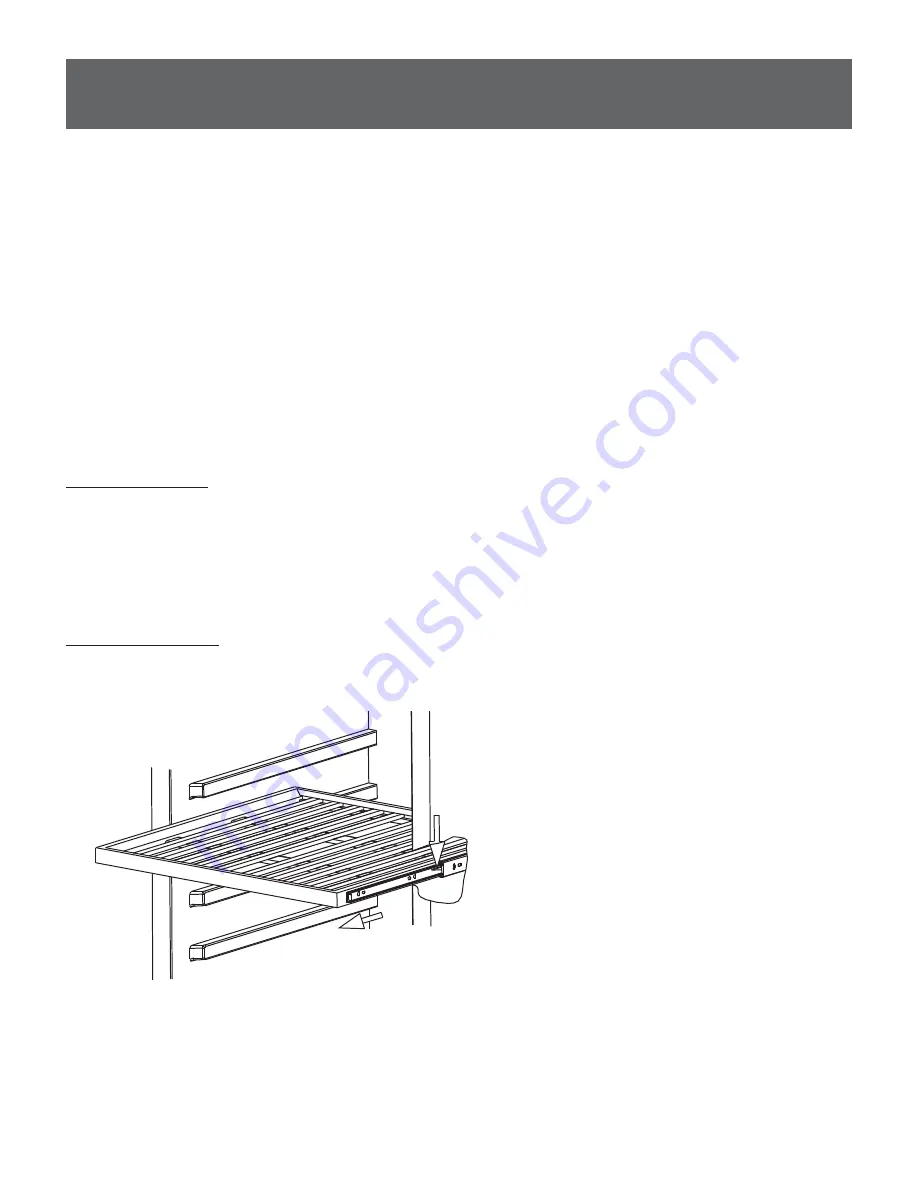
INSTALLING THE SHELVES:
To install the shelves:
1. Open the door completely.
2. Slide the shelf on the shelf track and slowly push back un
Ɵ
l it stops.
3. Push down on the front of the shelf to allow the back of the shelf to li
Ō
over the plas
Ɵ
c post. (Imagine a seesaw
movement.) Con
Ɵ
nue to push the shelf back un
Ɵ
l both notches pass through the plas
Ɵ
c posts on each side of the
shelf track.
4. Con
Ɵ
nue to push the shelf back.
To remove the shelves:
1. Open the door completely.
2. If necessary, make sure you remove all the contents si
ƫ
ng on the shelf.
3. Pull the shelf forward un
Ɵ
l the notch aligns with the plas
Ɵ
c post on each side of the shelf track.
4. Li
Ō
the shelf un
Ɵ
l both notches pass through the posts.
5. Con
Ɵ
nue to pull the shelf forward un
Ɵ
l it is completely removed from the inner compartment.
Installing your Door Handle and Shelves


