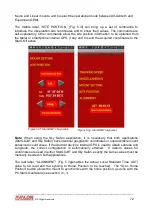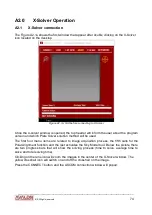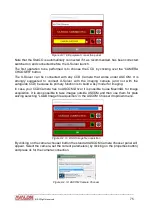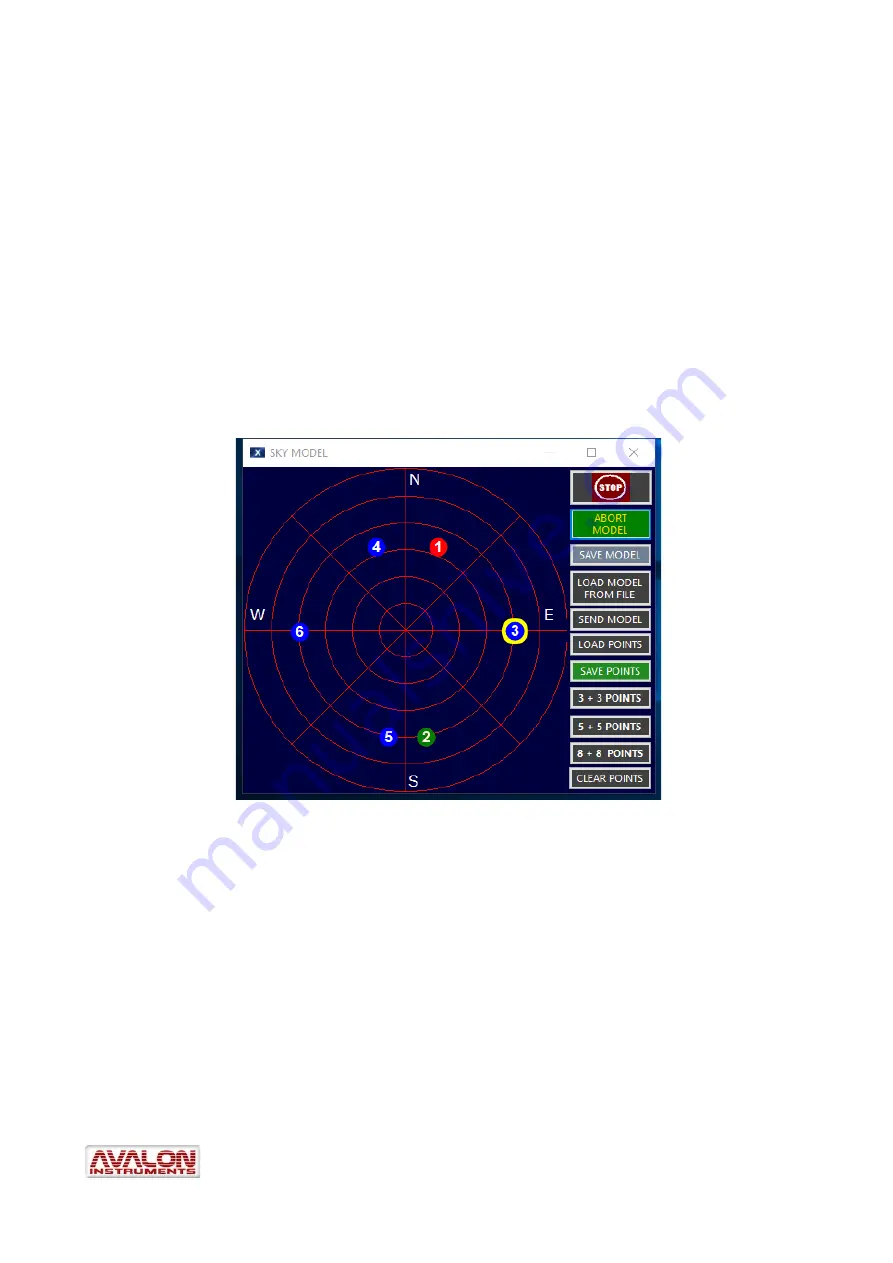
To simplify the sky point choice it is possible to automatically generate points using one of
the three buttons on the menu ( 3+3, 5+5, 8+8) and, eventually, manually complete the
point generation up to 24 positions. After the scheme has been completed, we are able to
build a
personalized model of the sky
by performing the following operations:
1. BEGIN SEQUENCE. Clicking on the green ACQUIRE AND SOLVE button will initiate
the sequence
a)
The telescope will slew to the first point.
b)
If the “Solve After GoTO” box is selected a plate solve will be performed when
the goto is completed.
c)
If the plate is successfully solved, a Sync will be performed, the PMF file will be
updated and the point color change to green.
d)
If the plate solving failed, the point color become red.
e)
In any case the telescope will slew to the next point repeating the operation a) to
d) for all points.
2. Click SAVE MODEL button: The model just build, present in a temporary file named
temp.pmf, will be saved with a choosen name.
3. LOAD MODEL FROM FILE: with this button it is possible to load a previously saved
sky model file in the X-Solver to be used for any correction or addition o to be forward
to the StarGO ( see point 5).
4. CLEAR POINTS: This button clears all the points on the sky map.
5. SEND MODEL TO STARGO. Clicking on this button the model just built (point 1) or the
model just loaded from file (item 3) will be sent to the StarGO.
____________________________________________________________________
©
All Rights reserved
79
Figure A2.3.c: X-Solver Sky Model


