background image

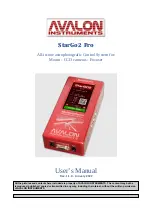
StarGo2  Pro

All-in-one astrophotografic Control System for:

Mount - CCD cameras - Focuser

User’s Manual

Rev. 1.1.0 -  January 2022

All the pictures and contents here included are property of AVALON INSTRUMENTS. The content may bot be 
reproduced, published, copied or transmitted in any way, including the internet, without the written permission 
of AVALON INSTRUMENTS 

Summary of Contents for StarGo2 Pro

Page 1: ...Focuser User s Manual Rev 1 1 0 January 2022 All the pictures and contents here included are property of AVALON INSTRUMENTS The content may bot be reproduced published copied or transmitted in any way...

Page 2: ...irect Operations with SkySafari 12 3 1 2 Smart Device Direct Operations with kStars lite 16 3 2 Computer Direct Operations 18 3 2 1 KStars EKOS 19 3 2 2 Using Cart du Ciel or Sky Chart as Planetary ap...

Page 3: ...rm drivers for native INDI devices So the StarGo2 Pro can be used mainly as a Standalone system or as a GoTo Control System only 1 Used as Standalone system REMOTE DESKTOP CONNECTION VIA VNC Using an...

Page 4: ...ble in the Raspberry environment but the disadvantages are that in this way the constant commands transmission between the remote device and the StarGo2 Pro is required so a temporary lack of transmis...

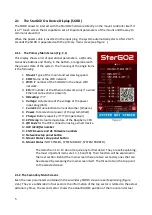
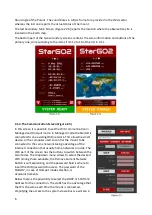
Page 5: ...he voltage at the power input plug Volt 7 Current Actual electrical current absorber Ampere 8 Power Total electrical power of the system Watt 9 Charge Battery capacity Ampere Hour 10 CPU temp Actual t...

Page 6: ...o one existing WiFi network This allow the smart device or the computer used to control the mount to be connected to the same network taking advantage of the Internet connection that usually home netw...

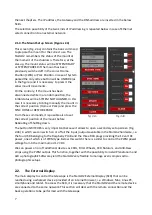
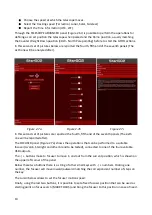
Page 7: ...ble also to set the correct position of the mount before Rebooting of Shutting down The button SWITCHES is very important because it allows to open a secondary setup screen Fig 2 4b in which we can sw...

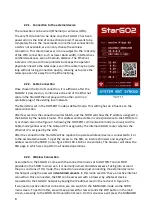
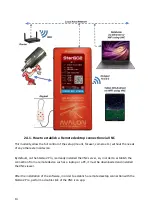
Page 8: ...will be visible in correspondence to the SODD item 4 as shown also in the figure 2 5 showing the HOTSPOT communication mode red oval and the Cable mode yellow oval The Hotspot IP is assigned by the i...

Page 9: ...ple and user friendly display It is an internet page called in the following pages WEB Application subdivided in several panels each accessible by clicking on his name The SED automatically resizes it...

Page 10: ...th fifth and of the seventh panels The sixth one will be reported after The FOCUSER panel Figure 2 7a shows the operations that can be performed to a suitable focuser Avalon Starlight and other brand...

Page 11: ...S section allows to regulate the Display Brightness very important to not disturb during observation to set the mount speed rates for Guide Center Find and Slew to activate or exclude the Mount Meridi...

Page 12: ...ng of the installation by the users of the desired applications directly on the StarGO2 Raspberry allowing in this way to manage the telescope with on StarGO2 third party software accessed with smart...

Page 13: ...nal device By default on the StarGo2 Pro is already installed the VNC server so in order to establish the connection from a remote device such as a laptop or a PC it must be downloaded and installed t...

Page 14: ...he device must be connected on the same network In the corresponding field write the I P in our sample is 192 168 1 136 as shown in the pictures below and press Enter Now a new window will pop up aski...

Page 15: ...well known and used by the astro photographers such as SGP N I N A Voyager etc The advantage of using KStar and EKOS is that the commands sent to the telescope are generated directly inside the StarGO...

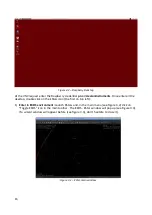
Page 16: ...e click on the kStars icon the first on top left 1 Enter in EKOS environment Launch KStars and in the main menu see Figure 3 2 click on Toggle EKOS icon in the main toolbar The EKOS KStar window will...

Page 17: ...ivers in any of the available equipment dropdown menu related to the specific piece of equipment available in the system What is very important in setting up the profile is selecting the Local Mode of...

Page 18: ...itor 3 To connect the equipment to the StarGO click the triangle icon see Figure 3 4 in the EKOS KStars window The INDI Control Panel will appear containing a series of Tabs and Sub Tabs related to th...

Page 19: ...Figure 3 6a StarGO2 Main Control Tab Figure 3 6b StarGO2 General Info Tab 19...

Page 20: ...Figure 3 6c StarGO Option Tab Figure 3 6d StarGO2 Connection Tab 20...

Page 21: ...Figure 3 6e StarGO2 Site Management Tab Figure 3 6f StarGO2 Motion Control Tab 21...

Page 22: ...f colorful icons each related to the tabs necessary to operate the single pieces of equipment in our profile se figure 3 7 Figure 3 7 EKOS StarGO2 Profile KStars window 5 The important Tab for the pur...

Page 23: ...ng the button on the upper right corner of the window Figure 3 9 Mount Virtual Keypad Figure 3 9 Mount Virtual Keypad It must be noted that many of the routine operations with the mount such as gotos...

Page 24: ...the StarGO2 Raspberry and can be found in the Education main Menu Telescope Setup with CdC The procedure to connect the StarGO2 to CdC from the inside Raspberry is the following 1 Launch the SkyChart...

Page 25: ...pears Figure 3 13 Select the StarGO2 Telescope by clicking the Get button this is needed only at the first access Fill the Observatory coordinates if not already set before and press Connect Leave all...

Page 26: ...Unpark command it is necessary to enter the INDI window by clicking the INDI gui see Figure 3 14 button The windows that will open See Figure 3 15 which is the same EKOS windows but with another grap...

Page 27: ...3 15 INDI StarGO2 Telescope panel in EKOS 8 After the unparking it is possible to move the telescope using all the CdC planetarium commands highlighted in Figure 3 16 Figure 3 16 CdC telescope comman...

Page 28: ...nt telescope functions that need to be performed with the StarGO2 Stellarium is preinstalled in the StarGO2 Raspberry and can be reached on the same Education voice of the main menu The instructions f...

Page 29: ...bar An additional empty window will appear named Telescopes Figure 3 19 Figure 3 19 4 Press the Add This will make to appear another window named Add New Telescope in which all the information related...

Page 30: ...he RA DEC fields the coordinates of the screen center StarGO2 or whatever other telescope name available makes possible the choice among several telescope settings Slew This big button primes the tele...

Page 31: ...late with other fields to be filled with the parameters of your guiding setup The most important is the guide camera If your camera is not on the presented list choose INDI Camera Pressing Next button...

Page 32: ...the mount and to perform all the astro photographic operations reside on a remote computer once again connected to the StarGO2 wireless through WIFI or wired via Ethernet cable being the second prefer...

Page 33: ...2 In this window select the ASCOM item even if we are well aware that ASCOM environment does not exist for Macs and Linux computers The click Apply and OK to exit the window 3 Now open the ASCOM tele...

Page 34: ...Clicking on it will unpark the mount and the button will turn green and the label will become Unparked Otherwise the mount will appear already unparked This button can be used to park Unpark the tele...

Page 35: ...mation related to our StarGO2 will be inserted 5 Enter the information as shown in the figure but using the actual IP address as shown in the StarGO2 Main Display and inserting in the last line the di...

Page 36: ...ds with the information provided in Figure 3 27 with the only exception of the IP address that will be taken from the main ODD see Figure 2 5 of section 2 Figure 3 27 3 After the insertion of the requ...

Page 37: ...to users making it a very flexible mount control system It is useful to repeat that in the next paragraphs we assume that the PC essentially Window but also MAC Linux when the tools are available is...

Page 38: ...ssed by the Main Menu See figure 3 4 1a Figure 3 4 1a In this window select ASCOM in the Telescope dropdown menu the ASCOM chooser will be proposed for selecting the StarGO2 telescope TheSkyX On the T...

Page 39: ...ith the use it shows to be a very powerful and complete application for astrophotography For accessing the ASCOM Telescope Chooser press the Profile icon in the top menu See Figure 3 4 1d Figure 3 4 1...

Page 40: ...el opened see Fig 3 4 1f Close it because the profile may be set in a second moment Figure 3 4 1f Click the Telescope icon on the left of the screen to open the Telescope setup windows and on this ope...

Page 41: ...really evident To access the ASCOM Chooser in this program after its launch click the menu items Edit Devices Setup figure 3 4 1g to open the homonymous window Figure 3 4 1g Choose Mount device in th...

Page 42: ...will have the following aspect Very First Access The initial ASCOM Chooser use to have the following form Figure 3 4 2a Note that there are two unselected tabs If the color rectangle on the right is r...

Page 43: ...wo figure may be the last time you see them because the next times you will invoke the chooser it will automatically detect the StarGO2 Next accessing Next times you call the ASCOM Chooser it will hav...

Page 44: ...rst is available for both iOS and Android the second only for the latter The Skysafari is a very attractive application that can be however used only for simple slewing goto and sync operations but it...

Page 45: ...pp on the device and select the icon Setup in the toolbar Figure 3 1a 3 In the Setup screen select Telescope and in the new screen see figure 3 1b insert the following Telescope Type Meade LX200 Class...

Page 46: ...o This app has been very recently published November 2021 It has many improvements over the version 6 but the most important for us is that it uses two new modes to connect to the StarGO2 The new vers...

Page 47: ...related page Figure 3 1 1h The autodetect function is activated by the default Press the Scan Network For Device button to auto detect the StarGO2 network If all is OK the IP Address the port number...

Page 48: ...Fig 3 1 1g Fig 3 1 1h Fig 3 1 1i Fig 3 1 1l Fig 3 1 1m Fig 3 1 1n 48...

Page 49: ...position indicator will be placed over the North Pole 8 Select a bright star close to the object you want to visit and press the GOTO button The telescope will move to the object but probably will no...

Page 50: ...e telescope press the symbol on the bottom screen border A small panel will open showing some small icons for time regulation in the center and for small arrows on the sides This are the four arrows t...

Page 51: ...ms which are related to the other devices eventually connected to the StarGO via the USB ports CDD guide CCD Focuser etc Pressing these it is possible to enter in the related pages to shoot picture st...

Page 52: ...APPENDIX A A 1 System Update Download the StarGo2 Pro update file from Support Page on Avalon website Click on the FILE button available inside the CONFIGURATION tab StarGo2 Pro WebApp 52...

Page 53: ...PC to find the downloaded file required for the system update NOTE if you don t see the downloaded file inside the download folder select the All file option in the dropdown file men Click on the UPDA...

Page 54: ...A security warning pop up will show up Click on the Ok button After few seconds when the operation will be completed a warning message will advice about the System update successful operation 54...

Page 55: ...To restart the system press the REBOOT button NOTE After the reboot to make the update run properly it is required to clear the browser cache Normally this operation it is made pressing together Ctrl...

Reviews: