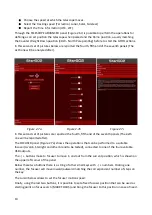
The SWITCHES panel (Figure 2.7b) contains the controls of the power supply and the USB signals.
In particular, the first two (OUT) will switches on/off the 12 V DC fixed voltage supply to devices
such as CCD, Filter Wheels, Rotators, etc. The third switch (PWM) regulate the voltage from 0 to
12 VDC, essentially for the anti-dewing band.
The four USB switches turn on/off the access to the
correspondent ports of the Raspberry PI in the
StarGO2, used to control peripheral devices, like
those cited above.
The sixth panel INFO (Figure 2.7c) report a summary
of the StarGO2 features to put allow the new user
to get the most important characteristics of this
new control system.
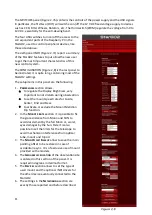
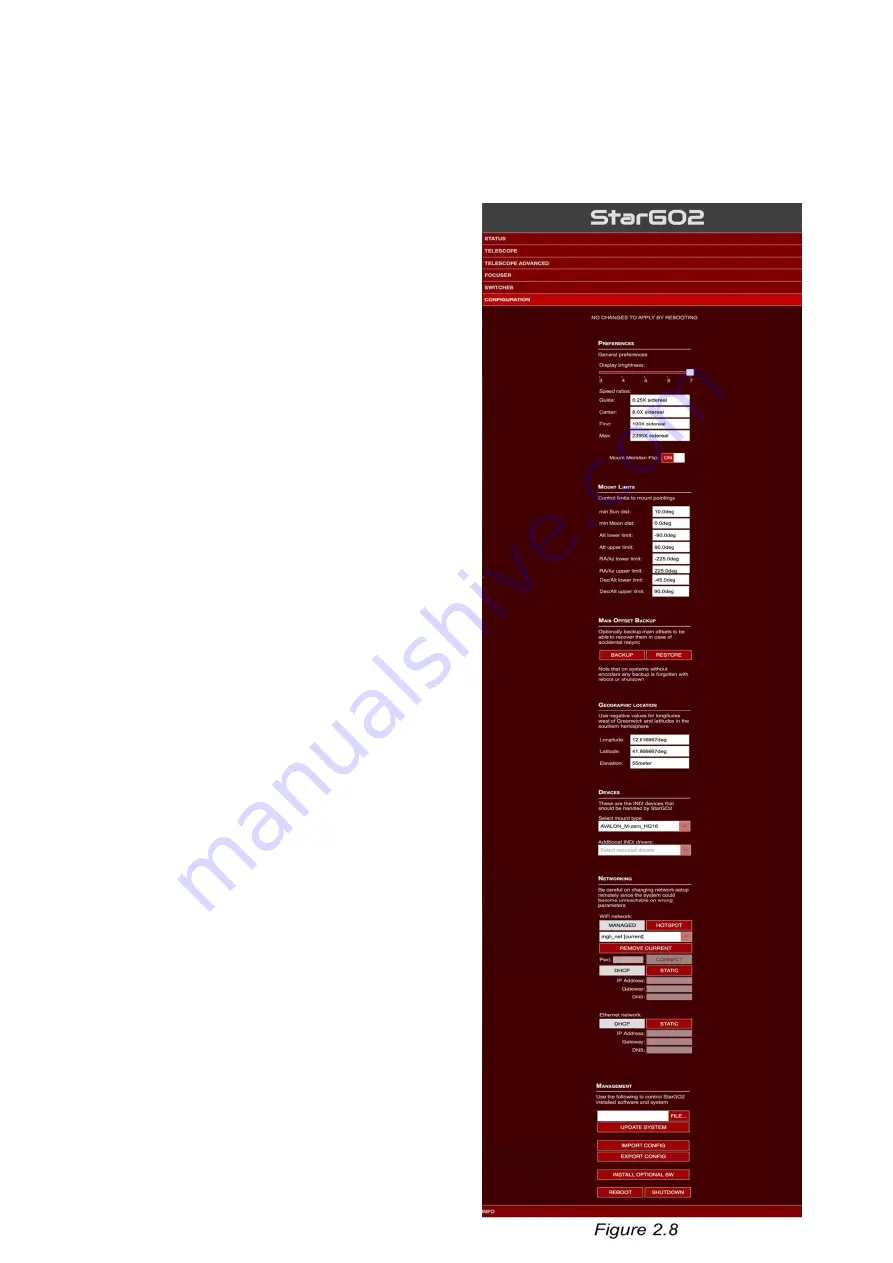
The CONFIGURATION (Figure 2,8) is the last panel to
be illustrated. It is quite long, containing most of the
StarGO2 settings.
The setup items in this panel are the following:
1.
P
REFERENCES
section allows:
to regulate the Display Brightness, very
important to not disturb during observation.
to set the mount speed rates for Guide,
Center, Find and Slew.
to activate or exclude the Mount Meridian
Flip function.
2. In the
M
OUNT
L
IMITS
section it is possible to fix
the grace distance from Moon and SUN to
avoid dazzlement by the full Moon or, worst,
eyes damages by the Sun. Here it is also
possible to set the limits for the telescope to
avoid mechanical interferences from optical
tube, mount and tripod.
3. The
M
AIN
O
FFSET
B
ACKUP
allow to save the main
pointing offset to be restored in case of
accidental resync. It is of exclusive use of mount
provided with encoders.
4. The
G
EOGRAPHIC
L
OCATION
of the observation site
is entered in this section of the panel. It is
required in degrees in decimal format.
5. The
D
EVICES
section allows to set the type of
used mount and the optional INDI drivers for
the other device eventually connected to the
StarGO2.
6. The settings in the
N
ETWORKING
section are
exactly those reported and before described.
11
Summary of Contents for StarGo2 Pro
Page 19: ...Figure 3 6a StarGO2 Main Control Tab Figure 3 6b StarGO2 General Info Tab 19...
Page 20: ...Figure 3 6c StarGO Option Tab Figure 3 6d StarGO2 Connection Tab 20...
Page 21: ...Figure 3 6e StarGO2 Site Management Tab Figure 3 6f StarGO2 Motion Control Tab 21...
Page 48: ...Fig 3 1 1g Fig 3 1 1h Fig 3 1 1i Fig 3 1 1l Fig 3 1 1m Fig 3 1 1n 48...

