Optional Equipment
(
for qualified installers only)
45
© Travis Industries
4151204
100-01430
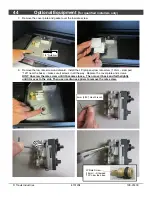
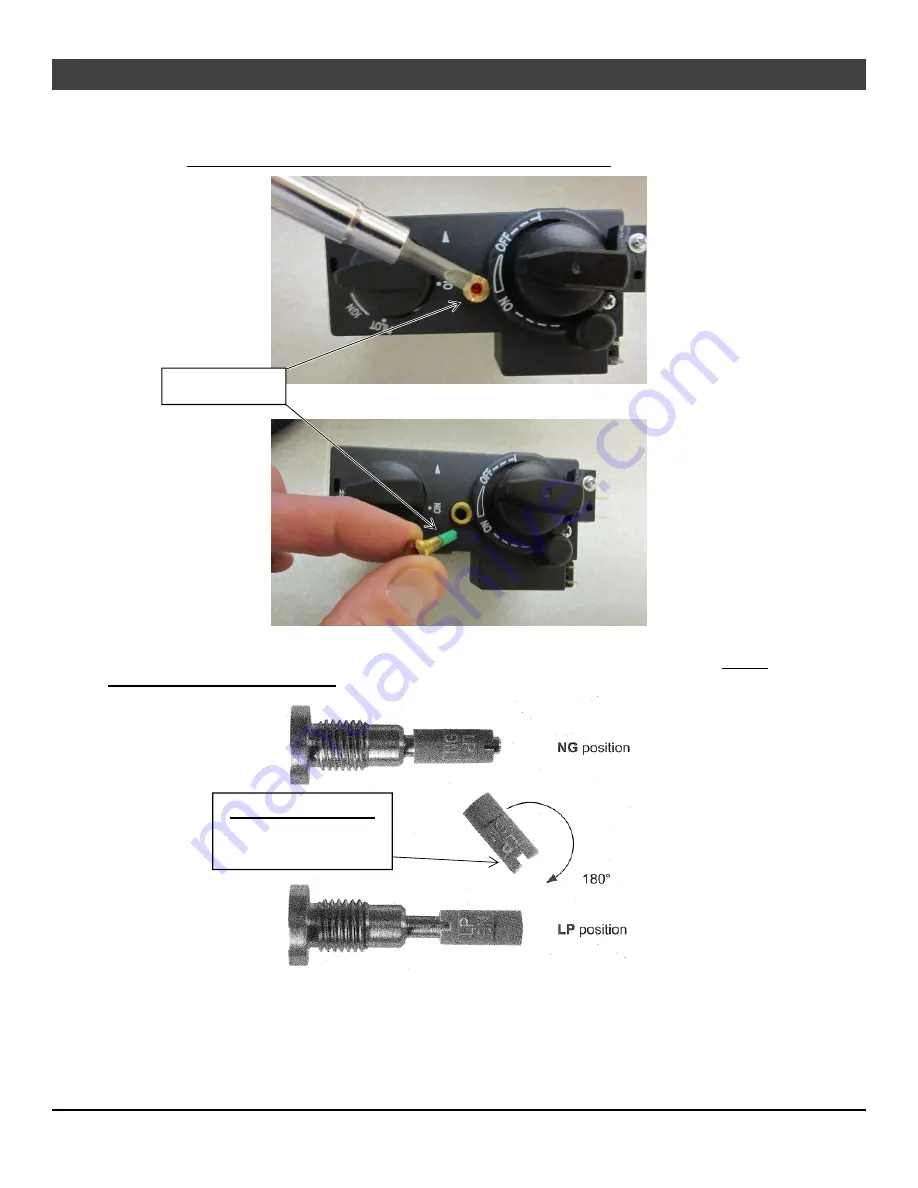
9. Unscrew the conversion plug on the front of the valve using a ¼” flat-head screwdriver (see pictures
below). Carefully unsnap the plastic cap on the inward end of the conversion plug. Rotate the plug
180° and re-attach it to the conversion plug. Screw the conversion plug back into the gas control
valve –
do not overtighten the conversion plug – it is not a gas seal
.
Carefully unsnap the plastic cap on the inward end of the conversion plug. Rotate the plug 180° and re-
attach it to the conversion plug. Screw the conversion plug back into the gas control valve –
do not
overtighten the conversion plug
.
10. Replace the firebox components.
11. Restore the appliance to the correct configuration. Make the gas line connection, bleed the gas line
(if applicable), start the heater and thoroughly leak-test all gas connections and the gas control valve.
Conversion Plug
Note Position of Notch
NG = Notch Out
LP = Notch In
Summary of Contents for Radiant Plus Small Insert
Page 32: ...32 Operation Travis Industries 4151204 100 01430 Remote Control Operation ...
Page 33: ...Operation 33 Travis Industries 4151204 100 01430 Remote Control Operation continued ...
Page 34: ...34 Operation Travis Industries 4151204 100 01430 Remote Control Operation continued ...
Page 35: ...Operation 35 Travis Industries 4151204 100 01430 Remote Control Operation continued ...

