background image

_____________________________________________________________________     


© 

All Rights reserved


69 

7.


Firmware Updating 


StarGoLoader


The first time StarGO is launched, after the software is updated, a check is performed to 
verify if the firmware is compatible with the latest version of the software. If the check result 
indicates incompatibility, the warning reported in figure 3.1 on page 22 will be shown. In this 
case it is necessary to open the setup panel and to activate the firmware updating routine 
by pressing the Firmware Upload button (see figure 4.2, pag 25). This will cause the sudden 
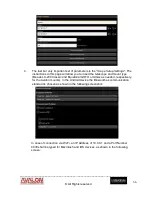
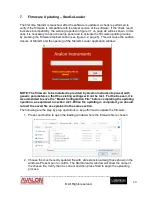
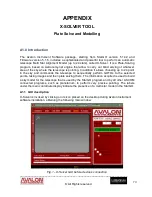
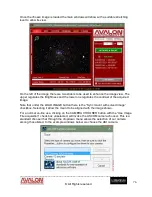
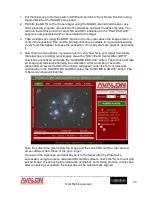
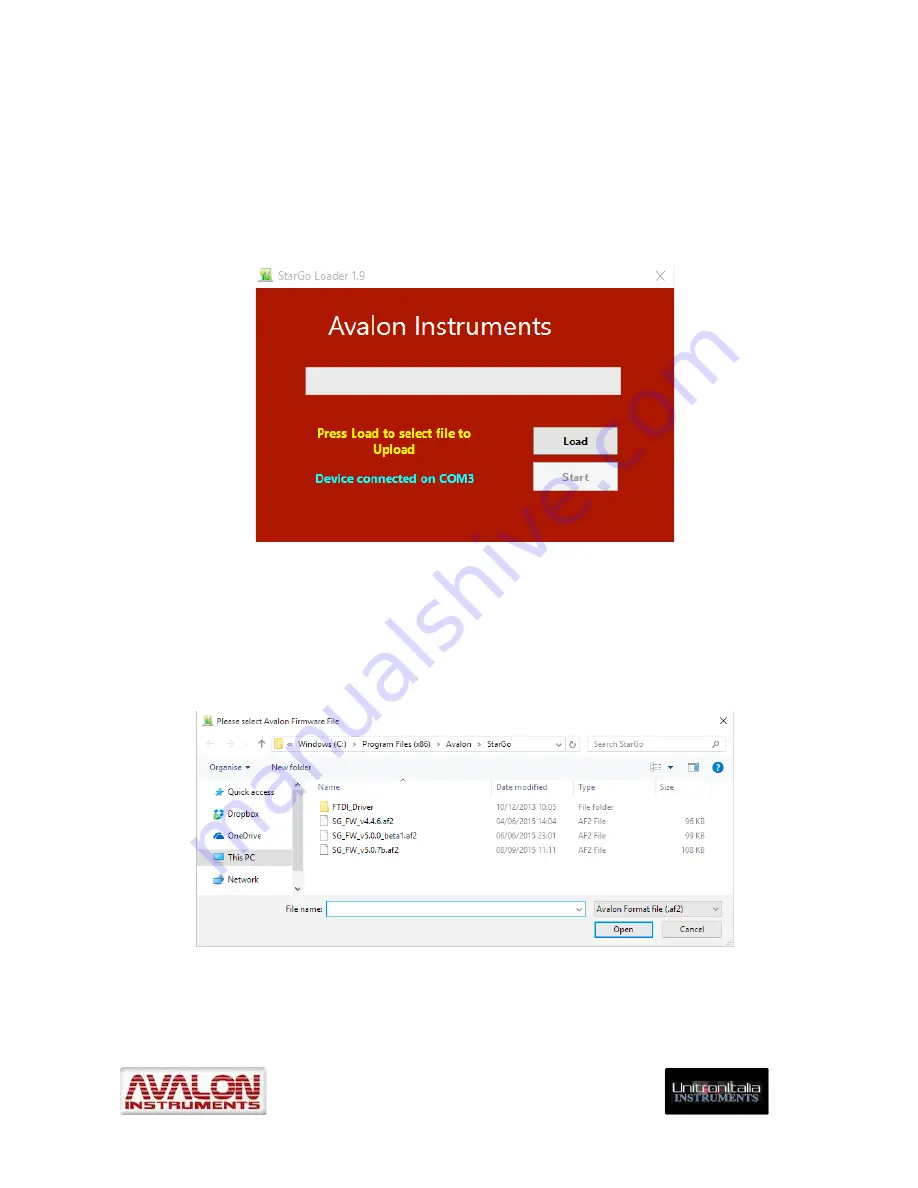
closure of StarGO and the opening of the StarGO Loader application window: 


NOTE:


The firmware to be installed is provided by Avalon Instruments pre-set with 

generic parameters so that the existing settings will not be lost.  For that reason, it is 
recommended to save the “Mount Configuration File” before completing the updating 
operation, as explained in section 4.2.1. When the updating is completed, you should 
re-load the saved file as explained in the same section. 

The following are the step by step operations to be performed to update the firmware:  

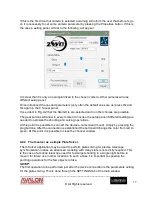
1.  Press Load button to open the loading window where the firmware file is chosen. 


2.  Choose the most recently updated file with .af2 extension among those shown in the 

windows. Press Open to confirm. The StarGo loader window will show the name of 
the chosen file. Verify that it is correct and then press Start to begin the uploading 
process. 

Summary of Contents for StarGO

Page 1: ...y Mauro Ghiri Revised by Steven Gaber All the pictures and contents here included are property of AVALON INSTRUMENTS The content cannot be reproduced published copied or transmitted in any way including the internet without the written permission of AVALON INSTRUMENTS ...

Page 2: ...ontrol System for astronomical mounts is part of a set which also includes the manuals of the single mounts produced by Avalon Instruments as well as a training manual for the use of third party software with the StarGO hardware This manual is in a process of continual development and improvement Therefore it is suggested that users regularly consult the web support page of the Avalon Instruments ...

Page 3: ...llation 15 3 2 Software Updating 21 4 StarGO program description 23 4 1 Graphical User Interface GUI 23 4 2 Parameter setting 25 4 2 1 System Panel 25 4 2 2 RA DEC Panel 26 4 2 3 AUX Panel 27 4 2 4 ADVANCED Panel 28 4 2 5 ALIGN Panel 29 4 3 Warning Description 31 4 4 Using the special features of the Main Graphical Area 32 4 5 Use of the StarGO for controlling telescope in Equatorial Mode 37 4 5 1...

Page 4: ...i Fi connection of StarGO with an Android tablet or smartphone 53 5 2 Sky Safari setup 54 5 3 SkySafari Connection and alignment 57 5 4 StarGO and SkySafari in Alt Azimuth mode via Bluetooth or WiFi 61 6 Mount Control with StarGO BT for Android 62 6 1 Application Installation 62 6 2 Application Use 64 6 3 Application setup 65 7 Firmware Updating StarGoLoader 69 A1 0 Introduction 73 A1 1 GUI descri...

Page 5: ...l inside the StarGO setting press the button Sync Home Position 2 Section 4 1 and Section 4 1 1 sub ALIGN Panel 6 Launch the planetary software of your choice and initialize the telescope function N A 7 Perform the GOTO to a bright and easily visible star close to the object to be captured It will probably not be centered in the telescope eyepiece N A 8 Using the finderscope previously aligned wit...

Page 6: ...tion of SkySafari without moving the mount from its HOME position 2 Section 5 3 7 As a result of the previous action the telescope will result aligned to the pole where it is really pointing This operation corresponds to the execution of the Sync Home Position using the StarGO software on the PC 2 Section 5 3 8 Perform a GOTO to a bright and easily visible star close to the sky area being observed...

Page 7: ...it the StarGo Control Box is also compatible with many mounts from other manufacturers It has the ability to provide a smart interface between the mount s drive motors and the external world Using internal and user selected computerized astronomy software applications it performs all the necessary communications with specific components including the autoguider focuser CCD rotator DSRL camera and ...

Page 8: ...ices become perfect smart device control pads This application as well as StarGO is under continuous development to add new functionalities 5 The AvalonStargo ASCOM driver makes possible the interaction between the StarGO Control Box and the vast majority of third party software applications such as Cart du Ciel Stellarium etc In addition thanks to the compatibility with the LX200 standard the Sta...

Page 9: ...ed Ultra on the power supply at least 15 VDC Tracking Speeds Sidereal Solar Lunar Terrestrial No tracking RA DEC Motor Currents Typical currents are 0 3 A for tracking and 1 5 A adjustable for slewing Data Base 14000 Default objects The database is easily editable by the user using a simple text editor This database is part of the StarGO software and it may be accessed using a PC Input Output Port...

Page 10: ... design follows the most recent technological developments in this field It consists of a very simple hardware interface which facilitates a wide range of applications such as the management of focusers filter wheels autoguiders DSLR cameras etc without the need of frequent modifications to additional devices At the same time it retains the ability to be controlled by PCs smartphones and tablets T...

Page 11: ..._____________________________________________________________________ All Rights reserved 11 ...

Page 12: ...ly installed from the factory On the M zero mount it is mounted externally The StarGO control box which comes with the Stand Alone Kit is designed to be installed externally on mounts of other brands The StarGO Control Box is an attractive Aluminium case which contains the StarGO main control board and has external connections to power the motors and other devices item 1 above This section describ...

Page 13: ...elled Keypad 8 with the included RJ45 cable Figure 2 2 Keypad W E Decreases Increases the Right Ascension N S Increases Decreases the Declination Fn Function Key SPEED Increases Decreases the mount s movement speed Fn SPEED Increases Decreases the Polarscope LED light intensity FOCUS Controls the in and out movement of the SteelDrive focuser motor in the port with the same name Also controls the m...

Page 14: ...y to the default Sidereal speed 3 By holding pressure on the Fn key and the pressing the W key the telescope max slewing speed varies in the order Low Medium Fast Ultra By keeping pressure on the Fn key then pressing E key the selection order is inverted Ultra Fast Medium Low The system does not memorize the tracking speed as modified and the next time the system is powered on it returns automatic...

Page 15: ...grams autoguide CCD and DSLR management software plate solving applications etc are also run as administrator 3 1 StarGo StarGoLoader application and FTDI driver installation To get maximum use of the StarGO system features and to obtain complete mount control it is necessary to install the applications supplied on the flash drive However the mount is able to track objects both in equatorial and A...

Page 16: ...e generated Upon special request Avalon Instrument could supply a version of StarGO not needing the ASCOM platform The StarGO software is provided in a USB flash drive The software installer file called Install StarGo_xxx exe is located in the folder Installer Tutorial Software The step by step software installation procedure on a Windows 8 computer is the following 1 Launch the Install StarGo_xxx...

Page 17: ...All Rights reserved 17 3 The welcome window inside the splash screen will be replaced by the License Agreement window Select I accept the agreement and then Next 4 The next window will allow the creation of a StarGO desktop icon It is advised to accept and then press Next ...

Page 18: ...task selected and proposes to start the installation Press Install button 6 At the end of the installation process a window will be presented to finish the installation process asking to perform additional operations if needed install The FTDI USB drivers install the most updated StarGO ASCOM driver and launch the StarGO software at the end of the installation process ...

Page 19: ...se they are much more less frequently updated than the StarGO driver it is not necessary to install them each time 7 Press Finish In case the FTDI driver installation has been selected the Device Driver Installation Wizard will appear 8 Press Next The windows announcing the correct driver installation will appear Press End to exit The new drivers are ready for the USB connection ...

Page 20: ..._____ All Rights reserved 20 9 After the FTDI driver installation if selected the Avalon ASCOM driver installation wizard will pop up Press the Next button 10 Accept the License Agreement in the following window and press Next Press Install on the subsequent window ...

Page 21: ...bject to continual improvement and updating with additional functions being added all the time We therefore advise users to frequently consult the Avalon Instruments website Support page to be assured that their StarGo software and firmware are the latest updated versions The updating process consists of repeating the installation operations previously described in Software Installation Section 3 ...

Page 22: ... is obsolete and incompatible with the newly installed software Figure 3 1 If this message appears it will be necessary to update the firmware following the instructions given in Section 7 The file containing the newest firmware to be chosen will be the most recent one among those available in the StarGO folder When the firmware updating has been completed it is necessary to restart the StarGO app...

Page 23: ...GO Main Panel before connection To animate the GUI it is necessary to perform the StarGO connection with the hardware To do this press the button with the USB icon and the COM port selection window will appear Figure 4 1b COM Port setting The connection will be established by selecting the correct COM port normally the port suggested in the Select Com Port menu and pressing OK The USB icon will be...

Page 24: ...ed A quick click on the LED or on one of the directional arrow buttons will activate the sidereal tracking and the LED will remain on same as the physical LED on the StarGO obtaining the same result of a brief pressure of the mentioned physical button 11 in the StarGO hardware Just as holding the red power button on the StarGo Control Box for longer than 5 seconds will cause tracking to stop a dou...

Page 25: ...box selects if the StarGO GUI position on the screen should be saved Figure 4 2 SYSTEM Panel This panel reports also the StarGO software firmware and ASCOM driver versions as well as the type of mount and the axis mode equatorial or alt azimuth The timeliness of the given versions of firmware and software is evaluated by the software itself and in case they are not current the user is warned and a...

Page 26: ...nables access to the guide settings of the mount Figure 4 3 RA DEC Panel The AUTOGUIDE SETTING frame allows the regulation of the auto guiding speed with increments of 0 05x times the sidereal speed This regulation can be performed independently for the two axes It has effect for the signal coming from the ST4 port and forthe pulse guiding signals coming from the USB ports The check box ST4 Enable...

Page 27: ...er ports can drive stepper motors for specialized functions such as motor driven focusers of other brands filter wheels CCD rotators etc The STEELDRIVE frame only allows the setting of a decimal number see note below because all other parameters are fixed and internally set by the focuser s manufacturer The two frames below AUX1 and AUX2 contain the parameters pertaining to the auxiliary devices a...

Page 28: ...parate windows see section 4 4 Furthermore it is possible to change the Aux port denomination by double clicking over the frame tab Fig 4 4a SHOW BUTTONS checked Fig 4 4b and unchecked 4 2 4 ADVANCED Panel Clicking on the ADVANCED tab brings up a panel in which base parameters are selected during the installation phase and rarely used thereafter Figure 4 5 Figure 4 5 ADVANCED Panel The REVERSE MOT...

Page 29: ...se of its Gear Ratio In particular the Avalon mounts Linear M uno and M zero are nominally indicated Starting from firmware version 4 0 0 the motor torque management system has become dynamic For the regulation of the RA DEC Torque value please refer to the following table Mount Voltage Linear M uno 12 V Linear M uno 15 V M zero 12 V M zero 15 V Max Slew Speed Fast Ultra Fast Ultra Torque 70 70 50...

Page 30: ...rted even after many days without losing the sky alignment Slew to Home Position buttons brings the mount to the Home position previously defined with the Sync Home Position function corresponding to the starting position to which the Sync Home Position has been previously set Two check boxes are on the bottom of the frame The first Use Multi Star Model enables the StarGO to accept the sky model b...

Page 31: ...Support page of the Avalon web site When StarGO during connection determines that firmware and software versions are incompatible because they are at different stages of updating the following warning will appear over the main GUI panel Clicking on the OK button will allow operation to continue normally However possible malfunctions could occur if any important software changes or updates have tak...

Page 32: ...l all items and features in the Main Control Panel of the GUI which are not described or are only briefly mentioned in the previous sections The instructions of this section are applicable in both equatorial and alt azimuth modes The large window on the upper left angle shows the current values of Right Ascension RA and Declination DEC coordinates of the telescope The directional buttons on the mi...

Page 33: ...Solar and Lunar buttons in the Tracking row If the terrestrial speed is selected the mount stops and remains motionless relative to the sky but the display shows the RA changes due to the sidereal motion of the sky DSRL management NOTE To enable this button in the Main GUI it is necessary to select the DSRL SHOW check boxes inside the SHOW BUTTON sub frame in the Aux Panel see section 4 2 3 figure...

Page 34: ...m The controls have been designed with the ability to use Time Lapse imaging The total time in seconds is reported in the window in the upper left corner The Start button initiates the sequence of the exposures The Stop button interrupts the sequence before the total number of shots is carried out The Resume button re starts a sequence that has been previously interrupted The Shot button allows th...

Page 35: ... section 4 2 3 figure 4 4 The user shall perform the setup of the AUX ports parameters as described in Section 4 2 3 AUX Tab Clicking over the name of the device in the related sub frames a new input window will appear as follows In this window it is possible to insert new names for the device connected to each of the Aux ports This name will appear in the above matrix Also the gauge units defined...

Page 36: ... case of need The display will show the current values of the parameters including the measurement units The two buttons enable the manual movement of the related device in either of the two directions in a continuous manner The six small buttons with the numbers 1 0 1 0 01 0 01 0 1 1 will move the associated device in a fixed value defined by the number on the used button Double clicking on the s...

Page 37: ... objects It is possible to sort each catalogue in alphabetic or numeric order by simply clicking on the chosen column heading The catalogue consists of simple textual files in a well defined format located in the StarGO main directory It is possible to create new catalogues or to edit the existing ones simply using a text editor following the specified format 4 5 Use of the StarGO for controlling ...

Page 38: ...el or an existing one has been loaded in memory each additional Sync will increase the number of stars of the model up to the total of 24 In order that this incremental feature has a correct effect it is mandatory that the operations be started with the mount Synced in Home position as below explained For the correct execution of the Single Star Alignment the mount must be positioned with the tele...

Page 39: ...pointing toward the selected star Using the finderscope bring the star to the center of the crosshair by mean of the keypad or the directional buttons of the StarGO software To refine the centring use the telescope eyepiece to bring the star exactly to the field of view center Once the star is perfectly centred press the SYNC button on the left of the previous one The telescope is now aligned with...

Page 40: ...on up to a fraction of an arcmin without the need to develop a sophisticated and complicated pointing model Such a pointing model may use tens of stars and may be required to be corrected and updated often for external and uncontrollable reasons Note It is also possible to perform with more simplicity the Sync operation directly inside the planetarium software of choice For example SkyChart or Sky...

Page 41: ...of the finder scope center the star in the eyepiece using the directional commands in the main GUI or the directional buttons in the control keypad When the star is well centred perform a Sync using the button in the Celestial Database panel Now perform the goto to the second star This time the pointing should be much more precise Perform again the precise centring as before and a new sync to this...

Page 42: ...o perform for controlling the telescope with CdC under the ASCOM platform environment is the following Launch CdC under the administrator privileges as may be needed for all other software programs used with StarGO Select the Telescope settings item under the Telescope menu of the main CdC interface as indicated by the red oval in the following Figure 4 10 Figure 4 10 CdC main GUI_1 The General pa...

Page 43: ... CdC Telescope Interface selection window Select the Control panel item under the Telescope menu as highlighted by the green oval 1 in Figure 4 12 below or click on the telescope icon indicated by the green oval 2 in the main CdC interface The ASCOM telescope interface will open Figure 4 12 CdC Main GUI_2 ...

Page 44: ...OM Telescope Chooser panel will open Select the AvalonStarGo NET driver in the dropdown menu and then click OK Once the Avalon ASCOM driver has been accepted press the Connect button on the ASCOM telescope interface panel of Figure 4 13 At this point the telescope will be under ASCOM control and it may be driven by CdC as well as other ASCOM compatible programs like Astrotortilla PHD Guiding or Se...

Page 45: ...XP 7 and 8 TheSkyX Pro 2 MACOSX 10 9 4 TheSkyX Pro 3 MACOSX 10 9 4 Sky Safari Pro 4 Samsung Galaxy Tab S Android Sky Safari Pro 5 Samsung Galaxy Note 2 and 8 Android Sky Safari Pro 6 Samsung Galaxy 5S Android Sky Safari Pro 7 Apple iPhone and iPad Sky Safari Pro Other Device Software combinations will be added once further compatibility tests now being conducted have been successfully completed Th...

Page 46: ...eserved 46 Select Devices green oval to open the related panel as follows In this panel select the Bluetooth item and then the StarGO device In our example it is named M zero However other Avalon Instruments product names are possible and are easily identifiable A subpanel will open ...

Page 47: ...tical to those performed with a USB connection 4 8 2 Bluetooth pairing the StarGO with a Macintosh The procedure to pair a Mac with the StarGO via Bluetooth is very similar to that just described On the Mac follow these steps Open System Preference window and select Bluetooth The following panel will open The already connected devices will be shown in the window and the rotating wheel in the upper...

Page 48: ...In this click Pair in correspondence with the discovered StarGO Bluetooth device A subpanel will open Insert the StarGO code It is normally 1234 If different the correct one will be provided with StarGO documentation After few seconds the pairing will be established as shown in this screenshot ...

Page 49: ...vailable WiFi network names chose StarGO WiFi If it is the first time the connection is attempted the insertion of the password is required Type avalon1234 or whatever password Avalon Instruments has provided with the software Wait few seconds until the connection is established The StarGO SW is now wireless connected to the PC and the mount is ready to be operated 4 8 4 Connect the StarGO to a Ma...

Page 50: ...ttempted the insertion of the password is required Type avalon1234 or whatever password Avalon Instruments has provided with the software Wait few seconds until the connection is established The StarGO SW is now wireless connected to the Mac and the mount is ready to be operated trought compatible software such as The SkyX and SkySafari ...

Page 51: ... 5 1 2 respectively whereas the connection of iOS devices is described in section 5 1 3 Once the connection has been established the operational mode is similar for all the considered devices 5 1 Mobile device Bluetooth and Wi Fi connection 5 1 1 Bluetooth pairing the StarGO with an Android tablet or smartphone This operation can be easily done following these simple steps the figures can be sligh...

Page 52: ...arGO with an iPad or iPhone This operation can be easily done following these simple steps 1 Select Settings in the device main screen and when window opens select Wi Fi 2 Choose StarGO WIFI in the CHOOSE A NETWORK section 3 After a few seconds the StarGO WiFi network will appear as selected one on the side of Wi Fi icon ...

Page 53: ...d tablet or smartphone This operation can be easily done following these simple steps the figures can be slightly different in various Android devices 1 Select Setting in the device main screen and when window opens select Wi Fi in Wireless and network section The screen will look as follows 2 Choose StarGO WIFI in the Wi Fi NETWORK section 3 At the first connection a password is required Type ava...

Page 54: ...rameters in the program setup page SkySafari is provided with plenty of parameters to set mostly dedicated to the program display characteristics This section of the manual will deal only with those parameters which are necessary for the Avalon mount control Read the SkySafari manual to set all other parameters http www southernstars com support manual index htm 1 Launch the SkySafari version 4 or...

Page 55: ... the Use current Time box Otherwise set the current date and time as required When done click over the X in the upper right corner to save and exit the current page 3 Open the Location Settings page In this page insert the name and the geographic coordinates of the site Also insert also the approximate elevation and the Standard Time Zone as required It is most important that the date time and loc...

Page 56: ...ow you to insert the telescope and mount type Meade LX 200 Classic and Equatorial GOTO or Alt Az as needed respectively for the Avalon mounts In the Android device the Bluetooth as communication standard is chosen as shown in the following screenshot In case of connection via Wi Fi an IP Address of 10 0 0 1 and a Port Number 4030 shall be typed for Macintosh and iOS devices as shown in the followi...

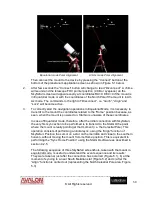
Page 57: ...ssible to start moving the telescope using SkySafari The first action to perform is to manually put the telescope in the Home position i e with the counterweights pointing the down CWD direction and the telescope pointing toward the North Celestial Pole for the mount in Equatorial Mode see next figure to the left or the telescope pointing toward the North Celestial Pole regardless the mount orient...

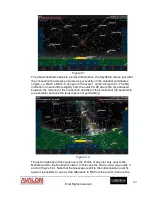
Page 58: ... position because as seen when the mount is powered on StarGo is unaware of these coordinates In case of Equatorial mode therefore after the initial connection with SkySafari the very first sync action to be performed is to transmit to the StarGO the point where the mount is really pointing at that moment i e the Celestial Pole This operation consists of performing an initial sync using the Align ...

Page 59: ...ication in oval 2 differs slightly from the point 00 00 due to the time elapsed between the moment of the connection and that of the screenshot 38 seconds in our example because the telescope is not yet tracking Figure 5 2 The second phase in this sequence is the choice of any star very near to the Meridian and to the Southern horizon In this case the star is η Aql see ovals 3 and 4 of figure 5 2 ...

Page 60: ...val 8 where the mount is indeed pointing This information is sent to the StarGO This is also the initial position of the telescope in case of Alt Az mode From this moment the movement of the telescope is synchronous with that of SkySafari 4 Now the telescope can be operated using the available commands and the direction control on the side of SkySafari screen below On the left the RA direction con...

Page 61: ...ion for the Alt Azimuth mode corresponds to pointing the telescope in the direction of the Celestial North Pole Since the polar scope is not available in this mode this operation is not trivial A certain degree of error is acceptable and will be compensated in the following alignment by placing Polaris the North Star in the center of the telescope FOV With the telescope in this position perform a ...

Page 62: ...e but it must be directly installed in the device by the user The following sections describe the instructions for the app installation and use The starting point for the installation is the establishment of communication between the Android device and StarGO hardware This operation has been already described in section 5 1 6 1 Application Installation The app is contained in a single file named S...

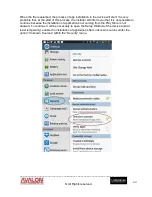
Page 63: ...at at the start of this process the installer will inform you that it is not possible to continue because the installation of applications not coming from the Play Store is not allowed To continue it will be necessary to open the Setup Window of the device and at least temporarily enable the installation of applications from unknown sources under the option Unknown Sources within the Security menu...

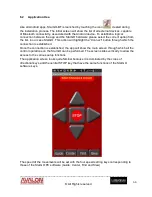
Page 64: ... list in our case StarGO This action will highlight the Connect button through which the connection is established Once the connection is established the app will show the main screen through which all the control operations on the StarGO can be performed The screen slides vertically to allow the access to the various setup functions The application screen looks quite familiar because it is domina...

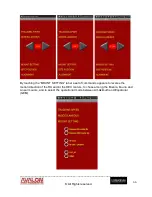
Page 65: ...e TRACKING SPEED label Touching the label opens the string of the buttons to select the desired tracking speed Sidereal Solar Moon and Earth The latter is used for taking terrestrial time lapse pictures The MISCELLANEOUS label controls the auxiliary functions i e focuser or others which will appear There will be a pair of opposing arrows to move connected devices in opposite directions The central...

Page 66: ...All Rights reserved 66 By touching the MOUNT SETTING label a set of commands appears to reverse the motion direction of the RA and or the DEC motors to chose among the M zero M uno and Linear mounts and to select the operational mode between Alt Azimuth and Equatorial GEM ...

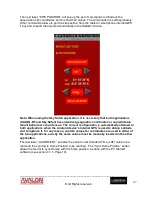
Page 67: ...rGO BT and Sky Safari have identical geographic coordinates or unpredictable mount behaviours could ensue The correct configuration is automatically attained in both applications when the Android device s internal GPS is used to obtain Latitude and Longitude If for any reason custom values for coordinates are used in either of the two applications exactly the same values must be manually inserted ...

Page 68: ..._____________________________________________________________________ All Rights reserved 68 ...

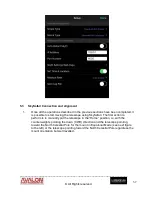
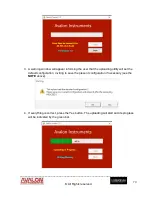
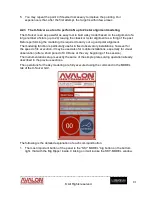
Page 69: ...Loader application window NOTE The firmware to be installed is provided by Avalon Instruments pre set with generic parameters so that the existing settings will not be lost For that reason it is recommended to save the Mount Configuration File before completing the updating operation as explained in section 4 2 1 When the updating is completed you should re load the saved file as explained in the ...

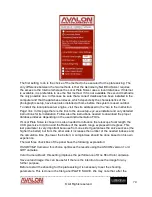
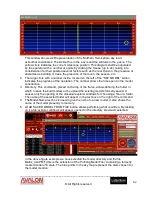
Page 70: ...ing window will appear informing the user that the uploading utility will set the default configuration inviting to save the present configuration if necessary see the NOTE above 4 If everything is correct press the Yes button The uploading will start and its progress will be indicated by the green bar ...

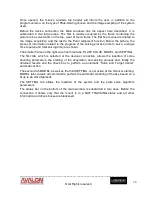
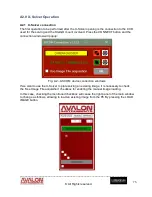
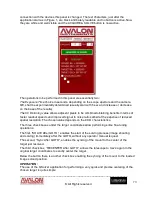
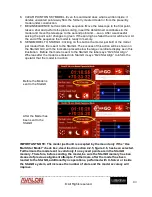
Page 71: ...ccessful uploading is announced Press Close button to exit the application 6 Restart StarGO and connect it A warning will appear informing that the mount is not configured asking to reload the Mount Configuration File previously saved 7 Pressing OK will cause the opening of the loading windows for the available configuration files ...

Page 72: ...en loading is finished the StarGO will be ready to work with the newly installed firmware and the correct configuration NOTE The uploader is able to restart its function even after an accidental interruption of the uploading process without any risk of StarGO hardware damage In this case simply restart the operations from the beginning ...

Page 73: ...re the telescope is pointing In addition it allows choosing up to 24 point in the sky and commands the telescope to sequentially perform GOTOs to the selected points taking images and then plate solving them The information acquired is used to build a sky model for the telescope that is used by the StarGO program and by all other ASCOM connected programs such as planetarium to perform very precise...

Page 74: ...ge time to solve and total solving time are shown The smaller frame on the right side has three tabs PLATE SOLVE MODEL and SETTING The first tab which is selected at the devices connection allows the insertion of some shooting parameters the starting of the acquisition and solving process and finally the obtained results and the check box to perform an automatic Solve and Target Center automatic a...

Page 75: ...nt involved Press the CONNECT button and the connection window will popup Fig A2 ASCOM device connection windows If we want to use the X Solver to plate solving an existing image it is necessary to check the Use Image File acquisition checkbox for enabling the manual image loading In this case checking the mentioned checkbox will cause the right panel of the main window to change as follows allowi...

Page 76: ... lower one regulates the contrast of the acquired image Note that under the LOAD IMAGE button there is the Sync mount with solved image checkbox Selecting it allow the mount to be aligned with the image shown For a normal on line use clicking on the CAMERA CHOOSER button with the Use Image File acquisition check box unselected will invoke the ASCOM camera chooser This is a standard chooser that th...

Page 77: ...rent setting are needed to optimize the shooting and solving operations At this point it is possible to connect the devices camera and mount simply by pressing the plug buttons After the connection is established the button will change the color from red to green At this point it is possible to close the chooser window A2 2 The X solver as a simple Plate Solver The X Solver application may be used...

Page 78: ...ctions for its installation Follow also the instructions needed to download the proper database indexes depending on the used instrumentation FOVs If Local Plate Solve is chosen it is also needed to introduce the telescope focal length the CCD pixel size in micron and the Radius of the search range expressed in degrees This last parameter is very important because from one side it guarantees the s...

Page 79: ...ster readout speeds and improved signal to noise ratios albeit at the expense of reduced spatial resolution The chosen value depends on the CCD characteristics The three check boxes under the target coordinates allow performing some fine tuning operations The first SOLVE After GOTO enables the start of the solving process image shooting and solving immediately after the GOTO without any operator m...

Page 80: ...nt decreases it 4 Now there are two options if you want just to verify how far is your target from where the telescope is pointing your image leave the SOLVE and Center After GOTO check box unchecked and press the ACQUIRE SOLVE button The X Solve will take an image and will start performing the calculation After a number of seconds depending on several factors the solution will appear under the fo...

Page 81: ...ut a good polar alignment The modeling function is particularly useful in fixed observatory installations however for the speed of its execution it may be used also for mobile installations especially for visual observation after a short period of CCD use at the very beginning of the session The instrumentation setup is exactly the same of the simple plate solving operation already described in th...

Page 82: ...spent in the model construction 3 Directory This command placed on the top of the frame allows defining the folder in which to save the built models or the upload the existing models formerly saved It causes only the opening of the classical explorer windows for choosing a file or a folder The name of the selected folder will appear in the text box on the right of the command 4 The Model Name text...

Page 83: ...arGO The success of this action will be shown on the StarGO GUI with the indication placed below the large coordinate display as in this illustration Before the model is sent to the StarGO the label says 0 24 Star Align Whereas after the model is entered into StarGO it says 8 24 Star Align to inform the operator that the model is in action Before the Model is sent to the StarGO After the Model has...

Page 84: ...d in the previous sections The next two are those needed to manage the acquired image The LIVE VIEW command start the live view function on the base of the shooting parameters defined in the PLATE SOLVE tab During Live View execution it is possible to use the telescope movement commands to better framing the object to be shot and to reach or improve the image focus before to use more dedicated man...

Page 85: ...zoom window to open as follows The magnifying ratio can be regulated as needed using the slider placed in the left upper side of the image A2 5 XSolver as a tool to perform precise Polar Alignment Last but not least is the Polar Alignment function allowed by XSolver Clicking on the last button P ALIGN of the main window menu will invoke the auxiliary window to perform the measurement of the degree...

Page 86: ...e lighted By pressing the START POLAR ALIGNMENT button the mount which has been well aligned to the sky in advance will move the telescope to the chosen side of the sky at the selected altitude to tale the first images The XSolver will perform the due calculations to estimate the Azimuth error After this phase the telescope will move to the South meridian where it will automatically take another s...

Reviews: