_____________________________________________________________________
©
All Rights reserved
83
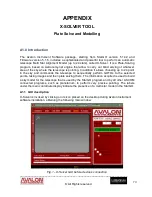
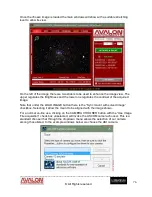
6. CLEAR POINT ON SKYMODEL. Even this command does what is written inside: it
deletes unwanted point away from the formerly created model or from the presently
model under construction.
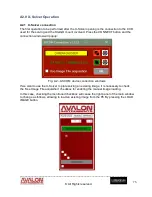
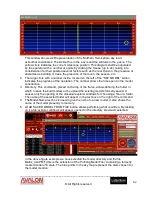
7. BEGIN SEQUENCE button starts the sequence. Move the telescope to the first point,
takes a shot and perform the plate solving, insert the determined coordinates in the
model and move the telescope to the second point and
…
.so on. After a successful
solving the point color changes to green. If the solving has failed the color will be red. At
the end of the sequence the model is ready in memory.
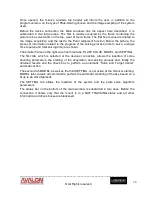
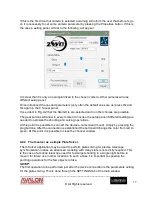
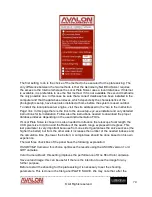
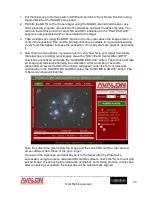
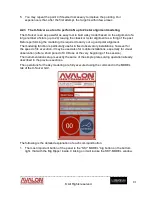
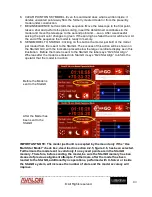
8. SEND MODEL TO STARGO. Clicking on this button the model just built or the model
just loaded from file is sent to the StarGO. The success of this action will be shown on
the StarGO GUI, with the indication placed below the large coordinate display as in this
illustration. Before the model is sent to the StarGO the label says “0/24 Star Align.”
Whereas after the model is entered into StarGO it says “8/24 Star Align” to inform the
operator that the model is in action.
Before the Model is
sent to the StarGO
After the Model has
been sent to the
StarGO
IMPORTANT NOTE: The model just build is accepted by the mount only if the “Use
Multi-Star Model” check box, described in section 4.2.5, figure 4.6, has been selected.
Furthermore the model sent is valid only if no synced points are in the StarGO
memory. Therefore, before sending the model, be sure the StarGO memory has ben
cleaned of previous alignment attempts. Furthermore, after the model has been
loaded to the StarGO, additional Sync operations, performed with X-Solver or inside
the StarGO system, will increase the number of stars and the model accuracy will
improve.

