background image


9 (22) 


4.


Technical specifications 

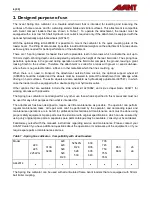
Table 2 – Spring tine cultivator - Specifications 

Product number 

A442314 

Working width: 

1 530 mm 

Other dimensions: 

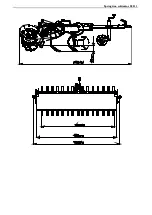
See overview 

Weight: 

198 kg 

Compatible AVANT loaders: 

See Table 1, Designed purpose of use 

Options: 


Transport wheel kit, manual: 

A36593 

Transport wheel kit, hydraulic: 

A37547 

Side wheel: 

A418962 

Side scraper blade: 

A36471 

Lifting accessory: 

A449060 


4.1


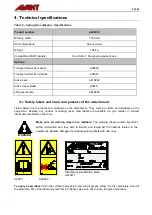
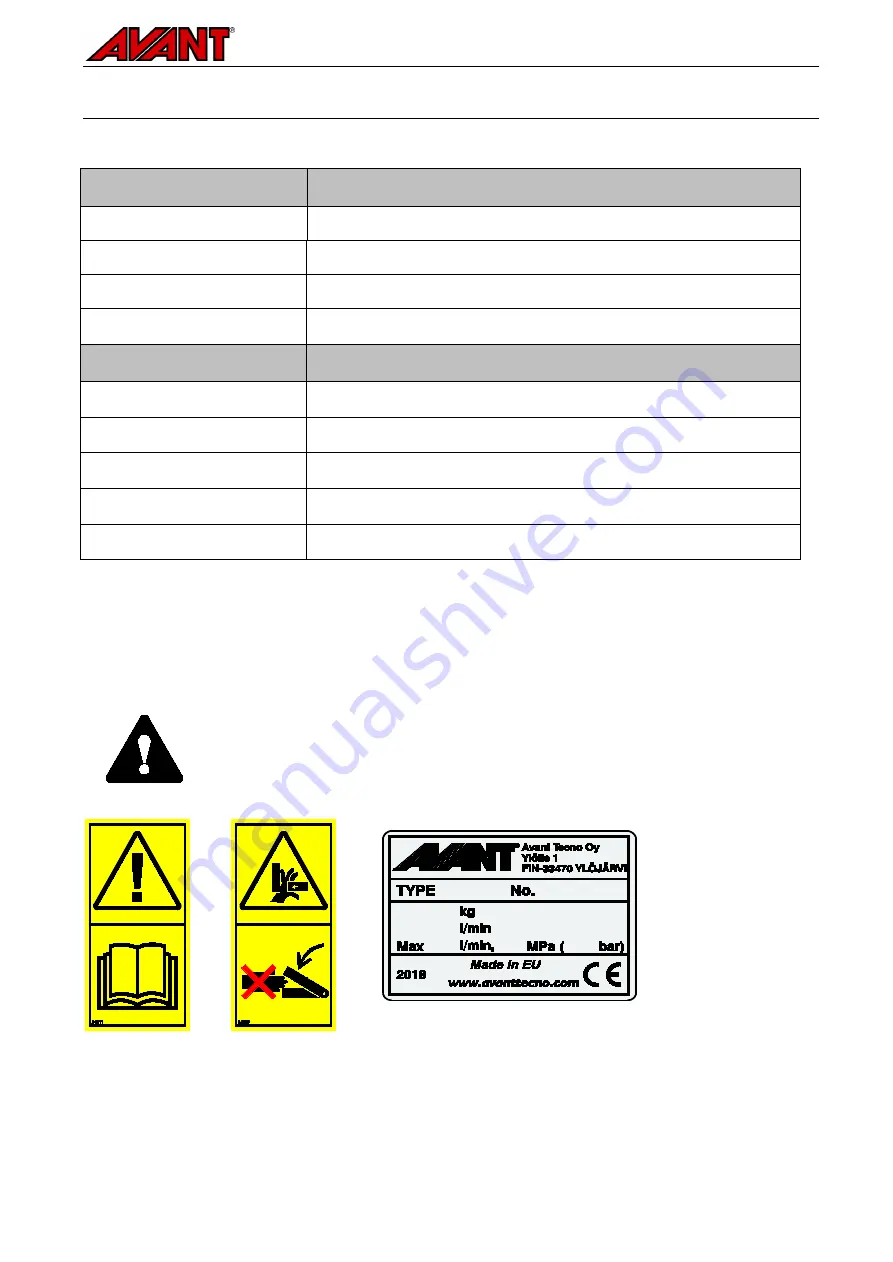
Safety labels and main components of the attachment 

Listed below are the labels and markings on the attachment. They must be visible and readable on the 

equipment. Replace any unclear or missing label. New labels are available via your retailer or contact 

information provided on the cover. 


WARNING


Make sure all warning decals are readable.

  The warning labels contain important 

safety information and they help to identify and remember the hazards related to the 
equipment. Replace damaged or missing warning labels with new ones. 


Attachment identification plate 

A443471 


A46771 

A46803 


To apply a new label:

 Clean the surface thoroughly to remove all grease. Allow it to dry completely. Peel off 

the protective film of the label and press firmly to apply. Take care not to touch the glue of the label. 


 . 


Summary of Contents for A442314

Page 1: ...Spring tine cultivator 2021 1 Operator s Manual for Attachment Spring tine cultivator Product number A442314 English A449586 2021 1 EN 2020 www avanttecno com ...

Page 2: ...Spring tine cultivator 2021 1 ...

Page 3: ...cks before use 11 5 2 Operator qualification 11 5 3 Use 12 5 4 Transport position 14 5 4 1 Support wheels optional extra 14 5 4 2 Hydraulic support wheels optional extra 15 5 5 Lifting accessory Optional extra 16 5 5 1 Transport with lifting accessory 16 5 6 Side wheel and scraper blade optional extra 17 5 6 1 Adjustment 17 5 7 Storage 17 6 MAINTENANCE AND SERVICE 18 6 1 Inspection of hydraulic co...

Page 4: ...quipment for other purposes or use in any other way than described in this manual is prohibited Keep this manual at hand throughout the service life of the equipment If you sell or transfer the equipment be sure to hand over this manual to the new owner If the manual is lost or damaged you can request a new one from your Avant dealer or from the manufacturer In addition to the safety instructions ...

Page 5: ...ention to instructions involving your personal safety or the safety of others When you see this symbol be alert your safety is involved carefully read the message that follows and inform other operators DANGER This signal word indicates a hazardous situation which if not avoided will cause death or serious injury WARNING This signal word indicates a potentially hazardous situation which if not avo...

Page 6: ...ls must be lowered to protect the attachment from damage while driving on hard surfaces The extra wheels are also available as hydraulically adjustable A37547 in which case the loader must be equipped with a double acting rear hydraulics outlet Other options that are available include the side wheel kit A418962 and side scraper blade A36471 for working at areas with side walls The Spring tine cult...

Page 7: ...sufficient when operating indoors Do not operate the loader in closed spaces regardless of the engine or fuel type Exhaust gases may concentrate to hazardous levels Never transport loads or persons with the harrow Make sure to use only an attachment that is in good condition Check the attachment thoroughly in regular intervals Do not modify the attachment in a manner that would affect its safety I...

Page 8: ...chment unattended WARNING Always set the attachment to a safe position before going near the attachment Safe position will prevent unintentional movements of the attachment Safe stopping procedure Lower the boom completely down and lower any attachment possibly fitted on the loader boom on the ground Shut down the loader engine and lock the parking brake Prevent moving of an uncoupled attachment U...

Page 9: ...tachment They must be visible and readable on the equipment Replace any unclear or missing label New labels are available via your retailer or contact information provided on the cover WARNING Make sure all warning decals are readable The warning labels contain important safety information and they help to identify and remember the hazards related to the equipment Replace damaged or missing warnin...

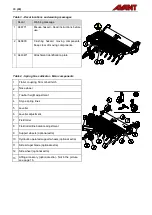
Page 10: ...ble 4 Spring tine cultivator Main components 1 Trailer coupling 50 mm ball hitch 2 Nose wheel 3 Towbar height adjustment 4 S type spring tines 5 Leveller 6 Leveller adjustment 7 Field roller 8 Field roller tine balance adjustment 9 Support wheels optional extra 10 Hydraulic operated support wheels optional extra 11 Side scraper blade optional extra 12 Side wheel optional extra 13 Lifting accessory...

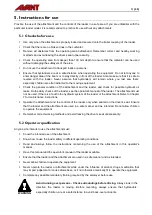
Page 11: ... of the loader The attachment must not be used if there is a fault in the hydraulic system of the loader or the attachment Refer to Chapter 7 for maintenance instructions Operate the attachment and the controls of the loader only when seated on the driver s seat Ensure that the loader and the attachment are used in a safe manner and as intended Do not allow children to operate the equipment Rememb...

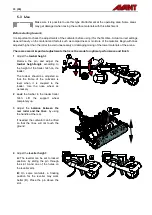
Page 12: ...ormance and finish 1 Adjust the towbar height Remove the pin and adjust the towbar height angle according to the height of the trailer hitch on the loader The towbar should be adjusted so that the frame of the cultivator is level when it is coupled to the loader Use the nose wheel as necessary 2 Lock the towbar to the loader trailer hitch Lift the support wheel completely up 3 Adjust the balance b...

Page 13: ...ace by towing the attachment on the ground with the loader Drive to forward direction with the loader Always drive slowly while operating the Spring tine cultivator Adjust the drive speed according to the operating conditions and the ground Avoid sharp turns while operating the attachment Lift the nose wheel completely up before using or transporting the attachment If the nose wheel is left to low...

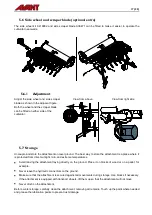
Page 14: ... get damaged Lift the nose wheel completely up before using or transporting the attachment If the nose wheel is left to low position it may get damaged 5 4 1 Support wheels optional extra The support wheel kit A36593 can be fitted to make it possible to tow the cultivator on hard surfaces or over longer distances To set the wheels to either operating position use both hands and simultaneously push...

Page 15: ...sure In case residual pressure is left in the hydraulic system of the attachment it is often possible to disconnect the hydraulic couplings but it may be difficult to connect them the next time If the fittings will not connect the residual pressure must be released by turning the rear auxiliary hydraulics control lever optional extra of the loader when the engine is turned off To make sure that th...

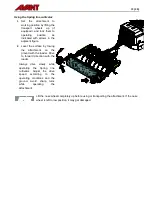
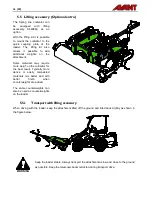
Page 16: ... on the cultivator for the best result Typically more dense or easily compacted materials mix better and with better finish when counterweights are added The same counterweights can also be used as counterweights on the loader 5 5 1 Transport with lifting accessory When driving with the loader keep the attachment lifted off the ground and tilted back slightly as shown in the figure below WARNING K...

Page 17: ...y to store the attachment is a place where it is protected from direct sunlight rain and extreme temperatures Avoid leaving the attachment laying directly on the ground Place it on blocks of wood or on a pallet for example Never leave the hydraulic connectors on the ground Make sure that the attachment is secured against all movements during storage Use blocks if necessary If the attachment is equ...

Page 18: ...id is also harmful to the environment and any leak to the environment must be prevented Repair all leaks immediately after detecting them a small leak can quickly grow into a big one Operate the attachment only with type of hydraulic oil that is accepted for use in Avant loaders DANGER Risk of high pressure fluid injection through skin Release residual pressure before maintenance Never handle hydr...

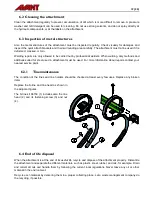
Page 19: ...or steel used in attachment must be used For more information about repairs contact your nearest service point 6 3 1 Tine maintenance The condition of the tines and tine holders should be checked at least every few uses Replace any broken items Replace the S tine and tine head as shown in the adjacent figures The S tine kit 66150 1 includes also the tine head 2 and its fastening screw 3 and nut 4 ...

Page 20: ...y reimburse the price of components purchased by the customer in special cases that have been agreed in advance The warranty does not cover Normal maintenance work or parts and consumables required for it Damages caused by unusual operating conditions or ways of use negligence structural changes made without the consent of Avant Tecno Oy use of non original parts or lack of maintenance Consequence...

Page 21: ... och säkerhetskrav i EG maskindirektiv EG direktiv 2006 42 EG som ändrat Följande harmoniserade standarder har tillämpats We hereby declare that the products listed below are in conformity with the provisions of the Machinery Directive directive 2006 42 EC as amended The following harmonized standards have been applied SFS EN ISO 12100 SFS EN ISO 4413 Mallit Modeller Models Avant Hydraulitoimisill...

Page 22: ......
Reviews: