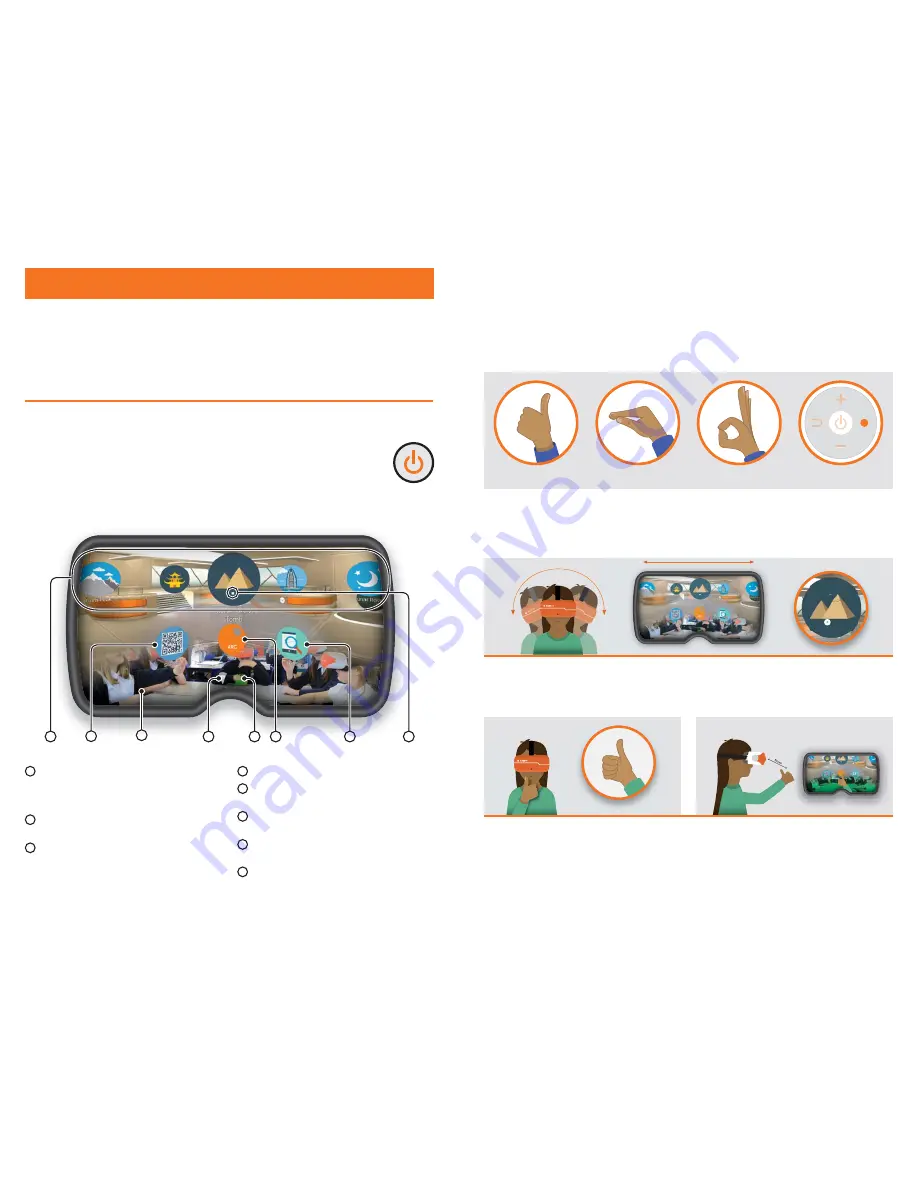
2.1. Turning your headset on
To turn your ClassVR headset on, simply press and hold the power button on the
left side of the headset for five seconds. You will see the ClassVR logo appear
followed by the menu screen.
Section 2
Learn the Basics:
How do the ClassVR
headsets work?
1
2
4
5
6
8
7
3
1
2
3
4
5
6
7
8
Wi-Fi
This icon indicates connectivity.
Battery Level
The colour will turn from green
to red when battery is low.
ARC App
Load up preconfigured Augmented
Reality activities.
Device Information
Quickly display
information about the headset.
White dot (reticle)
Treat this dot as your select
tool to highlight items you wish to open.
VR Experiences
Immerse your class in a huge
variety of Virtual Reality experiences, either
from the provided collections or create your
own using the ClassVR Portal.
QR Code Scanner
Used to quickly switch
between collections of VR experiences.
Augmented View
Keep students safe and
aware of their environment. The front facing
camera projects the immediate surroundings
into the headset, in real-time.
To conserve power, the screen will turn off when the headset is not in use. Simply place
the headset on your face to activate the sensor and the screen will turn on again.
Turn your head to find the icon you would like to select. Look at the icon. You should see a
white dot in the location of your gaze.
2.2. Gesture controls
While students are wearing the ClassVR headset and it is not being controlled by the
teacher, they can navigate using simple ‘select’ gestures or button presses.
Thumbs-up
Pinch
Okay Sign
Select/Action
Button
To select an experience:
Keeping your eyes fixed on the icon, move your hand in front of the headset until you
can see it at the bottom of the screen. Make a select gesture with your hand, holding it
about 30cm in front of the camera. The image will turn green when your gesture has
been recognised. Alternatively, press the select button on the left side of the headset.
10
11


