background image

OPERATIONAL INSTRUCTIONS

13

EXERCISE WORKOUT

To start using the 

AVARI® Magnetic Elliptical

 simply stand on the foot pedals with the front of your shoes 

close to the front edge of the pedal cap. Place your hands at a comfortable position on the handlebars.  

Simply move your highest foot forward and follow the natural path of the machine.

Start on a load level that is comfortable to familiarize yourself with the machine. Once you are comfortable, 

start adjusting the load level to achieve the workout desired.

Forward and Reverse

The 

AVARI® Magnetic Elliptical

 can be used in the forward and reverse direction to vary the muscles that 

you work out. This will also vary your workout, helping you to stay motivated. To change directions, simply 

slow the pedals down until they stop, and switch directions.

Load Level Adjustment

The load level of 

AVARI® Magnetic Elliptical

 can be changed at any time during your workout. Adjusting 

your load level will allow you to increase or decrease your intensity level.
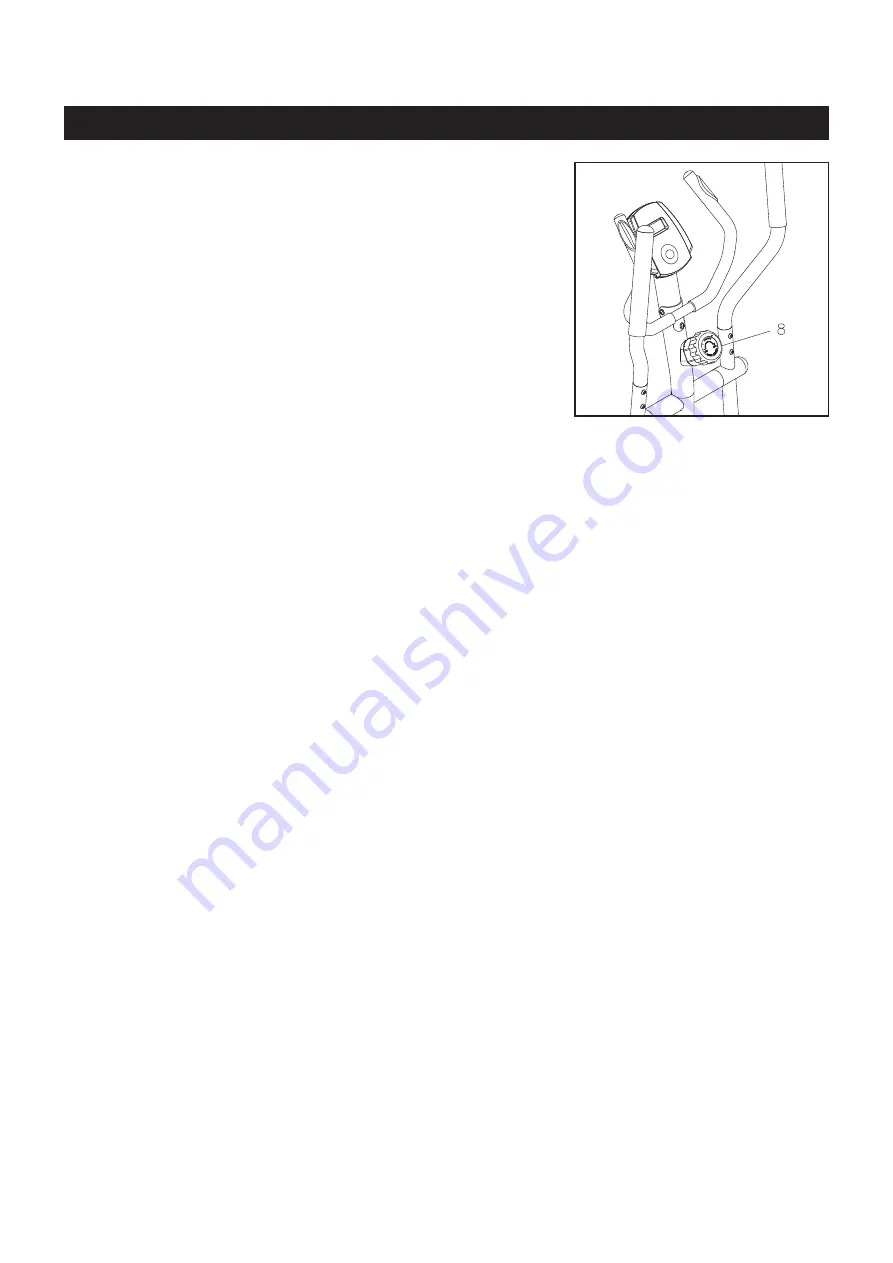
LOAD ADJUSTMENT

To increase the load, turn the 

TENSION KNOB(8)

 clockwise. To 

decrease the load, turn the 

TENSION KNOB(8)

 counterclockwise. 

There are eight levels for the load adjustment.

NOTE:

  The load will increase as you pedal faster.

Summary of Contents for A550-090

Page 1: ...a physician before beginning any exercise program with this equipment If you feel faint or dizzy immediately discontinue use of this equipment Serious bodily injury can occur if this equipment is not...

Page 2: ...as running walking or cross training shoes that fit well provide foot support and feature non skid rubber soles 14 Be careful to maintain your balance while using mounting dismounting or assembling th...

Page 3: ...service staminaproducts com To enact your warranty please register your product by going to register staminaproducts com Call Us First 1 800 375 7520 Customer Service THANK YOU FOR PURCHASING THE AVAR...

Page 4: ...andards of manufacturing and quality control there can sometimes be missing parts or incorrectly sized parts If you have any questions or problems with the parts included with your AVARI Magnetic Elli...

Page 5: ...vided to help identify the warning caution and notice labels on the AVARI Magnetic Elliptical Please take a moment to familiarize yourself with all of the warning caution and notice labels EQUIPMENT W...

Page 6: ...f the bolts or screws on the circles to check for the correct diameter Use the small scale to check the length of the bolts and screws NOTICE The length of all bolts and screws except those with flat...

Page 7: ...oll free at 1 800 375 7520 in the U S Our Customer Service Staff is available to assist you from 7 30 A M to 5 00 P M Central Time Monday through Thursday and 8 00 A M to 3 00 P M Central Time on Frid...

Page 8: ...SION CABLE 17 2 Pull on the Cable of the TENSION KNOB 8 firmly so that enough cable is available to allow the METAL FITTING to go through the slot in the top of the BRACKET 3 Insert the METAL FITTING...

Page 9: ...47 STEP 5 Slide the lower end of the PIVOTING ARM 71 into the bracket on the PEDAL ARM 9 and secure with the SHOULDER BOLT 15 9x77mm M10x1 5 threaded 13 WASHER M10x 21x1 5mm thick 60 and NYLOCK NUT M1...

Page 10: ...the right side STEP 7 There is a L decal on the LEFT PEDAL CAP 30 and a R decal on the RIGHT PEDAL CAP 31 Attach the LEFT PEDAL CAP 30 to the PEDAL ARM 9 on the left side with BUTTON HEAD BOLTS M8x1 2...

Page 11: ...AD BOLTS M8x1 25x15mm 67 and WASHERS M8 68 STEP 9 Install two AA batteries into the METER 15 the batteries are not included See page 14 for detailed battery installation instructions Plug the EXTENSIO...

Page 12: ...77 so the AVARI Magnetic Elliptical sits on the floor without rocking Remove and reposition the LEVELING CAPS 18 on the REAR STABILIZER 77 to level the AVARI Magnetic Elliptical MOVING The AVARI Magn...

Page 13: ...rd and Reverse The AVARI Magnetic Elliptical can be used in the forward and reverse direction to vary the muscles that you work out This will also vary your workout helping you to stay motivated To ch...

Page 14: ...yed If the heart symbol does not appear relax your grip or change your grip on the pulse sensors FUNCTIONS SCAN TIME SPEED DISTANCE CALORIES ODOMETER RPM PULSE Pedal movement or push the MODE button A...

Page 15: ...regularly examined for damage and wear Special attention should be given to the following MAINTENANCE 1 Adjust the TENSION KNOB 8 and verify that it functions properly and the resistance changes 2 Ve...

Page 16: ...of your maximum heart rate zone Start at the lower intensity and build up to higher intensity as you become more aerobically fit If you feel dizzy or lightheaded you should slow down or stop exercisin...

Page 17: ...cool down should include the stretches listed above and should be completed after each strength training session Lower Body Stretch Place feet shoulder width apart and lean forward Keep this position...

Page 18: ...PRODUCT PARTS DRAWING BACK FRONT 18...

Page 19: ...h Plate 1 21 Spacer 16 x 20 x 4mm 4 22 Crank 2 23 Screw Round Head M3 x 8mm 2 24 Crank Cap 2 25 Flange Nut M10 x 1 25 2 26 Spacer 8 x 12 5 x 10 5mm 1 27 Bearing Nut M17 x 1 2 28 Washer 17 x 22 x 1mm t...

Page 20: ...2 62 Bolt Button Head M6 x 1 x 40mm 4 63 Bolt Button Head M8 x 1 25 x 45mm 4 64 Pulse Sensor Wire 2 65 Dome Plug 22 2mm 2 66 Cover Cap 2 67 Bolt Button Head M8 x 1 25 x 15mm 3 68 Washer M8 10 69 Dome...

Page 21: ...IVERY OF THE PRODUCT TO THE PURCHASER This limited warranty is not transferable IF ANY PART OF THE PRODUCT IS NOT IN COMPLIANCE WITH THIS LIMITED WARRANTY OR ANY IMPLIED WARRANTY THE REMEDY OF REPAIR...

Page 22: ...NOTES 22...

Page 23: ...ER YOUR PRODUCT TO CONTACT CUSTOMER SERVICE TO ORDER PARTS TO CONTACT CUSTOMER SERVICE For your convenience Stamina s customer service representatives can be reached by email at customerservice stamin...

Reviews: