PARTNER Version Installation Manual
Page 44
- Issue 1c (09 April 2010)
IP Office Essential Edition
4.4.3 Adding a Pre-Built Configuration File
IP Office Manager can be used to
create an IP Office configuration file
. For IP500 V2 control units, such a pre-created IP
Office configuration file can be placed on the System SD card. That file will then be used when the IP Office system is
started.
1. Using IP Office, create an offline configuration that matches the customer requirements and the equipment that will
be installed in the IP Office.
2. Rename the configuration file config.cfg.
3. Using a card reader, copy the file into the /system/primary folder on the System SD memory card.
4.4.3.1 Creating a Configuration File
IP Office Manager can be used to create a new configuration without connecting to an IP Office system. During the
process, you can specify the locale of the system, what type of trunk cards it uses and what type of control unit and
expansion modules to include.
This allows the creation of a configuration prior to installation of system. For IP500 V2 control units, the configuration file
can be
placed onto the System SD card
before it is installed into the system. For other IP Office control units, the
configuration can be uploaded using Manager after initial installation of the system.
·
The configuration created must match the physical equipment in the IP Office system onto which the
configuration will be loaded. Doing otherwise may cause the IP Office system to reset and experience other
problems.
·
The configuration creation tool includes all control units, external expansion modules and trunk cards
supported by IP Office Release 6. It is you responsibility to confirm what IP Office equipment is supported in
your locale.
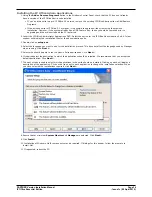
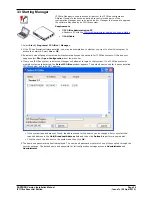
1. Start IP Office Manager with no configuration loaded into Manager
2. Click on Create an Offline Configuration in the simplified view.
3. Select the type of configuration that you want to create. When completed click OK.
4. Manager will create and load the configuration.Edit the configuration to match the customer requirements.
5. When completed, select File | Save Configuration As.


