background image

6

Selecting a Personalized Ring

The Select Ring feature allows you to choose your own personalized ringing 
pattern for your telephone from among eight different patterns.

To select a personalized ringing pattern

1. While on-hook, press 

.

Current ringing pattern plays and repeats every three seconds.

2. Continue to press (and then release) 

 to cycle through all eight 

ringing patterns.

3. If you want to save the ringing pattern currently being played, do not 

press 

 anymore. You will hear the selected ringing pattern two 

more times, and then it will be automatically saved.

You will hear a confirmation tone (two rising tones) and your new 
ringing pattern is set.

Note:  If you go off-hook, receive a call, or lose power while selecting a 

ringing pattern, the process is interrupted and you must start again.

Selected Voice Features

How to Access a Voice Feature on the 6402 and 6402D

When you want to use one of the voice features on the 6402 or 6402D 
telephone, you can access the feature in one of two ways:

You can access up to 12 features by pressing 

 and then the dial 

pad key (1 through 9, or 0, * or #) that corresponds with that feature. 
These features are administered on your telephone by your system 
manager. (The red light next to 

 goes on steadily when the button 

is pressed to let you know that your dial pad is now in the Feature 
selection mode.)

For example, if the Send All Calls feature is assigned to F1, you can press 

, then dial 

 in order to use this feature. If you have 

programmed your home number on an Abbreviated Dialing button 
assigned to F*, you can press 

 and then press 

 on your dial pad 

whenever you want to use this AD button.

Note:  As your system manager assigns features to the Feature Directory slots 

(1 through 9, 0, *, and #), be sure to write the feature on the Feature 
Directory card (shown in Figure 3) in the tray located under the base of 
the telephone. This directory list provides a convenient quick reference 
for the 12 features programmed on the dial pad.

Select Ring

Conf

Conf

Conf

Feature

Feature

Feature

1

Feature

*

Summary of Contents for 6402D

Page 1: ...How to Access a Voice Feature on the 6402 and 6402D 6 Using the Display on the 6402D 12 Installation 13 Desktop Installation 13 Wall Installation 14 Removing the Telephone Tray 17 Installing the Telephone Number Card 18 Tones and Their Meaning 19 Line and Feature Button Lights 20 555 230 738 Comcode 108339011 Issue 3 April 1999 6402 and 6402D Telephones User s Guide ...

Page 2: ...echnologies will not be responsible for any charges that result from such unauthorized use Product administration to prevent unauthorized use is your responsibility and your system manager should read all documents provided with this product to fully understand the features available that may reduce your risk of incurring charges TRADEMARKS DEFINITY and AUDIX are registered trademarks of Lucent Te...

Page 3: ... Use When using your telephone equipment the following safety precautions should always be followed to reduce the risk of fire electric shock and injury to persons Read and understand all instructions Follow all warnings and instructions marked on the telephone This telephone can be hazardous if immersed in water To avoid the possibility of electric shock do not use it while you are wet If you acc...

Page 4: ...spilled into the telephone If the telephone has been exposed to rain or water If the telephone has been dropped or the housing has been damaged If you note a distinct change in the performance of the telephone SAVE THESE INSTRUCTIONS Intellectual property related to this product including trademarks and registered to Lucent Technologies Inc has been transferred or licensed to Avaya Inc Any referen...

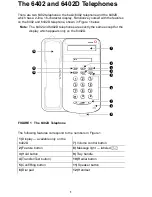
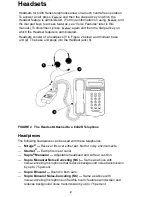
Page 5: ... for the display which appears only on the 6402D FIGURE 1 The 6402D Telephone The following features correspond to the numbers in Figure 1 1 Display available only on the 6402D 7 Volume control button 2 Feature button 8 Message light labeled 3 Hold button 9 Tray handle 4 Transfer Test button 10 Redial button 5 Conf Ring button 11 Speaker button 6 Dial pad 12 Handset 7 PQRS 3 DEF Spkr Feature Hold ...

Page 6: ...set jack 3 FIGURE 2 The Headset Attached to a 6402D Telephone Headpieces The following headpieces can be used with these telephones Mirage Receiver fits over either ear Not for noisy environments StarSet Eartip fits in ear canal Supra Monaural Adjustable headband and soft ear cushion Supra Monaural Noise Canceling NC Same as above with noise canceling microphone that reduces background noise trans...

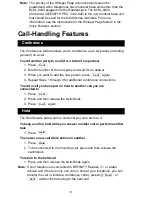
Page 7: ...son press again 4 Repeat Steps 1 through 3 for additional conference connections To add a call you have put on hold to another call you are connected to 1 Press 2 Press and then release the switchhook 3 Press again The Hold feature puts a call on hold until you can return to it To keep a call on hold while you answer another call or perform another task 1 Press To answer a new call while active on...

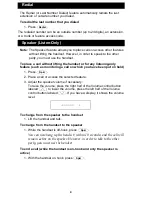
Page 8: ...on hold 1 Press 2 Place a call or access the selected feature 3 Adjust the speaker volume if necessary To raise the volume press the right half of the Volume control button labeled to lower the volume press the left half of the Volume control button labeled If you have a display it shows the volume level To change from the speaker to the handset 1 Lift the handset and talk To change from the hands...

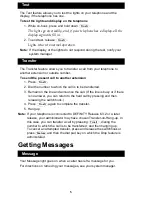
Page 9: ...ransferred 3 Remain on the line and announce the call If the line is busy or if there is no answer you can return to the held call by pressing and then releasing the switchhook 4 Press again to complete the transfer 5 Hang up Note If your telephone is connected to DEFINITY Release 6 3 2 or a later release your administrator may have chosen Transfer on Hang up In this case you can transfer a call b...

Page 10: ...e features on the 6402 or 6402D telephone you can access the feature in one of two ways You can access up to 12 features by pressing and then the dial pad key 1 through 9 or 0 or that corresponds with that feature These features are administered on your telephone by your system manager The red light next to goes on steadily when the button is pressed to let you know that your dial pad is now in th...

Page 11: ...nd one Enhanced List You program numbers on a Personal List numbers on Group Lists are programmable by the controller of the list System Lists and Enhanced Lists are programmable only by the system manager To program reprogram an AD entry on your Feature Directory Note The system manager must program a feature button as an AD button before you can program a number onto it Note If your telephone is...

Page 12: ... as items on your Personal List s 2 While off hook dial the Abbreviated Dialing Program access code dial tone 3 Dial the Personal List number 1 2 or 3 dial tone 4 Dial the list item 1 2 3 See your system manager for the number of Personal List items you can program dial tone 5 Dial the number you want to store up to 24 digits 6 Press confirmation tone then dial tone Number is stored 7 Repeat Steps...

Page 13: ...ss while off hook then the dial pad key on which the Call Forwarding feature is administered dial tone OR dial the Call Forward cancel code while off hook confirmation tone Your calls will now ring at your own telephone The Call Park feature allows you to put a call on hold at your telephone for retrieval at any extension To park a call at your extension for retrieval at any extension 1 Press dial...

Page 14: ...al pad key on which the Call Pickup feature is administered OR dial the Call Pickup access code Called telephone stops ringing and you are connected to the ringing call Note To return to the held call after completing the call you have picked up press and then release the switchhook The Leave Word Calling LWC feature leaves a message for another extension to call you back The called party will be ...

Page 15: ...eature is administered OR dial the Send All Calls access code while off hook confirmation tone To cancel Send All Calls 1 While on hook press again then the dial pad key on which the Send All Calls feature is administered OR dial the Send All Calls cancel code while off hook confirmation tone The Whisper Page feature allows you if you have the appropriate permissions to make an announcement to a p...

Page 16: ...lay on the 6402D Note The 6402D can be used only with a DEFINITY ECS Release 6 3 or later Note Only the 6402D telephone has a 2 line by 16 character display The basic 6402 telephone does not have a display The primary uses for the display on the 6402D telephone are Viewing the time and date which is the usual display See Figure 4 Using the Call Timer or the Timer feature if administered on your di...

Page 17: ...Installation Note You may use the 6400 Series telephones without the desktop stand In this case it is suggested that you place small round feet included in a plastic bag in the box in which the telephone was packed on each corner of the bottom of the telephone housing 1 Turn the telephone face down on a flat surface 2 Snap one end of the line cord D2R or D8W into the LINE jack on the back of the t...

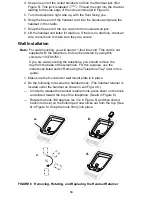
Page 18: ...plied with the telephone but can be ordered by using this comcode 103786760 If you are wall mounting the telephone you should remove the tray from the base of the telephone For this purpose use the instructions listed under Removing the Telephone Tray later in this guide 1 Make sure the 8 conductor wall mount plate is in place 2 Do the following to reverse the handset hook The handset retainer is ...

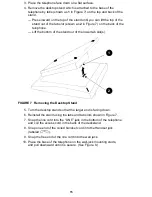
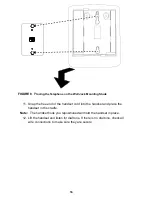
Page 19: ... out of the lower tab slot s FIGURE 7 Removing the Desktop Stand 5 Turn the desktop stand so that the larger end is facing down 6 Reinstall the stand using the tabs and tab slots shown in Figure 7 7 Snap the line cord into the LINE jack in the bottom of the telephone and coil the excess cord in the back of the deskstand 8 Snap one end of the coiled handset cord into the Handset jack labeled 9 Snap...

Page 20: ... free end of the handset cord into the handset and place the handset in the cradle Note The handset hook you repositioned will hold the handset in place 12 Lift the handset and listen for dial tone If there is no dial tone check all wire connections to make sure they are secure ...

Page 21: ...all mounting the telephone See Figure 9 for further help 1 Pull the tray from the base of the telephone as far as it will go 2 Using your thumb press down on the center of the tray 3 Continue to pull the tray until it is completely separated from the base FIGURE 9 Removing the Tray from the Base of the Telephone 1 2 3 ...

Page 22: ...e Figure 10 4 Place the completed telephone number card into the number card holder the area from which you removed the telephone number card cover 5 Replace the telephone number card cover by inserting one end into its slot Then slightly flex the plastic and slip the other end into its slot FIGURE 10 Removing and Reinstalling the Telephone Number Card Cover Note You can order additional designati...

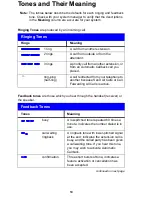
Page 23: ...dant 3 rings A priority call from another extension or from an Automatic Callback call you placed ring ping half ring A call redirected from your telephone to another because Send All Calls or Call Forwarding All Calls is active Feedback Tones Tones Meaning busy A low pitched tone repeated 60 times a minute indicates the number dialed is in use call waiting ringback A ringback tone with lower pitc...

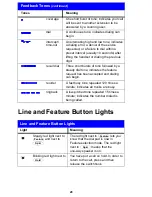
Page 24: ...Three short bursts of tone followed by a steady dial tone indicates the feature request has been accepted and dialing can begin reorder A fast busy tone repeated 120 times a minute indicates all trunks are busy ringback A low pitched tone repeated 15 times a minute indicates the number dialed is being called Line and Feature Button Lights Light Meaning Steady red light next to and next to The red ...

Reviews: