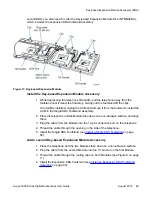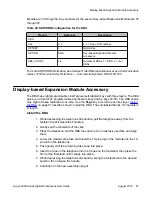
8. Snap the plastic cable cover in place over the ACM ribbon cable.
9. Connect the line cord into the base of the telephone.
10. Connect the hinges to the telephone base and swing the footstand back in place.
11. Snap the footstand into a fixed position.
12. Return the telephone to its original position.
Installing the ACM into the footstand
There is a cut out on the base of the footstand which displays the ACM connector ports. When
ready to attach an accessory, insert the appropriate cartridge into the port slot. There is one
accessory port available on the Avaya 3902 Digital Deskphone. There are two accessory ports
available on the Avaya 3903, 3904, and 3905 Digital Deskphones.
The accessories you attach to the telephone must be compatible.
Table 17: Compatibility of
accessories
on page 81 shows accessory compatibility.
You require a wall transformer to power accessory cartridges. The transformer does not come
with the ACM unit. Contact your Avaya representative to order the ACM compatible wall
transformer (NTMN80AA).
Figure 10: ACM Module
on page 81 shows the installation of the ACM into the telephone
footstand.
Installation
80 Avaya 3900 Series Digital Deskphones User Guide
August 2010
Summary of Contents for Communication Server 2100
Page 8: ...New in this release 8 Avaya 3900 Series Digital Deskphones User Guide August 2010 ...
Page 26: ...Feature keys 26 Avaya 3900 Series Digital Deskphones User Guide August 2010 ...
Page 36: ...Avaya 3901 Digital Deskphone 36 Avaya 3900 Series Digital Deskphones User Guide August 2010 ...
Page 50: ...Avaya 3903 Digital Deskphone 50 Avaya 3900 Series Digital Deskphones User Guide August 2010 ...
Page 58: ...Avaya 3904 Digital Deskphone 58 Avaya 3900 Series Digital Deskphones User Guide August 2010 ...
Page 66: ...Avaya 3905 Digital Deskphone 66 Avaya 3900 Series Digital Deskphones User Guide August 2010 ...
Page 76: ...Hardware options 76 Avaya 3900 Series Digital Deskphones User Guide August 2010 ...


