Page 16 - Installation
Page 16
DECT - Installation Manual
Unpacking
38HBKD0001SAH – Issue 14 (27th October 2003)
Installation
Unpacking
1. Do not start unpacking until the equipment is at the site of
installation.
2. Before unpacking check for any signs of damage that has occurred
during transit. If any damage exists bring it to the attention of the
carrier.
3. Check all cartons against the packing slip. Report any errors or
omissions to the dealer who supplied the equipment.
4. Whilst unpacking the equipment, retain all the packaging material.
Fault returns are only accepted if repackaged in the original
packaging.
5. Visually inspect each item and check that all the necessary
documentation and accessory items have been included. Report any
errors or omissions to the dealer who supplied the equipment.
6. Ensure you read and understand any documentation included with
any item.
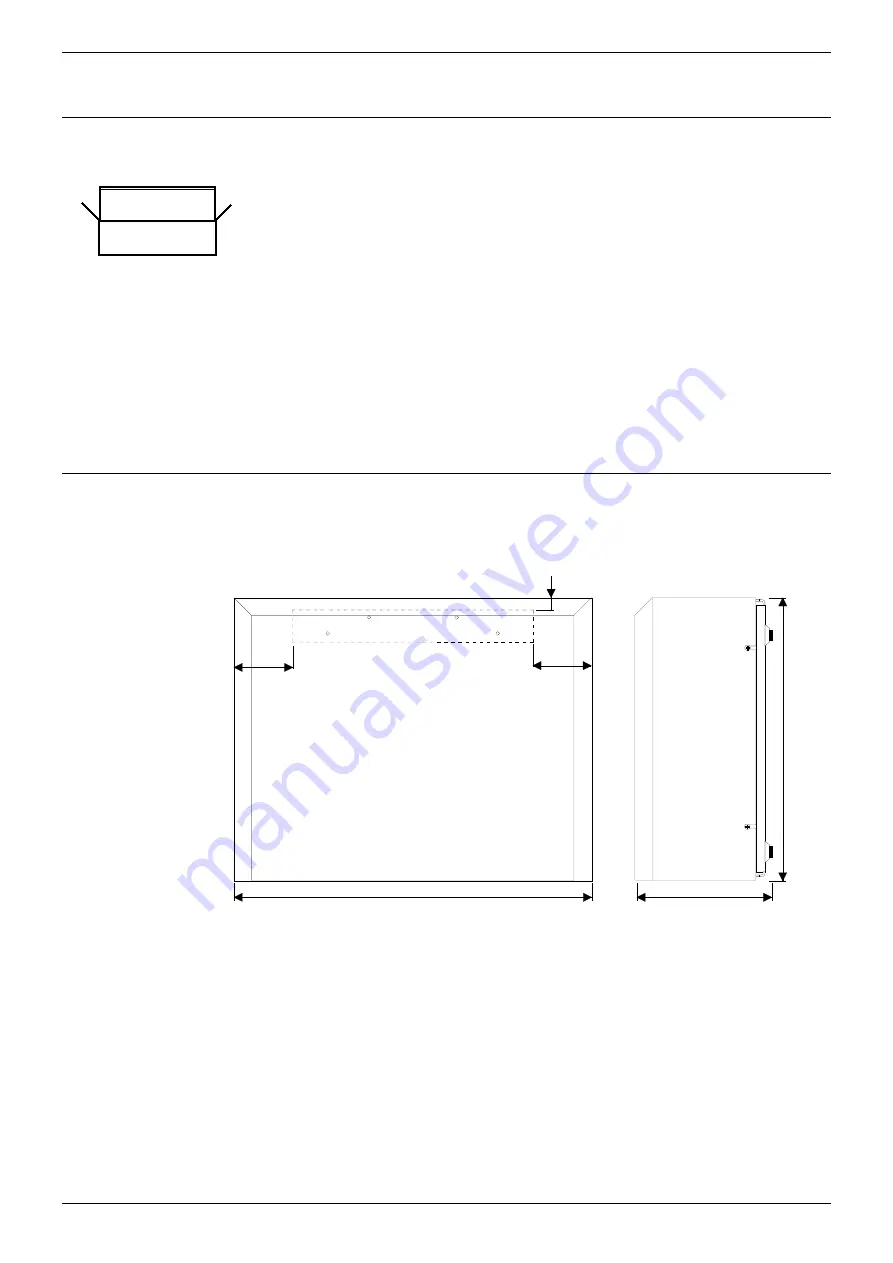
Installing the DECT Control Unit (DCU)
The Control Unit is supplied with a 2m power cable for mains power supply
connection. It is also supplied with a 5m cable for connection to the MDF
and a software disk(s).
65mm
14mm
316mm
400mm
155mm
65mm
1. Check the proposed position of the Control Unit:
– Mains power supply within 2 metres.
– MDF for Base Station and PABX interconnections within 5 metres.
– Allow 200mm's clearance on all sides of the cabinet.
2. Use the mounting bracket as a template to mark the required holes
(see the diagram above)
. Ensure that the bracket is level.
3. Attach the bracket to the wall using No.6 round head screws at all four
fixing points.
4. Place the Control Unit onto the mounting bracket and check that it is
securely held by the bracket.
5. Connect the mains lead supplied to the mains power supply.


