PARTNER® Version, Installation and Reference Manual
Page 42
- Issue 1a (30 January 2010)
IP Office Essential Edition
3.6 Connections
If the site already has a patch panel for all outside lines and extensions, you should be able to use the existing wiring to
install the system hardware and connect telephones to the system yourself.
During control unit startup
·
Extensions and Users
A user is automatically created for each physical extension port detected in the system. Users are assigned
extension numbers starting from 201. User names take the form Extn201, Extn202, ....
·
Hunt Group
A single hunt group 200 called Main is created and the first 10 users are placed into that hunt group as members.
·
Incoming Call Routes
Two default incoming call routes are created. Voice calls are routed to the hunt group Main.
Installing Telephones
After you have installed the IP Office 500v2 control unit and have connected the line and extension cords, you are ready
to install the telephones. Installing the telephones includes assembling, testing and connecting, the telephone. As
desired, you also can connect an Intercom Autodialer to certain telephones
Assembling PARTNER® Version Telephones
All PARTNER telephones are shipped with a stand for either desk-mounting or wall-mounting the telephone. For other
telephones, see the instructions that are provided with the telephone.
Gather the line and extension cords hanging from the control unit and twist-tie or wire-wrap them.
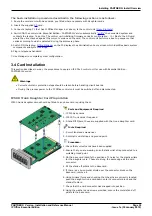
Testing the modules
1. Test the base card modules by doing the following:
a. Plug a system telephone into the first port on each module.
b. Press the line button on the telephone for each outside line and listen for a dial tone.
Connecting handsets
2. For telephone systems that are based on a patch (intermediate) connection system:
a. Connect line cords to the line jacks on the modules.
b. Connect the free end of each line cord to the appropriate telephone network interface jack
3. Fill each module before moving to the next module to the right
As each handset is connected any necessary software it contains is automatically checked and updated as necessary.
3.7 Final Actions
You may be required to compile calling lists, build groups and allocate permissions etc. before leaving the customer
premises. This depends on arrangements made between your local office and the customer. If required, use Manager to
create any lists. Changes to the basic Essential Edition - PARTNER® Version configuration, setting up trunks, adding
licenses etc. are detailed in the Avaya IP Office <%SHORTNAME%> Administrator Tool User Guide identified in the
Introduction
.
As you use Manager to make changes to the <%SHORTNAME%> setup, you are prompted to save or discard
changes you have made before leaving any administration window to go on to another task. However, you should
remember that you are accumulating these changes in a COPY of the control unit configuration file which must be
saved back to the SD card before changes are effective. Similarly, system changes such as plugging in handsets
during this time are recognized by the <%SHORTNAME%> system control unit but are undetected by Manager which
is working with a copy of the configuration file. Avaya recommend that whilst using Manager you save the
configuration file at frequent intervals to ensure the working copy and Manager copy of the configuration file remain
as compatible as possible.
Do not leave the Manager application open for long periods and particularly when it is not being used.
Check system operation and gather all packing materials for disposal.
If appropriate, obtain sign-off signature.

