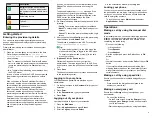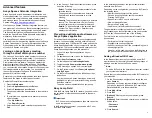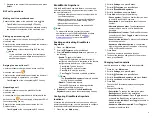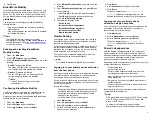
yourself to activate the feature. See
Limitation
The features that are configured on your phone, such as
Call park, apply only to your primary extension and cannot
be used on additional shared extensions.
Conference and Transfer can only be performed within a
single extension. For example, you cannot start a
conference with a call on your primary extension and a
call on an additional shared extension.
Joining a call in a shared line
Join a call that is active on another phone on an extension
which you are sharing. These calls are identified by the In-
use icon
Ensure that you are assigned a shared extension.
1. Scroll to the shared line.
2. Press
Barge in
.
3.
(Optional)
Press the corresponding line key beside
the held call that is active on the other phone.
Putting a call on private hold and resuming
a call
If you are on call using a shared extension, use this
procedure to put your call on private hold. Putting a call on
private hold prevents any other phone with the same
shared extension from barging into the call while it is on
hold. The private hold feature can be useful when
transferring a call or preparing to create a conference call.
A unique icon indicates a call on private hold on
another phone on the same shared extension. When a
call is on private hold on another phone, the Barge-in
softkey is not available and the green LED does not blink.
Ensure that you are assigned a shared extension.
1. Scroll to the shared line.
2. During a call, press
More
.
3. Press
Priv Hold
.
To retrieve a call held privately on a shared extension,
press
Resume
or the corresponding line key beside the
held call.
Shared Parking
You can park an active call to a Shared Parking room from
which other agents can retrieve it to talk to the caller. The
Phone screen displays the shared room as a BLF line.
The line icons reflect the current status of the shared
room: idle or busy.
You can move a Shared Parking line occupied by the
room and change its label from the Phone keys
customization menu.
To monitor the shared room, you must have the Shared
Parking feature configured on the phone. Contact your
system administrator for more details.
Shared Parking icons and indication
The following table shows the Shared Parking icons for
Avaya J159 IP Phone:
Shared
room state
Phone
icons
Red LED
for the line
key
Green LED
for the line
key
Idle
Off
Off
Busy
Off
Blink
Parking a call to a shared room
You might need to park an active call to the shared room
so that other agents having access to that room can
resume it.
• Make a call.
• Ensure the Shared Parking room is idle.
On the Phone screen, do one of the following:
• Scroll to the Shared Parking line, and press
Park
.
• Press the corresponding line key.
The call is parked to the shared room. The Shared
Parking line displays the Busy icon.
Unparking a call from a shared room
If you have access to the shared room, you can resume a
call parked to that room by the agent who answered it
first.
Ensure the Shared Parking room has a parked call.
On the Phone screen, do one of the following:
• Scroll to the Shared Parking line, and press
Unpark
.
• Press the corresponding line key.
The call is unparked from the shared room, and you
can talk to the caller. The Shared Parking line displays
the Idle icon.
Customization
Configuring Long term acoustic
protection
Long-term acoustic protection feature reduces the loud
volume of the conversations on the phone call to
permissible acoustic limits, you can configure the long-
term acoustic exposure protection for your headset.
Ensure you set the headset profile to Profile1, and use
L100 Series Headsets.
1. Press the
Main menu
.
2. Scroll to
Settings
and press
Select
.
3. Scroll to
Audio
settings and press
Select
.
4. Scroll to
Long term acoustic protection
, and press
Select
.
5. Choose one of the following and press
Select
:
•
Default
: Sets the acoustic protection values to one
of the following options that your administrator sets:
- Dynamic
- 8 hours
- 4 hours
- Off
Administrator configured value will be chosen as
the default value.
•
Off
: Sets the acoustic protection off.
•
Dynamic
: Sets the acoustic feature to Dynamic,
which activates itself and gradually reduces the
loud volume of the phone conversations to prevent
from reaching the damaging decibel levels.
•
4 hours
: Sets the acoustic protection for 4 hours.
•
8 hours
: Sets the acoustic protection to 8 hours.
6. Press
Save
.
Turning button clicks on and off
1. Press the
Main menu
.
2. Scroll to
Settings
and press
Select
.
3. Scroll to
Audio
settings and press
Select
.
4. Use the
Down Arrow
key to go to the Button clicks
screen.
5. Press
Toggle
to turn the audio on or off.
6. Press
Save
.
Setting the display language
1. Press the
Main menu
.
2. Scroll to
Settings
and press
Select
.
6


