background image

Customer Support and Warranty (cont'd)

During a period of ninety (90) days from the Effective Date, 

AVAYON

 will provide service labor to repair a manufacturing defect at its 

designated service center at no charge to you. If a defective part is replaced after ninety (90) days from the Effective Date, you pay labor 
charges for the repair.

For one (1) year from the Effective Date, 

AVAYON

 will use new or refurbished parts for repairs. Such replacement parts are warranted 

for the remaining portion of the original Warranty Period.

During the Warranty Period, 

AVAYON

 will, at its option and sole discretion, repair or replace defective parts, including replacement of the 

entire Player. You will be required to ship the player to the service center indicated at the time you contact 

AVAYON

 customer service for 

warranty support. You are responsible for all transportation charges to and from the service center and for all loss or damage during 
transport. 

AVAYON

 is not responsible for the de-installation or re-installation of the player.

WHAT IS NOT COVERED BY THIS ONE-YEAR LIMITED WARRANTY

This warranty does not cover defects, malfunctions or failures resulting from shipping or transit accidents, abuse, misuse, 
operation contrary to furnished instructions, operation on incorrect power supplies, operation with faulty associated 
equipment, modification, alteration, improper servicing from anyone other than an 

AVAYO N

 authorized service center, 

tampering, normal wear and tear, if the serial number has been removed/defaced or deterioration of the external cabinet.

ANY IMPLIED WARRANTIES, INCLUDING ANY IMPLIED WARRANTY OF MERCHANTABILITY AND FITNESS FOR A PARTICULAR 
PURPOSE SHALL BE LIMITED IN DURATION TO THE PERIOD OF TIME SET FORTH ABOVE. 

AVAYON

'S LIABILITY FOR ANY AND 

ALL LOSSES AND DAMAGES RESULTING FROM ANY CAUSE WHATSOEVER, INCLUDING OUR NEGLIGENCE, ALLEGED DAMAGE 
OR DEFECTIVE GOODS, WHETHER SUCH DEFECTS ARE DISCOVERABLE OR LATENT, SHALL IN NO EVENT EXCEED THE 
PURCHASE PRICE OF THE PLAYER. WE SHALL NOT BE RESPONSIBLE FOR LOSS OF USE, COMMERCIAL LOSS OR OTHER 
INCIDENTAL OR CONSEQUENTIAL DAMAGES.

~ 32 ~

Summary of Contents for DXP-10P II

Page 1: ...ENGLISH UNIVERSAL SERIAL BUS PORTABLE DivX MPEG 4 DVD PLAYER Model DXP 10P II OWNER S MANUAL Please read this manual before operating ...

Page 2: ......

Page 3: ...r Harness Kit Optional Accessory 14 Playing a Disc 15 17 Playing MP3 and Regular Audio CD 18 Playing Picture CD 19 Displaying and Sorting Files 20 Setting Language for OSD Menu Audio Subtitle External Subtitle 21 Setting Screen for Display Format Screen Saver TV System 22 Setting Audio for Downmix 23 Setting Parental Control Password Displaying DivX Registration Number 24 Setting Camera Angle Retu...

Page 4: ... The Player should be connected to a power supply only of the type described in the operating instructions or as marked on the Player Please read all of the safety and operating instructions before operating this Player follow all warnings placed on the Player and in the user s manual These safety and operating instructions should be retained for future reference WARNING SAFETY WARNING Safety Info...

Page 5: ...ertified by DivXNetworks the creators of DivX video technology and are capable of playing all versions of DivX video content DivX Certified ensures that the DivX content you attain and create can be played on your AVAYON DivX Certified product Supports DivX V3 11 V4 x V5 x and later files without QPEL and GMC 3 ...

Page 6: ...the playback starts each time when the MARK button is pressed later on 1 MENU PBC Button Brings up the disc menu 2 L R Button Selects left right and stereo sound tracks 3 P N Button Selects PAL NTSC AUTO TV systems 4 TITLE Button 5 SUBTITLE Button Selects the subtitle s language 6 Number Buttons 0 1 9 7 SETUP Button Brings up the setup MENU to set up the system s language audio display password et...

Page 7: ... 4 PLAYBACK BUTTONS PLAY SKIP PREVIOUS FAST REVERSE SKIP FORWARD FAST FORWARD PAUSE STEP STOP 1 OPEN 2 EARPHONE SPEAKER VOLUME 3 DC IN 12V 4 POWER ON OFF 5 VIDEO IN 6 AUDIO IN OUT 7 VIDEO OUT 8 SPDIF Digital audio signal output jack 9 EARPHONE JACK 5 LCD on off switch 6 CURSOR UP DOWN LEFT RIGHT ENTER 7 MENU PBC 8 DVD USB LCD adj Button 2 2 2 3 5 6 7 4 8 1 3 1 9 3 4 5 6 7 2 8 OP EN OP EN 1 OP EN O...

Page 8: ...nt of the DVD Player Installing the battery 1 Open the battery compartment cover using a coin 3 Replace the battery compartment cover and turn clockwise until it stops 2 Insert a 3V lithium battery into the battery compartment with the polarity facing up as marked Battery battery compartment cover Remote Control Sensor ...

Page 9: ...onal Accessory You can attach an earphone with a stereo mini jack plug to the phone jack for private listening The volume can be adjusted using VOL and VOL on the remote control Note When the earphone is connected to the Phone Jack the speaker will be disconnected ...

Page 10: ...o cables as illustrated below 3 Turn on power 8 AUDIO OUT VIDEO OUT L R VCR or other component equipped with external output connectors AV CABLE Not provided Audio left White Audio right Red Video out Yellow Video in Green Audio left White Audio right Red AV adaptorcable provided Mini jack to RCA Video out Yellow Audio black Video yellow OP EN OP EN VIDEO IN AUDIO IN OUT ...

Page 11: ... the audio and video cables as illustrated below 3 Turn on power 4 Repeatedly press TV Video button on your TV to select the input from the DVD player 9 OP EN OP EN AUDIO IN VIDEO IN L R AV CABLE Not provided Audio left White Audio right Red Video in Yellow Connect to a TV equipped with external connection jacks Video in Green Audio left White Audio right Red AV adaptorcable provided Mini jack to ...

Page 12: ...r or processor you can enjoy full 5 1 channel surround sound Follow these steps for making the connection COAXIAL SPDIF black COAXIAL black Coaxial cable Depending on your amplifier system you need to make the following selection from MENU 1 Refer to Changing Audio Output on page 23 2 Select SPDIF RAW if your amplifier has 5 1 channel decoder 3 Select SPDIF PCM if your amplifier has 2 channels 4 S...

Page 13: ...er accepts most USB devices such as MP3 DSC USB drive Digital Camcorder etc The USB this Player supports version 1 1 2 0 on 1 Insert the USB device and repeatedly press DVD USB to select USB mode The file manager appears and the first song file of the first folder plays 2 Use direction key and to select the file you want to play and press to play Note If you have different file types photo music v...

Page 14: ...period of time the adaptor may heat up this is normal and is not a cause for concern When not using the adaptor unplug it from the outlet To home power outlet To DC12V IN on the DVD player This portable DVD player can be powered by AC through the supplied switching power AC adaptor It can also use the supplied battery pack to power When the AC adaptor is connected to the unit and powered the unit ...

Page 15: ...INDICATOR Charging the battery pack 1 Attach the battery pack to the Player 2 Use the AC adapter to charge the battery pack Make the connection as illustrated below 3 Slide POWER to OFF The Player must be turned off to charge the battery During charging the red and green LEDs blink alternatively When the battery is fully charged the orange LED stays lit When the Player uses battery for power stead...

Page 16: ...or when charging the battery pack This battery pack is designed exclusively for your portable DVD player Do not use it with other devices Warning 1 Do not drop or subject to strong vibration 2 Keep out of reach of children 3 The battery pack may leak fluid that is harmful to your eyes If this fluid gets in your eyes wash eyes immediately with large amounts of running water and get medical attentio...

Page 17: ...enu B Use direction key to select REVERSE and press ENTER Installing Carrying Bag Car Harness Kit Optional Accessory 15 You can install the Carrying case Car harness kit to a car seat to enjoy the movie in the car Following these steps Adjust the length of the two hanging straps Strap the carrying bag to the car seat with the two hanging straps across each other 4 5 1 Unzip the carrying bag and fl...

Page 18: ... increase to 4x 8x 16x 32x You can also simply repeatedly press on the remote control to increase the fast forward speed 2 During playback to fast reverse press and hold on the player to increase the fast reverse speed 2x then repeatedly press to increase to 4x 8x 16x 32x You can also simply repeatedly press on the remote control to increase the fast reverse speed 3 To resume normal playback press...

Page 19: ...kmarked scene The Playback continues until the end of the disc Repeat the above to play the other marked scenes B To play from a specific point of time 1 Press GOTO twice to move to the time display and it changes 00 00 00 2 Fill in the time hour minute second 3 Press ENTER to confirm and start play ZOOM ZOOM lets you enlarge the video image during playback and pan through the enlarged image 1 Pre...

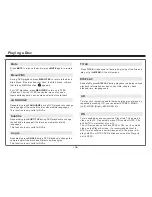
Page 20: ...ess TITLE it takes you to the very beginning of the title and play or to the MENU if it has title menu DISPLAY Repeatedly press DISPLAY during playback to display various playback information such as current title chapter track elapsed time languages etc L R This function is mostly used for karaoke sing along discs by repeatedly pressing L R you can select STEREO MONO Left MONO Right MIX MONO etc ...

Page 21: ...e ISO 9660 or JOLIET format Valid MP3 CD Play In most cases when a MP3 or audio disc is placed into the player the first song file of the first folder plays In other cases the file manager appears Use direction keys and to select the song file and press to play ...

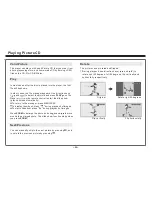
Page 22: ...pears Use direction keys and to select the picture and press PLAY on the Player or on the remote control to start the slide show plays photos automatically To return to file manager press MENU PBC To display thumbnail press during playback of images To start slide show press during playback of images Press ZOOM to enlarge the photo and use and to move around the enlarged photo The slide show funct...

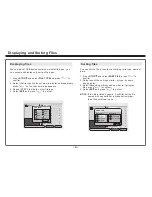
Page 23: ...le types 1 Press STOP and select FILE TYPE and press to confirm 2 Select the file type you do not want to display and repeatedly press so the check mark disappears 3 Repeat STEP2 to hide the other file type 4 Select EXIT and press to get out You can list the file in the order according to its type name or date 1 Press STOP and select SORT FILE press to confirm 2 Select one of the sorting criteria ...

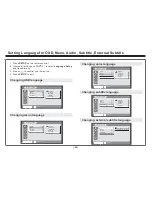
Page 24: ...subtitle language Select OSD Language Setup English French German Italian Spanish Select OSD Language Setup English Chinese Japanese French German Select OSD Language Setup English Chinese Japanese French German OSD Menu Audio Subtitle Select OSD Language Setup English Chinese Japanese French German OSD Menu Audio Subtitle OSD Menu Audio Subtitle OSD Menu Audio Subtitle Select OSD Language Setup M...

Page 25: ...f the screen are cut off and displays the central portion of the 16 9 screen 1 Press SETUP on the remote control 2 Use the direction keys to select Screen Setup and its sub menu 3 Press to confirm your selection 4 Press SETUP to exit Adjusting the Aspect Ratio Select OSD Screen Setup 4 3 PS 4 3 LB 16 9 Display Format Screen Saver TV System Select OSD Screen Setup On Off Display Format Screen Saver...

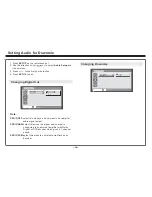
Page 26: ... Setup SPDIF PCM SPDIF RAW Off Changing Downmix Note SPDIF OFF select this when you do not want to have digital audio signal output SPDIF RAW select this when the digital audio output is connected to an external amplifier with Dolby Digital or DTS decoder which gives 5 1 channel sound SPDIF PCM select this when the external amplifier has no decoder Digital Out Downmix Select OSD Audio Setup Lo Ro ...

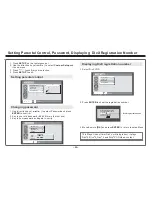
Page 27: ...again to verify Select OSD Custom Setup Parental Ctrl Password Angle Mark Default Old New Verify Select OSD Custom Setup 5 6 7 8 Off Parental Ctrl Password DivX VOD Angle Mark Displaying DivX registration number 1 Select DivX VOD 2 Press ENTER to show the registration number DivX registration code DivX Video On Demand Your registration code is xxxxxxxx to learn more visit www divx com vod OK This ...

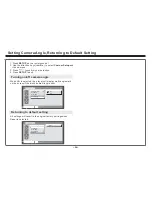
Page 28: ...ETUP to exit Turning on off camera angle When ON is selected the player will display multi angle mark on the screen if the disc has multi angle shot Returning to default setting All settings will revert to the original factory settings when Reset is selected Select OSD Custom Setup Password DivX VOD Angle Mark Default Reset Select OSD Custom Setup Parental Ctrl Password DivX VOD Angle Mark On Off ...

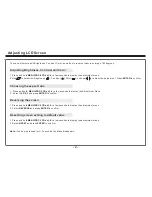
Page 29: ...and Color Reversing the screen 1 Press and hold MENU PBC LCD adj for a few seconds to display the adjustment menu 2 Select REVERSE and press ENTER to confirm Resetting screen setting to default value 1 Press and hold MENU PBC LCD adj for a few seconds to display the adjustment menu 2 Select RESET and press ENTER to confirm Note If no key is pressed for 3 4 seconds the Menu disappears Choosing the ...

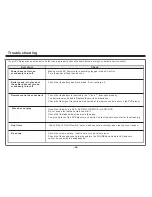
Page 30: ...ons properly The batteries may be dead Replace them with new batteries Check that the signal transmission is directed at the remote control senor on the DVD player Check that the disc is a DVD DVD RW VIDEO CD or AUDIO CD Do not use a disc that has scratches or dirt Check that the label side of the disc is facing up The pick up lens of the DVD player may be dirty Contact the service center for lens...

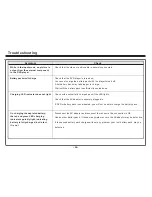
Page 31: ...D indicator does not light Check with another fully charged pack if the LED lights Check that the AC adaptor is securely plugged in If DVD or battery pack is overheated you will not be able to charge the battery pack Disconnect the AC adaptor and reconnect to make sure the connection is OK Use another battery pack if the same symptom occurs the AC adaptor may be defective If the second battery pac...

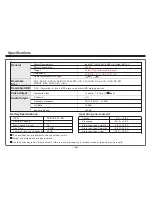
Page 32: ...e without notice Weight and dimensions are approximate Due to continued product improvements if there is any discrepancy in this user manual the actual unit prevails DVD DVD R DVD R DVD RW DVD RW VCD CD HDCD Picture CD CD R CD RW MPEG4 MP3 WMA DivX Video DSC Camcorder U drive MP3 player and other USB storage devices 12 W W x D x H 10 0 7 0 1 3 ITEM Nominal Voltage SPECIFICATION 7 4V Max Charge Cur...

Page 33: ...Player using new or refurbished parts or replace the entire Player with a new or refurbished Player TO ENSURE WARRANTY SERVICE KEEP THE DATED SALES RECEIPTAS EVIDENCE OF THE PURCHASE DATE Also be sure to register for warranty either through returning the completed mail in card found in the shipment box or on line at www ayayon com support To obtain warranty service in the U S you must also go to w...

Page 34: ...AYON is not responsible for the de installation or re installation of the player WHAT IS NOT COVERED BY THIS ONE YEAR LIMITED WARRANTY This warranty does not cover defects malfunctions or failures resulting from shipping or transit accidents abuse misuse operation contrary to furnished instructions operation on incorrect power supplies operation with faulty associated equipment modification altera...

Reviews: