13
12
RF1-21-US(V1)
RF1-21-US(V1)
DRAINING THE POOL & STORAGE
DRAINING THE POOL
Step 1
If you have a filter pump, make sure that the
electricity source has been disconnected.
Step 2
Check to make sure that the drain plug inside
the pool is plugged in place.
Step 3
Remove the cap from the drain valve on the
outside of the pool wall.
Step 4
Attach one end of the garden hose to the drain
valve connector and the other end of the hose
in an area where the water can drain safely,
such as a storm drain or street gutter. The end
of the hose must be lower in elevation than the
pool to ensure complete drainage.
Step 5
If you have a filter pump, insert the stoppers
into the inner and outer fixtures, on inside
of pool, and then disconnect the filter pump
hoses.
Step 6
Attach the drain valve connector to the drain
valve by turning the connector clockwise.
Step 7
Open the drain plug on the inside of the pool.
When the water stops draining, start lifting the
pool from the side opposite the drain, leading
any remaining water to the
drain and emptying the pool completely.
Step 8
Disconnect the hose and drain valve connector
when finished.
Step 9
Replace the drain plug in drain valve and replace
drain cap on outside of pool for storage.
Step 10
Completely deflate top ring and remove all
connecting parts.
DRAINING THE POOL & STORAGE(continued)
FOLDING INSTRUCTIONS
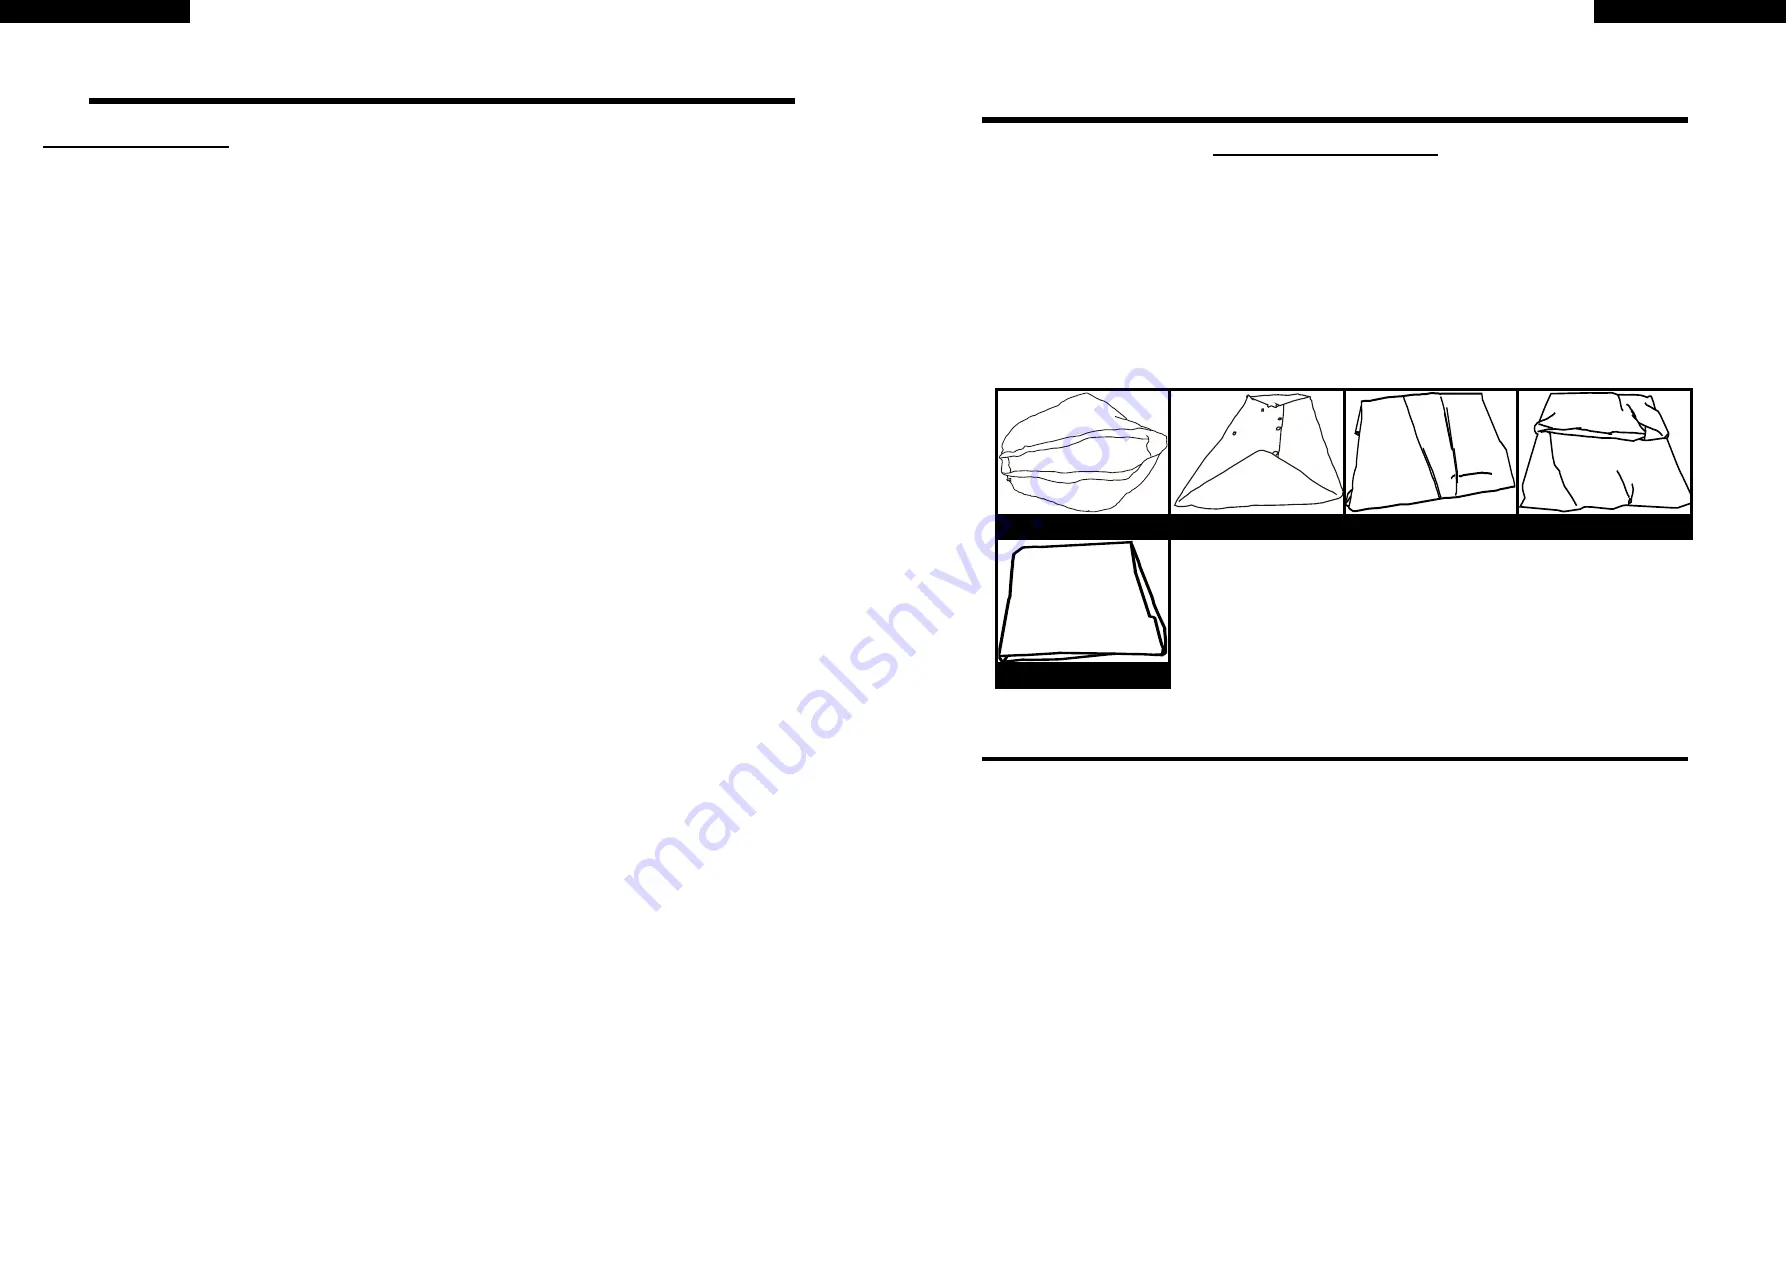
Before folding, it’s better to dry all parts and pool completely by lying them in the sun
for one hour or so.(PIC.1). And then, spread some talcum powder to prevent the vinyl
from sticking together.
Step1.
Please fold the protrusion sides inside to gain rectangle shape.(PIC.2).
Step2.
Fold each half of the rectangle to gain a smaller rectangle shape.(PIC.3).
Step3.
Fold each ends backwards. (PIC.4).
Step4.
Fold the rest ends together to create an ultimate rectangle one.(PIC.5).
TIPS1.
Please remove air inside to make the folded pool thin and flat during each folding.
TIPS2.
The original packing can be used for storage.
PIC.1
PIC.3
PIC.4
PIC.2
PIC.5
COMMON POOL PROBLEMS & SOLUTIONS
Repair Patch Instructions
(Small pinhole and small puncture leaks can be repaired with the included repair patch)
a) Locate the leak place.
b) Deflate the air.
c) Clean the area surrounding the leakage and wipe up all water from the surface.
d) Take out the repair patch, cut it into required shape and size, which should be larger than the leaking area, put the patch on
leaking area and press tightly.
e) Wait 30 minutes for open-air drying of the repaired position.
If the damage is too big, we recommend using a Silicone or rubber based glue for repair.
Repair Glue Instructions
1 Locate the leak place.
2 Deflate
(
if necessary
)
,and drain thoroughly
3 Clean the area surrounding the leakage and wipe up all water from the surface.
4 Thoroughly clean the area surrounding the leak .Cut a piece of repair material in round shape, which should be larger than
the damaged area.
5 Gluing (need to purchase adhesive separately) one side of the material patch to the repair area. Please notice the material
patch need to be applied glue evenly.
6 Put the patch on the damaged area and press tightly. Wait 12 hours for drying. After patch has dried, apply glue around the
edges for a complete seal (dry 4 hours) swimming pool storage.


