www.avenview.com
Page 7
4.1 Unpacking
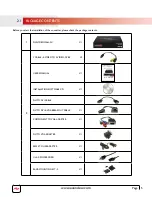
Remove the DVI-VIDEOWALL-9X from the Packaging and please examine the unit for any signs of shipping damage or missing
items (see package contents 2.1). All shipping items should be secured safely for future return for service. Returning the unit for
service not in the original box may result in voiding warranty or additional cost.
4.2 Placement
Please place the unit in a secure place and not to block the sides of this device or stack another device on the top or bottom of
the DVI-VIDEOWALL-9X.
4.3 System Requirements
The Avenview DVI-VIDEOWALL-9X includes Software Control program can be installed with the following Operating Systems
Windows XP / 2000 / Vista / 7 or later.
Connect the provide RS-232 to USB adapter to DVI-VIDEOWALL-9X and USB Port to your Windows based system that will
be used to configure the DVI-VIDEOWALL-9X. Once it is connected to USB Port, Windows will look for appropriate drivers. If
you are using an older version of Windows, then insert the Installation CD (provided) and have Windows search for drivers (you
may need to download latest drivers from Prolific’s website if you are using Windows Vista or Windows 7 or later).
4.4 System Connection
-
We HIGHLY recommend quality cables for both input and output connections to ensure proper results.
-
Power off the DVI-VIDEOWALL-9X and all devices that you want to connect.
-
Connect 9 monitors, projectors or other displays that comes with DVI/HDMI inputs by using male-to-male DVI cables
or DVI to HDMI or HDMI to DVI to DVI-VIDEOWALL-9X DVI outputs.
-
Connect a device equipped with DVI output (such as PC) to the DVI input connector of DVI-VIDEOWALL-9X.
-
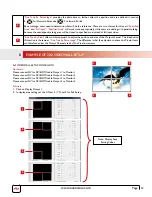
Switch on all devices connected and then control the display output through RS-232 and software.
-
Power up the DVI-VIDEOWALL-9X and you can see Vacuum Fluorescent Display (VFD) on the front panel blinks.
Make sure the serial port (RS232) connection is secured.
-
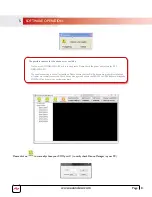
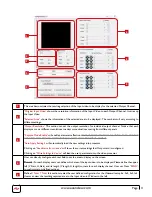
Click on the icon Avenview to start the control software
-
When Avenview software is launched, let it automatically detect the device response from RS-232 port. The process
takes 5 – 15 seconds. If there is no response, a warning window will show up.
4.
HARDWARE CONECTION
Summary of Contents for DVI-VIDEOWALL-9X
Page 7: ...www avenview com Page 4...

