25
NAS Settings: Used to send out the video to NAS server.
a. Enter necessary information in “Location”, “Workgroup”, “Account Name” and “Password”
columns.
b. If the user wants to create a new folder on the NAS server to save the video file, select “Yes”
under the “Create the folder”.
c. Click “Apply” to save the configuration.
System > Network Setting>DDNS
The IP camera supports DDNS (Dynamic DNS) service
.
a. Select “Enabled DDNS” to enable DDNS function.
b. Enter the Domain Name, Account Name, and Password that the user has registered on the
DDNS service provider in the appropriate columns.
c. Enter the IP refreshing time period in the “Schedule Update” column.
d. Click “Apply” to save the configuration.
[Note] If you set up schedule update to occur too frequently, the IP may be blocked. In general,
performing schedule update once a day (1440 minutes) is recommended.
Summary of Contents for SF2012H-B
Page 1: ...AVer SF2012H C User Manual ...
Page 4: ...COPYRIGHT 55 NOTICE 55 WARNING 55 LIMITED WARRANTY 56 GOVERNING LAW AND YOUR RIGHTS 57 ...
Page 12: ...8 3 Click Setup button 4 Click Add IPCam button 5 Select IP Camera item ...
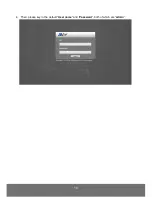
Page 18: ...14 4 Then please key in the default User name and Password both of which are admin ...
Page 20: ...16 5 When the following dialogue box appears click Yes ...
Page 43: ...39 Video Format H 264 or JPEG RTSP Path It s a URL address ...


