background image

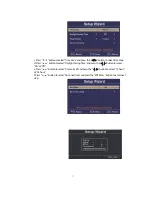
adjustment menu to adjust  

”  button  to  enter   

    button to select  Sleep T imer 

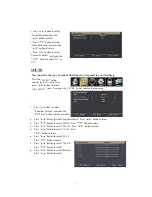
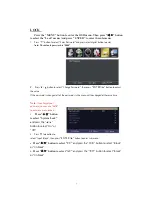
select the “TIME” menu. And press “ ENTER” to enter the sub-menu.   

Note: The b c d e f g function it is only available in USER  mode. 

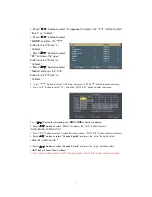
2. Press “ / ” button to select “MTS” and press the “ / ” button to adjust. 

Note: It is only available in ATV. 

3. Press “ / ” button to select “Audio L anguage” and press the “ / ” button to adjust.

Note: It is only available in DTV.

4. Press “ / ” button to select “Digital Audio Output” and press the “ / ” button to adjust. 
5. Press “ / ” button to select “AV L ” and press the “ / ” button to select “On” or “Off”. 

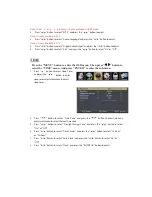
TIME

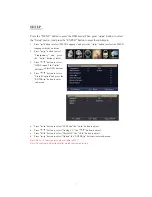
Press the “MENU” button to enter the OSD menu .Then press “ / ” button to 

1. Press  “

/

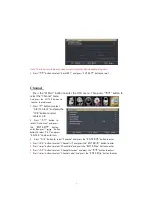
2. Press  “ / ”  button  to  select  “Time  Zone”  and  press  the  “ / ”  button  to  enter  time  zone 

adjustment menu to select the local time zone. 

3. Press  “ / ”  button  to  select  “Daylight  Saving  Time”  and  press  the  “ / ”  button  to  select 

“On” or “Off”. 

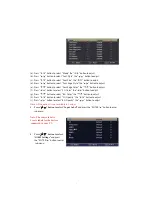
4. Press “ / ” button to select “Time Format” and press the “ / ” button to select “12-hour” 

or “24-hour”. 

5.

Press “ / ” button to select “Auto Clock” and press the “ / ” button to select “On” or 
“Off”.

6.

Press “ / ” button to select “Clock” and press the “ENTER / ” button to adjust.

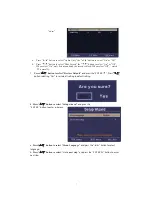
and press the “

sleep timer

sleep timer.

Return

Summary of Contents for 32AER05

Page 1: ...USER S MANUAL 32 LED TELEVISION 32AER05 ...

Page 2: ...Contents Introduction Warning Caution Main Unit Description Remote Control OSD Basic Adjustment Specifications Troubleshooting ...

Page 3: ...Avoid excessively warm locations to prevent possible damage to the cabinet or premature component failure This TV can be connected to AC 100 240V 50 60HZ Do not install the TV in a location near heat sources such as radiators air ducts direct sunlight or in closed compartments and closed areas Do not cover the ventilation openings when using the TV The indicator light will last for about 30 second...

Page 4: ...nstructions in the literature accompanying the equipment Class I structures of equipment should be connected to the grid power output with a protective earth connection on the socket Power plug as a broken appliance broken installations should be easy to operate CAUTION TO AVOID THE RISK OF ELECTRIC SHOCK DO NOT REMOVE COVER OR BACK NO USER SERVICEABLE PARTS INSIDE REFER SERVICING TO QUALIFIED SER...

Page 5: ... drop or push objects into the television cabinet slots or openings Never spill any kind of liquid on the television receiver Caution Avoid exposing the main unit to direct sunlight and other sources of heat Do not stand the television receiver irectly on other products which give off heat e g video cassette players and audio amplifiers Do not block the ventilation holes in the back cover Ventilat...

Page 6: ...Serious injury to an individual and damage to the television may result if it should fall Caution When the product is not used for an extended period of time it is advisable to disconnect the AC power from the AC outlet Caution The LED panel used in this product is made of glass and is therefore breakable This product must not be dropped or banged If the LED Panel breaks be careful of being injure...

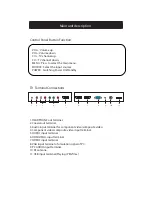
Page 7: ...tandby TV Terminal Connections 1 HEADPHONE out terminal 2 Coaxial out terminal 3 Audio input terminal for component video composite video 4 Component video composite video input terminal 5 HDMI1 input terminal 6 HDMI2 MHL input terminal 7 HDMI3 input terminal 8 VGA input terminal of simulation signal of PC 9 PC AUDIO input terminal 10 RF antenna 11 USB input terminal Playing JPEG files 1 2 3 6 5 4...

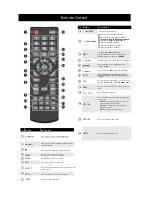
Page 8: ...rol to select the video input source then press ENTER return Press to navigate in on screen menus and to adjust settings INFO CCD MUTE CH CH MTS SAP PICTURE AUDIO Button Description 10 11 12 13 14 15 16 17 18 19 20 21 22 Press to select the picture mode Press to select the sound mode Press to stop the photo playback Remote Control In TV mode press to return to the previous channel Press to display...

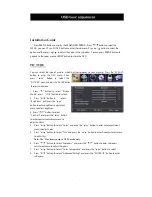
Page 9: ...n to select 2 Press button to select Brightness and press the button to enter brightness adjustment menu to adjust brightness 3 Press button to select Contrast and press the button to enter contrast adjustment menu to adjust contrast 4 Press button to select Color and press the button to enter color adjustment menu to adjust color 5 Press button to select Tint and press the button to enter hue adj...

Page 10: ...ton to select Equalizer Settings and press the ENTER button to enter sub menu a Press button to select Equalizer Mode Press button to select b Press button to select 150Hz Press button to select c Press button to select 500 Hz Press button to select d Press button to select 1K Hz Press button to select e Press button to select 5K Hz Press button to select f Press button to select 10K Hz Press butt...

Page 11: ... button to adjust 5 Press button to select AV L and press the button to select On or Off TIME Press the MENU button to enter the OSD menu Then press button to 1 Press 2 Press button to select Time Zone and press the button to enter time zone adjustment menu to select the local time zone 3 Press button to select Daylight Saving Time and press the button to select On or Off 4 Press button to select ...

Page 12: ... to select Closed Caption and press the ENTER button to enter a Press button to select CC Mode the button to adjust b Press button to select Analog CC the button to adjust c Press button to select Digital CC the button to adjust d Press button to select Option the ENTER button to enter sub menu Note The c d function it is only available in DTV Note The option is adjust the digital closed captionin...

Page 13: ...elect FG Color the button to adjust g Press button to select BG Color the button to adjust h Press button to select FG Opacity the button to adjust i Press button to select BG Opacity the button to adjust Note All the option it is not available in Custom 5 Press button to select Input Label and press the ENTER button to enter sub menu Note The source label is Create labels for the devices connecte...

Page 14: ...sub menu a Press button to select Menu Language and press the button to select language b Press button to select Go to next step and press the ENTER button to enter next step a Press button to select Audio Only the button to select On or Off b Press button to select Blue Screen the button to select On or Off When select On only listen sound and the screen is black When select Off watch TV normally...

Page 15: ...toselecttimezone d Press buttontoselect DaylightSavingTime andpressthe buttontoselect On or Off e Press buttontoselect TimeFormat andpressthe buttontoselect 12 hour or 24 hour f Press buttontoselect Gotonextstep andpressthe ENTER buttontoenternext step ...

Page 16: ...adjust the value If the password is changed all of the passwords in the menu will be changed at the same time Note If you forget your password you can use 1470 to enter any menu locked 3 Press button to select System Lock and press the button to select On or Off 4 Press button to select Input Block then press ENTER button to enter sub menu a Press button to select TV and press the button to select...

Page 17: ...s button to select Canada Rating and press ENTER button to enter sub menu a Press button to select Canada English and press the button to select Off C C8 G PG 14 18 b Press button to select Canada French and press the button to select Off G 8ans 13ans 16ans 18ans 7 Press button to select RRT Setting and press ENTER button to enter sub menu Return Return Media MHL f Press button to select Media and...

Page 18: ...ect Auto Scan and press the ENTER button ENTER to do auto scan 3 Press button to select Favorite and press the ENTER button to enter 4 Press button to select Channel list and press the ENTER button to enter 5 Press button to select Show Hide and press the ENTER button to enter 6 Press button to select Channel Number and press the button to adjust 7 Press button to select Channel Label and press th...

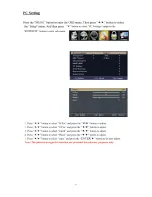
Page 19: ... PCSetting ...

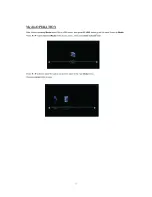
Page 20: ...Media OPERATION SOURCE ...

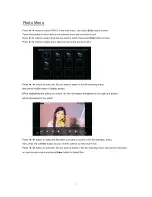
Page 21: ...Photo Menu ...

Page 22: ......

Page 23: ...ernal AV device Try another channel the station may have broadcast difficulties Adjust the brightness contrast in the Video menu Check that the unit is set to NTSC Audio noise Move any infrared equipment away from the TV The TFT LED panel uses a panel consisting of sub pixels which requires sophisticated technology to produce However there may be a small number of bright or dark pixels on the scre...

Reviews: