background image

Appendix B — 

Statements


CLASSIFIED AS A "CLASS 1 LASER PRODUCT.” TO USE THIS 
MODEL PROPERLY, READ THE INSTRUCTION MANUAL 
CAREFULLY AND KEEP THIS MANUAL FOR FUTURE 
REFERENCE. IN CASE OF ANY TROUBLE WITH THIS MODEL, 
PLEASE CONTACT YOUR NEAREST "AUTHORIZED SERVICE 
STATION.” TO PREVENT DIRECT EXPOSURE TO THE LASER 
BEAM, DO NOT TRY TO OPEN THIS ENCLOSURE. 


Summary of Contents for 3200 Series

Page 1: ...3200 Series User s Manual 2004 AVERATEC Inc ...

Page 2: ...Introduction Getting Started C Ch ha ap pt te er r 1 1 I In nt tr ro od du uc ct ti io on n ...

Page 3: ... productivity applications the notebook is an ideal choice for use in the office at home and on the road For maximum expandability without compromising portability the notebook accommodates a number of modules including a combination DVD and CD RW optical drive three USB ports modem port LAN port and PCMCIA card slot The high capacity hard disk drive provides you with plenty of storage space for m...

Page 4: ...make repairs to your notebook during the warranty period Update this section when you add new options DATE OF PURCHASE PLACE OF PURCHASE DEALER S NAME DEALER S ADDRESS TELEPHONE E MAIL ADDRESS WWW CONTACT PERSON PART NUMBER SERIAL NUMBER The serial number is on the label with a bar code on the bottom side of the computer The Part Number is also located on the bottom side of your compute and begins...

Page 5: ...for ventilation purposes Do not block or cover these openings or the system could overheat Do not use or store the computer near a source of heat or dust On the base or rear panel of this notebook there is a label with information on the power requirements of this system These requirements must be followed If you are unsure of your local power supply consult your dealer or local Power Company Do n...

Page 6: ...SB Floppy Disk Drive Caution When purchasing any of the accessories listed above purchase only those accessories that are approved for use with your computer Some of the above accessories are proprietary items Your system vendor can obtain these approved accessories If you use items that are not approved for use with this computer you may cause your computer to malfunction or to emit or receive el...

Page 7: ...o listen to a variety of multimedia applications Convenient Audio Control The conveniently located audio control knob enable you to easily adjust the volume to the stereo speakers Function Keys Function keys give you easy control of power management and your monitor Scrolling Area Comfortably scroll through documents with the ergonomically designed scrolling area within the touch pad Where to Look...

Page 8: ...ated below the touchpad Volume control button Alternatively you can adjust the volume with the Windows volume control applet located on the taskbar V c b Adjusting the Brightness Use the following hot key combinations to adjust the LCD panel brightness Fn F6 decreases the brightness Fn F7 increases the brightness ...

Page 9: ...enu click Shut Down 2 Click the radio button next to Shut Down in the Shut Down Windows screen and then click OK If you are going to be away from the computer for a short period there are ways of conserving power without shutting down the system See Chapter 5 Power Saving Modes for details Warning Shutting off the computer improperly may result in data loss ...

Page 10: ...ies In the workplace notebooks and accessories may often look exactly alike leading to equipment mix ups Prevent such mix ups by placing your name on your equipment Develop ergonomic work habits The science of ergonomics studies the relationship between health and a suitable work environment For more information on ergonomics contact your nearest computer bookstore or local library The Internet al...

Page 11: ...Getting Started Hardware and Software C Ch ha ap pt te er r 2 2 G Ge et tt ti in ng g S St ta ar rt te ed d ...

Page 12: ... including the hardware components the software and the audio and video systems Getting Started Before you begin using your computer read this chapter to familiarize yourself with the main components installed in the system Slide the screen latch on the front edge of the cabinet towards the right to release the cover latch and open up the computer ...

Page 13: ...el 3 Battery 4 Keyboard 5 Status indicators 6 Speakers 7 Touchpad 8 Touchpad buttons 9 Volume control knob 10 Microphone in jack 11 Audio out jack for external speakers or headphones 12 Power indicators 13 WLAN switch 14 Power button 1 2 3 4 5 13 14 6 7 8 9 10 11 6 12 ...

Page 14: ...etting Started Left View Left View 1 2 3 4 5 6 1 Kensington lock hole 2 VGA port for external video display 3 Phone jack for internal modem 4 LAN RJ 45 jack 5 PCMCIA card slot 6 PCMCIA card eject button ...

Page 15: ...Getting Started Right View Right View 1 USB ports 2 Optical drive 3 Optical drive eject button 4 AC adapter port 1 2 3 4 ...

Page 16: ...Getting Started Bottom View Bottom View 1 Ventilation slots 2 RAM compartment 3 Battery release button 4 Battery 1 2 3 4 ...

Page 17: ...the hard disk Number Lock The keyboard is in Num Lock mode Caps Lock The keyboard is in Caps Lock mode Scroll Lock The keyboard is in Scroll Lock mode Power Indicators The power indicators show which power source the system is using They also show battery status and low battery power alerts The power indicators remain active and viewable even when the LCD panel is closed Icon Light Description Blu...

Page 18: ...intensive input more convenient Press NumLock to enable or disable the numeric keypad Touchpad The touchpad is a pressure sensitive pointing device that provides all the features of a two button mouse Its primary function is to move the cursor around the screen Touchpad buttons Scrolling area Touchpad buttons The instructions listed below describe how to use the touchpad 1 First place your fingers...

Page 19: ...n is commonly referred to as double clicking an object Dragging There are two ways to drag Move the pointer to the desired location then press down the left button While still holding down the left button move the pointer to the desired location Release the button Move the pointer to the desired location Tap the touchpad twice quickly as if you were double clicking however do not remove your finge...

Page 20: ...k drive uses standard 3 5 inch 1 44 MB disks To use the disk drive insert a disk label side up into the drive slot and slide it all the way in To eject the disk from the drive press the eject button When the computer is reading from or writing to a disk the disk indicator light will flash Do not try to eject the disk when the light is active or you may lose data Hard Disk Drive The hard disk provi...

Page 21: ...ning When the computer is reading from the optical drive the indicator light for the optical drive will flash on Do not attempt to remove a disk while the light is active Precautions for Handling Optical Media Keep these precautions in mind when handling optical media disc Always hold the disc by the edges avoid touching the surface of the disc Use a clean dry cloth to remove dust smudges or finge...

Page 22: ...ports on the right side of your notebook The PC Card Slot The PC card slot can be used as an interface between your computer and a variety of communications devices such as network adapters SCSI adapters fax modems or provide additional data storage capacity Your computer s PC card slot supports PCMCIA Type II and 32 bit CardBus Installing a Card 1 The top side of a PC card is usually identified w...

Page 23: ... more smoothly with large files Users who increase memory demands by adding additional programs for example may notice a slowdown in operating speed and wish to increase memory The notebook includes a memory card slot for adding additional memory Note Use only 1 inch DDR333 SO DIMM 200 pin modules Replacing a Memory Card Warning Memory modules can be easily damaged by static electricity Leave the ...

Page 24: ...edge connector into the connector slot 3 The gold teeth of the edge connector should no longer be visible when the card is fully inserted 3 Press the card downwards so that it is flat inside the compartment 4 You may hear an audible click as the latches of the connector lock the card in place 4 Replace the RAM compartment cover and secure it with the two screws Your notebook computer will automati...

Page 25: ...it uses a 640x480 VGA resolution by default You can stretch the low resolution display to full screen size by selecting either the Expanded Display or Display Expansion Mode features in the BIOS utility However the stretching may cause distortion especially to fonts High Resolution with an external monitor Higher resolution modes may be used as long as the monitor supports them Connecting an Exter...

Page 26: ...indow opens 3 Click the Settings tab 4 Click the Advanced button 5 Click the Display Modes tab The screen shown at the right appears Under Display Modes there is a drop down list with tow options Single and Mirror These options are described below Single In Display Combination there are two options available VGA1 or LCD2 You can choose which device to apply as the Primary display VGA1 is the defau...

Page 27: ...g a built in wireless LAN Data and Fax Modem and wired Ethernet LAN Data and Fax Modem and Wireless and Wired LAN A phone jack on the left side of the computer allows you to connect to the Internet to send and receive data When used with fax software it can be used as a fax When using this function first plug the phone cord into the jack The Wireless and Wired LAN function allows you to connect to...

Page 28: ...Making Connections Making Connections C Ch ha ap pt te er r 3 3 M Ma ak ki in ng g C Co on nn ne ec ct ti io on ns s ...

Page 29: ...sington Lock Your computer includes a Kensington lock hole to be used with a standard Kensington lock You can connect the notebook to a large object with the Kensington lock to prevent theft of your notebook See the documentation that comes with your Kensington lock for more information 2 VGA Out External Video Port The 15 pin VGA port can be used to connect your computer to an external monitor Se...

Page 30: ...he LAN function wrap your LAN cable around an EMI ferrite suppression box to inhibit electromagnetic interference Kindly consult your network technician for additional information on the network cable you are using Right Side Connectors 1 2 1 USB Universal Serial Bus Ports The Universal Serial Bus USB is the latest standard for attaching portable storage input devices scanners multimedia and other...

Page 31: ... Front Side Connectors Front Side Connectors 2 1 1 Audio out Jack Connect a stereo headset or external speakers to this jack to listen to multimedia 2 Microphone in Jack Connect a microphone to this jack to record audio ...

Page 32: ...System Software Error Style not defined C Ch ha ap pt te er r 4 4 S Sy ys st te em m S So of ft tw wa ar re e ...

Page 33: ... new hard disk you must first partition it If you reinstall the factory software all of the data originally on the hard disk will be overwritten Before reinstalling the factory software carefully backup any important data Caution When you re install the factory software using the Recovery Media it is STRONGLY recommended that you connect the AC adapter do NOT use battery alone Recovering Windows a...

Page 34: ...Power Management Error Style not defined C Ch ha ap pt te er r 5 5 P Po ow we er r M Ma an na ag ge em me en nt t ...

Page 35: ...e sure that AC adapter Battery are present Do you wish to do the battery auto learning Yes No System Reboot 4 Press Y at the above Battery Auto Calibration dialog to begin the battery calibration Please press Space Bar to select option and Enter to continue Battery Calibration will take from 8 to 10 hours depending on how much power the battery may already contain Note For optimum performance we r...

Page 36: ...e Critical Battery Alarm Use the slidebar to set the power level at which the alarms are activated Click on the Alarm Action button to choose whether the alarm sounds displays a message or both Warning When battery power is low the battery indicator will flash red and the alarm will beep or display a warning on your screen Take immediate action such as saving files or connecting to the AC adapter ...

Page 37: ...ok PC provide a special feature for user As long as the battery of this notebook PC is fully charged The USB ports on this Notebook PC are always on even in power off state User can use this feature to charge some kind of mobile devices such as PDA MP3 player or mobile phone when needed User needs a specific cable for connecting USB port of notebook PC and the device Please check the device provid...

Page 38: ...g box The computer will automatically enter suspend mode when not used for a set period of time Selecting the Stand by button in the Shut Down Windows dialog box Closing the screen cover assuming no external monitor has been connected Pressing the power button if enabled in power settings Pressing the suspend function key Fn F4 Using the BIOS Utility for Power Management With Windows running in AC...

Page 39: ...atch 1 away from the battery Continue to hold it until the battery is removed 4 Push in the latch on the battery 2 while lifting the battery out of the compartment Remove the battery 5 Make sure the replacement battery is properly orientated Slide back the side battery latch 1 then insert the battery into the battery compartment Check that the latch locks back into position Heat Considerations The...

Page 40: ...Using the BIOS Setup Utility BIOS Setup Menu C Ch ha ap pt te er r 6 6 U Us si in ng g t th he e B BI IO OS S S Se et tu up p U Ut ti il li it ty y ...

Page 41: ... computer on the system reads this information to initialize the hardware so that it can operate correctly Use the BIOS setup utility to change your computer s start up configuration For example you can change the security and power management routines of your system Starting the BIOS Setup Utility You can only enter the BIOS setup utility as the computer is booting that is between the time you tu...

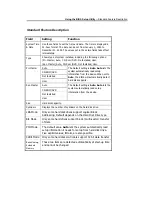
Page 42: ... PgUp to increase a value such as a date or number and PgDn to decrease it For other types of choices such as enabled or disabled use either key to move between choices Enter Press enter to make a selection F2 or F3 Pressing either key changes the color of the graphic display F10 Press F10 to save changes then exit The Main Menu The Setup Utility menu bar has nine main screens Standard CMOS Setup ...

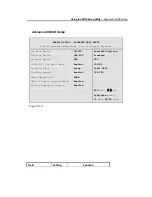
Page 43: ... Auto Detect Hard Disks Change User Password Change Supervisor Password Auto Configuration with Optimal Settings Save Settings and Exit Exit Without Saving Standard CMOS setup for changing time date hard disk type etc ESC Exit Sel F2 F3 Color F10 Save Exit Figure 6 1 ...

Page 44: ...e the basic configuration of the computer AMIBIOS SETUP STANDARD CMOS SETUP C 2001 American Megatrends Inc All Rights Reserved Date mm dd yyyy Wed Jan 12 2001 Base Memory 640 KB Time hh mm ss 16 55 24 Extd Memory 55 MB LBA Blk PIO 32Bit Type Size Cyln Head WPcom Sec Mode Mode Mode Mode Pri Master Auto On Sec Master Auto On Boot Sector Virus Protection Disabled Month Jan Dec ESC Exit Sel Day 01 31 ...

Page 45: ...et to Auto the BIOS will automatically detect hard disk capacity Auto CD ROM DVD Not Installed Sec Master User The Default setting is Auto Auto lets the system automatically read setup information from the device Size Hard disk capacity Cylinders Displays the number of cylinders on the hard disk drive LBA Mode Only some hard disk drives support Logical Block Addressing Default depends on the Hard ...

Page 46: ...ce CD DVD 2nd Boot Device USB FDD 3rd Boot Device HDD S M A R T for Hard Disks Enabled Password Check Setup TouchPad Support Enabled Share Memory Size 32MB USB 1 1 Device Legacy Support Enabled Display Expansion Support Enabled Available Options Disabled HDD CD DVD Intel UNDI USB FDD ESC Exit Sel PgUp PgDn Modify F1 Help F2 F3 Color Figure 6 3 Field Setting Function ...

Page 47: ...tion to run windows the display will not fill the entire screen Enable this mode to expand the display to the entire screen The default is Enabled Setup The default value is Setup which specifies that a password is only required to enter the setup utility Password Check Always If Always is selected the password is required when the system is booted up or resuming from a suspend to disk 8MB 16MB 32...

Page 48: ...er management BIOS settings likewise have no effect AMIBIOS SETUP POWER MANAGEMENT SETUP C 2001 American Megatrends Inc All Rights Reserved Cover Close Panel Off Auto DIM Enabled Battery Auto Calibration Disabled FAN Auto Learning Disabled Available Options Panel Off Stand by ESC Exit Sel PgUp PgDn Modify F1 Help F2 F3 Color Figure 6 4 Field Setting Function Panel off The LCD will turn off when th...

Page 49: ...o Detect Hard Disk When Auto Detect Hard Disk is selected the BIOS will automatically detect Pri Master and Sec Master settings AMIBIOS SETUP STANDARD CMOS SETUP C 2000 American Megatrends Inc All Rights Reserved Date mm dd yyyy Wed Jan 12 2001 Base Memory 640 KB Time hh mm ss 16 55 24 Extd Memory 55 MB LBA Blk PIO 32Bit Type Size Cyln Head WPcom Sec Mode Mode Mode Mode Pri Master User 12073Mb 233...

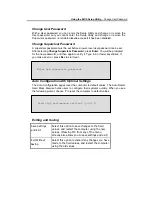
Page 50: ...kes If you make an error press Esc to start over Auto Configuration with Optimal Settings Enter new supervisor password The Auto Configuration pages reset the computer to default values The Auto Detect Hard Disks likewise helps users to configure their systems quickly When you see the following prompt choose Y to reset the computer to default values Load high performance settings y n N Exiting and...

Page 51: ... Frequently Asked Questions A Ap pp pe en nd di ix x A A F Fr re eq qu ue en nt tl ly y A As sk ke ed d Q Qu ue es st ti io on ns s ...

Page 52: ...stem Tools Run Disk Cleanup to remove unnecessary files and Disk Defragmenter to defragment the hard drive For more information refer to Windows documentation Q The internal fax modem dial tone sound is too low How can I increase the volume A There are two methods to adjust the volume of the internal fax modem dial tone Method 1 Double click the Volume Control icon on the Windows task bar Adjustin...

Page 53: ... power situation unplug the computer from the power outlet and remove battery at the same over 45 days your data in CMOS will be lost Please reconfigure your CMOS by following steps 1 Press F1 to enter the BIOS setup utility 2 Select Auto Configuration with Optimal Settings When you see the following prompt choose Y and then press Enter Load high performance settings y n Y 3 Select Save Settings a...

Page 54: ... Statements A Ap pp pe en nd di ix x B B S St ta at te em me en nt ts s ...

Page 55: ...is encouraged to try to correct the interference by one or more of the following measures 1 Reorient or relocate the receiving antenna 2 Increase the separation between the equipment and the receiver 3 Connect the equipment into an outlet on a circuit different from that to which the receiver is connected 4 Consult the dealer or an experienced radio TV technician for help Shielded interconnect cab...

Page 56: ... operations or procedures that could affect the operation of the equipment If this happens the telephone company will provide advance notice in order for you to make the necessary modifications in order to maintain uninterrupted service If trouble is experienced with this equipment please contact the manufacturer for repair and or warranty information If the trouble is causing harm to the telephon...

Page 57: ... the following Do not use this product near water for example near a bathtub wash bowl kitchen sink or laundry tub in a wet basement or near a swimming pool Avoid using a telephone other than a cordless type during an electrical storm There may be a remote risk of electric shock from lightning Do not use the telephone to report a gas leak in the vicinity of the leak Use only the power cord and bat...

Page 58: ...are connected together This precaution may be particularly important in rural areas CAUTION Users should not attempt to make such connections themselves but should contact the appropriate electric inspection authority or electrician as appropriate The Load Number LN assigned to each terminal device denotes the percentage of the total load to be connected to a telephone loop which is used by the de...

Page 59: ...IS MODEL PROPERLY READ THE INSTRUCTION MANUAL CAREFULLY AND KEEP THIS MANUAL FOR FUTURE REFERENCE IN CASE OF ANY TROUBLE WITH THIS MODEL PLEASE CONTACT YOUR NEAREST AUTHORIZED SERVICE STATION TO PREVENT DIRECT EXPOSURE TO THE LASER BEAM DO NOT TRY TO OPEN THIS ENCLOSURE ...

Reviews: