■
chapter 4 upgrading your computer
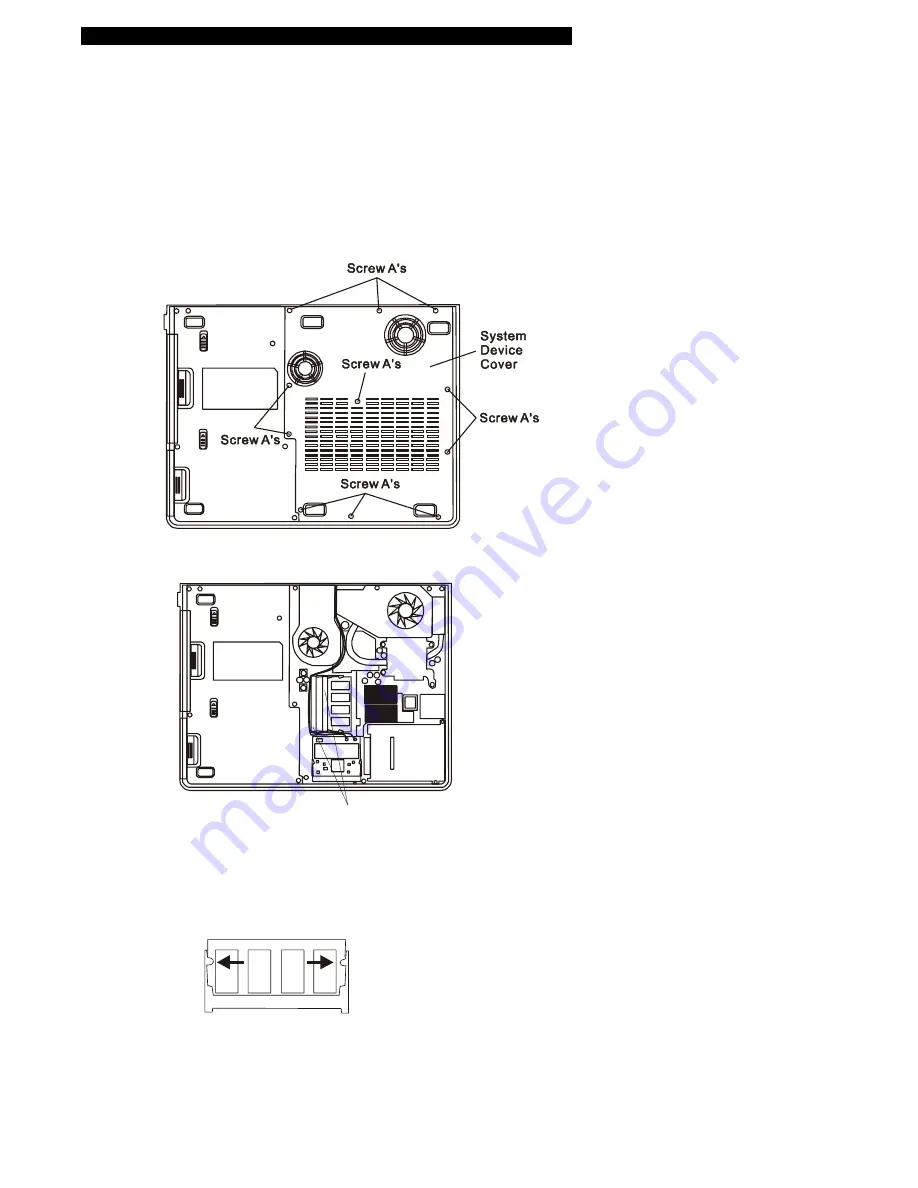
Installing a memory module (DIMM) into the system
To install the DIMM, do the following:
1.
Power OFF the notebook. Unplug the AC cord and all cables/devices attached to the notebook.
2.
Place your hand on a large metal object momentarily to discharge any static electricity. Place the
notebook on a flat surface and fully open the LCD lid.
3.
Locate and remove 11 Screw A’s on the Metal Cover.
4. Remove the Metal Cover. The DIMM socket is now seen as shown below.
Dual DDR
DIMM Sockets
5.
If you need to remove an old DIMM from the socket, press out on the latches located on both edges
of the socket at the same time. The DIMM should pop up to an angle of 30 degree (see diagram below.).
Pull the DIMM module out of the memory socket. Store away the DIMM for the future use.
6.
Install the new DIMM module into the memory socket. The DIMM will only fit in one orientation.
Insert the DIMM at an angle of approximately 30 degrees into the empty memory socket. Then press it
firmly so that the contact edge is driven into the receiving socket.
4-6
Summary of Contents for AV6110-EH1
Page 35: ... chapter 3 battery power power management 3 8 ...
Page 47: ... chapter 4 upgrading your computer 4 8 ...
Page 48: ... chapter 4 upgrading your computer 4 9 ...
Page 64: ... appendix A product specification A P P E N D I X A PRODUCT SPECIFICATION A 1 ...
Page 70: ... appendix B agency regulatory notices A P P E N D I X B AGENCY REGULATORY NOTICES B 1 ...


