background image

5

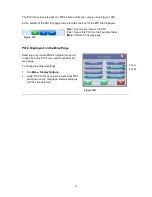
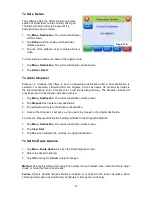
The POI Info screen provides the POI’s name and phone number. (See Figure 12B.)

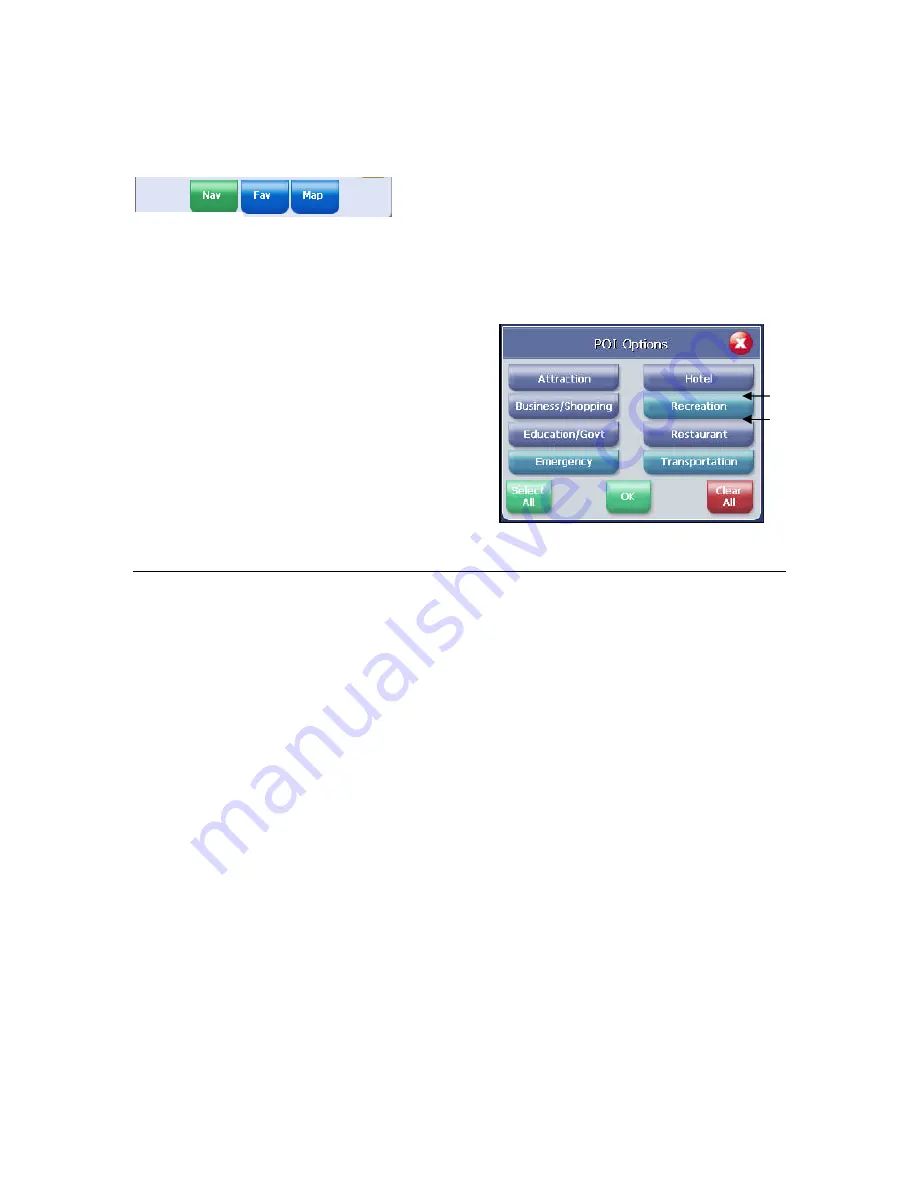
At the bottom of the POI Info page there are three choices for the POI info displayed:

Nav

= Set an auto route to the POI

Fav

= Saves this POI into the Favorites folder

Map

= Return to the map page

POIs Displayed on the Map Page

Selecting only certain POIs is helpful in large city
areas where the POI icons could overwhelm the
map page.

To change the default settings.

1.

Tap

Menu, Display Options

.

2.

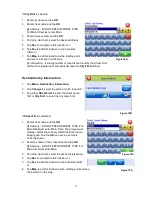
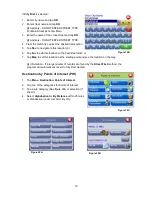
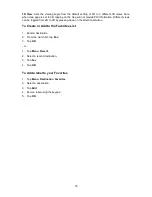
Under the POI Icons column, select what POI’s
are shown on the map page. Default setting is
all POI’s are selected.

Figure 12C

Figure 12D

POI off

POI on

Summary of Contents for Voya 350

Page 1: ......

Page 2: ... from Averatec This software product including the manual and media is copyrighted and contains proprietary information that is subject to change without notice The software may be used only in accordance with the terms of the license agreement Voya is a trademark of Averatec Inc All other trademarks or registered trademarks are acknowledged as the exclusive property of their respective owners Ver...

Page 3: ...e screen If you need to look at the screen for a prolonged time always park the car in a safe manner and in accordance with all traffic regulations Do not select or input destinations change settings or otherwise manually operate this software unless you have parked your car in a safe manner observing all traffic regulations If you are responding to an emergency it may not be prudent to rely on th...

Page 4: ...ed to provide reasonable protection against harmful interference in a residential installation This equipment generates uses and can radiate radio frequency energy and if not installed and used in accordance with the instructions may cause harmful interference to radio communications However there is no guarantee that interference will not occur in a particular installation If this equipment does ...

Page 5: ... recharge When not in use for a long period charge the battery every two weeks to prevent excessive discharge affecting battery performance VOYA 350 Secure Digital SD Card The included memory card contains the digital map files that are required for the GPS navigation data Please do not delete When removing the memory card please make sure the card is not reading data or it will cause a system cra...

Page 6: ...t or indicators on the map for details of building or road names Drag Touch the stylus point on the screen and drag to scroll around the map for a specific location or landmarks Select and hold Select the item icon and hold for a second to show the floating context menu and then select the item to be executed Under normal operating conditions the last satellite lock computed before the unit was tu...

Page 7: ...n Auto Route 9 Destination by Address 10 Destination by Intersection 11 Destination by Points Of Interest POI 12 Destination by Favorites 13 Destination by Recent 13 Destination by City Center 13 Set a Detour 14 Add a Stop Over 14 Set Route Options 14 Display Options 15 Creating or Adding Favorites 16 Panning and Zooming 17 Guidance Volume Setting 17 Localization 18 Speed Alert 18 Exit Map Program...

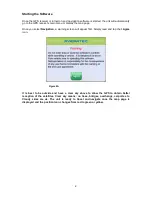
Page 8: ...ion a warning screen will appear first Simply read and tap the I Agree icon It is best to be outside and have a clear sky above to allow the GPS to obtain better reception of the satellites Clear sky means no trees bridges overhangs carports etc Cloudy skies are ok The unit is ready to travel and navigate once the map page is displayed and the position icon changes from red to green or yellow Figu...

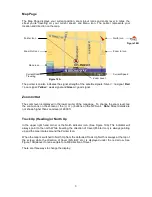
Page 9: ...treet details are not shown higher than zoom level of 2000 ft Track Up Heading or North Up In the upper right hand corner is the North indicator icon See Figure 10A This indicator will always point to the north While traveling the direction of travel Pointer Icon is always pointing up and the map rotates around the Pointer Icon When the map is switched to North Up from the defaulted Track Up North...

Page 10: ...I and street name information to be displayed and also allows movement of the map to different areas for viewing To enter Panning Mode Simply tap and drag along the screen to allow movement of the map to view different areas To exit Panning Mode tap the red X button in the lower right corner of the display To find out more info on a POI simply tap on the POI s icon and the POI Info screen will be ...

Page 11: ...his POI into the Favorites folder Map Return to the map page POIs Displayed on the Map Page Selecting only certain POIs is helpful in large city areas where the POI icons could overwhelm the map page To change the default settings 1 Tap Menu Display Options 2 Under the POI Icons column select what POI s are shown on the map page Default setting is all POI s are selected Figure 12C Figure 12D POI o...

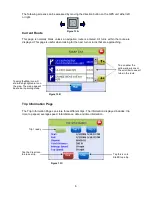
Page 12: ...aching Trip Information Page The Trip Information Page can store three different trips The information displayed includes trip time top speed average speed total distance date and time information Trip 1 ready Tapping the Map icon will show the highlighted turn on the map The map page will be shown in panning mode Tap on either the yellow arrow icons or the scroll bar to see all turns in the route...

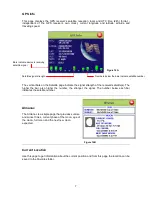
Page 13: ...umber the stronger the signal The number below each bar indicates the satellite number Almanac The Almanac is a simple page that provides sunrise and sunset times current phase of the moon age of the moon full moon and the next new moon expected Current Location Use this page to get information about the current position and from this page the location can be saved to the Favorites folder Bars ind...

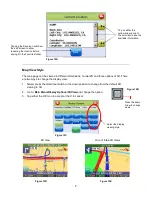
Page 14: ...enu Display Options 3D View and change the option 3 Tap either the OK Icon to accept or the X to cancel 2D View Press the down arrow to change views Tap on either the yellow arrow icons or the scroll bar to see the available information Tapping the Save icon will show the edit screen to allow renaming the location before saving it in the Favorites folder Select the display viewing style One of thr...

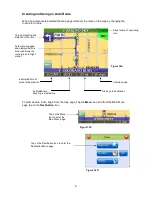
Page 15: ...on the Destination icon Tap on the Destination icon to enter the Destination Menu page Street name of upcoming turn Distance to destination Vehicle speed Estimated time traveling to destination Estimated time of arrival at destination Turn approaching and distance to the turn Auto route engaged and displayed with a blue road along the route green in Night mode Tap on the Menu icon to enter the Mai...

Page 16: ... ENTER STREET TYPE For Main Street just enter Main Note The program will display choices that closely match the street name being typed Tap the OK icon once a choice is correctly shown 2 Enter house number and tap OK 3 From the match list select the desired address 4 Tap Nav to navigate to this location or 5 Tap Fav to add this location to the Favorites folder or 6 Tap Map to set this location as ...

Page 17: ...rsection 2 Tap Change to select the state in which to search 3 Tap either Street First to enter the street name first or City First to enter the city name first If Street First is selected 1 Enter street name and tap OK Advisory DO NOT ENTER STREET TYPE For Main Street just enter Main Note The program will display choices that closely match the street name being typed Tap the OK icon once a choice...

Page 18: ... Favorites folder or 7 Tap Map to set this location as the starting point and see the location on the map i Information If a large number of records are found by the Street First method the program will automatically revert to City First method Destination by Points of Interest POI 1 Tap Menu Destination Points of Interest 2 Tap one of the categories for Points of Interest 3 Tap a sub category See...

Page 19: ...rites 2 Select a destination from the list if you have already created one 3 Tap Nav to navigate to this location or 4 Tap Map to set this location as your starting point and see the location on the map or 5 Tap Edit to create a label i e HOME for this destination or change the label if one already exists or 6 Tap Del to delete this location from the Favorites folder Destination from Recent 1 Tap ...

Page 20: ...eature will only be present if a destination has been entered 1 Tap Menu Destination The current destination will be shown 2 Tap Stopover then enter a new destination 3 The software will route to the Stopover destination 4 Once at the Stopover it will ask you if you want to proceed to the original destination To Cancel a Stopover Destination and Revert Back to the Original Destination 1 Tap Menu D...

Page 21: ...the Guidance screen to automatically switch when getting closer to a turn maneuver or have it appear only when manually selected Day Night The Auto setting changes from Day to Night Mode automatically at approximately sunrise and sunset Select Day to have the display be bright or select Night to have the display change to be better suited for night driving POI Icons The default setting will displa...

Page 22: ...ews can be toggled from 2D to 3D by pressing down on the directional button To Create or Add to the Favorites List 1 Enter a destination 2 From the match list tap Fav 3 Tap OK or 1 Tap Menu Recent 2 Select a recent destination 3 Tap Fav 4 Tap OK To Add a label to your Favorites 1 Tap Menu Destination Favorites 2 Select a destination 3 Tap Edit 4 Enter a label using the keypad 5 Tap OK ...

Page 23: ...at North or Heading is pointing up To Zoom In and Out Use the hardware up and down buttons to zoom in and zoom out You can also use the zoom icons on the Map screen See figure 10A To Adjust the Guidance Volume Setting 1 Tap Menu Setting Volume 2 Select the volume level 3 Tap the Test icon to hear the volume level 4 Tap OK to accept and return to Map screen Cancel icon Zoom Out Icon Zoom In Icon Fi...

Page 24: ...d speed alert lets you enter a speed and will warn you if that speed is exceeded To set the speed alert 1 Tap MENU The main menu appears 2 Tap Settings Speed Alert The Speed Alert screen appears 3 To set auto speed alert Tap the Auto Speed Alert check box A check mark indicates that Auto Speed Alert is on Tap OK A warning appears Tap OK to close the warning Tap OK You return to the map 4 To set a ...

Page 25: ...version information and also to exit the mapping program follow these steps 1 Tap Menu 2 Tap Exit on top left of the menu screen About screen will be shown 3 Tap the X icon to return to the map page 4 Tap Exit to turn off the GPS program Figure 25C ...

Page 26: ...m GPS reception Check to see if the GPS receiver has a clear view of the sky If not move to a location where the GPS receiver s view of the sky is not blocked Exit the program and restart it Perform a Soft Reset and restart A message on the display says Outside of Map Area If you are indoors or if the GPS receiver s view of the sky is obstructed the program may think you are at an inaccurate locat...

Page 27: ...ides position accuracy to 30 or 50 feet depending on the GPS receiver and external conditions weather number of satellites etc Q Do I have to pay a monthly fee for the services A No There are no fees to use GPS Q Will it work indoors A No GPS receivers require a view of the sky to receive the necessary signals from the satellites Similarly GPS will not work in a tunnel or under a freeway overpass ...

Page 28: ...magnetic field equipment Operating temperature The unit s operating temperature is between 14 10 and 131 F 55 C Please do not operate under extreme temperatures Using the stylus The LCD screen is easily scratched please use only the stylus or finger for operation Do not use any other sharp objects on the screen to avoid damaging the LCD screen Cleaning the screen Using a soft clean cloth to wipe t...

Reviews: