


58
ZM201 Indicator User Instructions
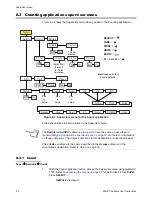
Supervisor menu
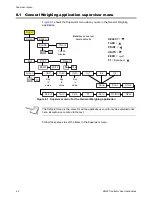
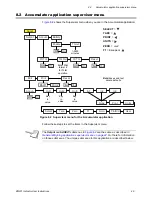
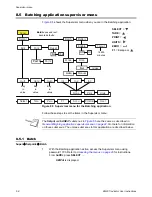
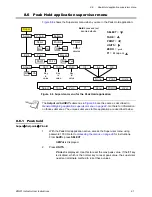
8.5 Batching application supervisor menu
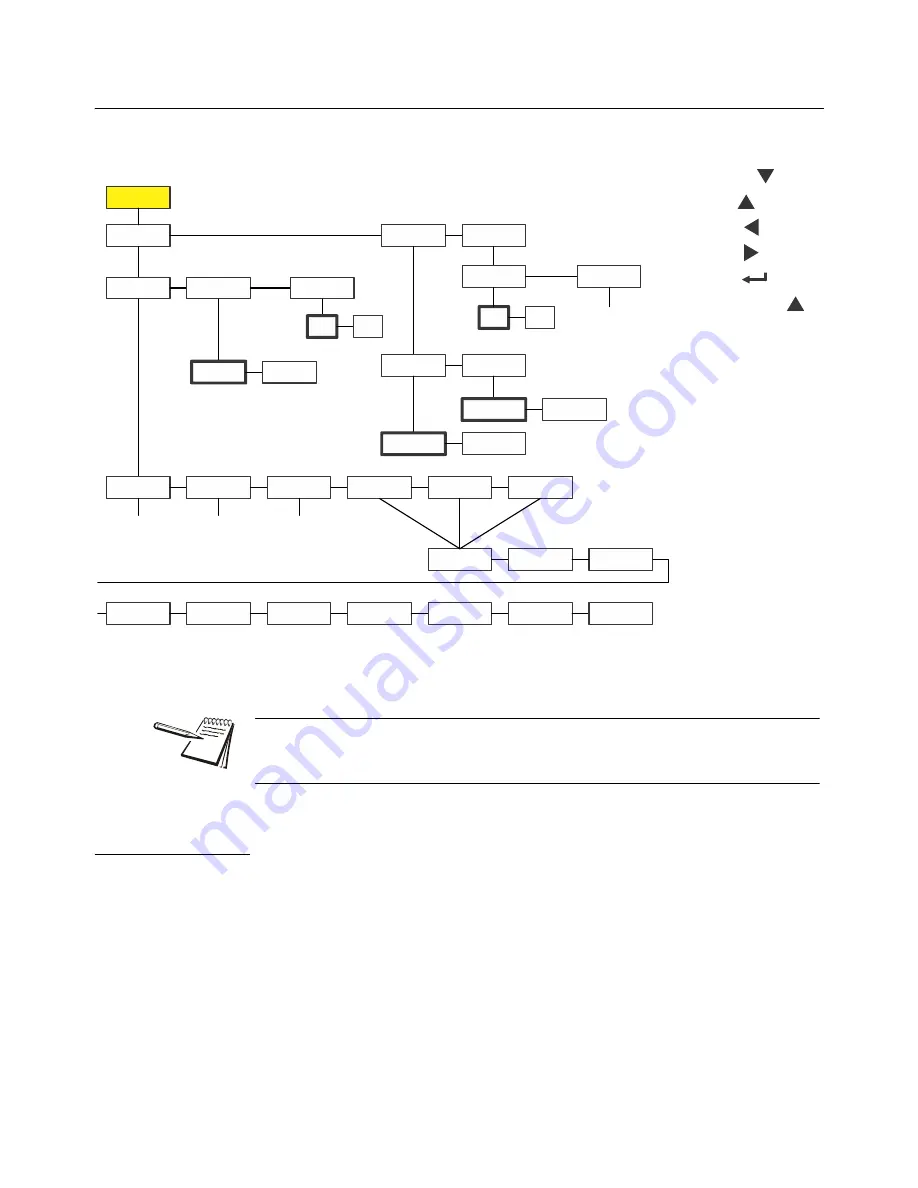
Figure 8.5
shows the Supervisor menu when you are in the Batching application:
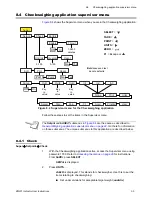
Figure 8.5 Supervisor menu for the Batching application
Follow these steps to set the items in the Supervisor menu.
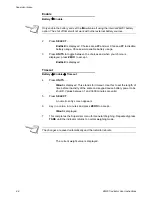
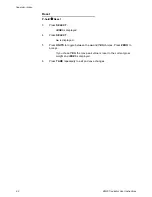
8.5.1 Batch
Super
Setpoint
Batch
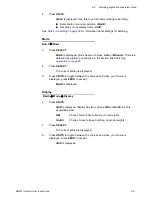
1.
With the Batching application active, access the Supervisor menu using
password 1793. Refer to
Accessing the menus on page 29
for instructions.
From
SuPEr
, press
SELECT
…
SEtPnt
is displayed.
Super
Setpnt
Edit
Reset
No
Yes
Batch
Mode
Disp
Net
Gross
Auto
Manual
Battery
Enable
Tmout
Off
On
Out1
Out2
Out3
In1
In2
In3
None
Units
Select
Tare
Zero
F1
Accu
Port 1
Port 2
PrntHld
User
Bold
boxes and text
denote defaults.
1-3600
minutes
Key
in
value
Key
in
value
Key
in
value
SELECT
=
TARE
=
=
UNITS
=
ZERO
=
F1
= Escape or
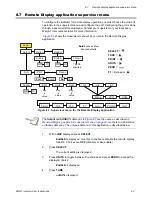
The
Setpnt
and
bAttErY
submenus in
Figure 8.5
are the same as described in
General Weighing application supervisor menu on page 44
. Go there for information
on those submenus. The unique submenus to this application are described below.


