INSTALLING THE MOUNTING BRACKET (
continued
)
IMPORTANT: Make sure that holes locations are leveled and correctly centered by the vertical centerline
(this installation instruction applies for concrete wall).
WARNING: AT LEAST TWO PEOPLE ARE REQUIRED TO LIFT AND POSITION THE HOOD ONTO THE
MOUNTING SCREWS.
WARNING: BE CAREFUL WHEN INSTALLING THE DECORATIVE CHIMNEY AND HOOD, THEY MAY HAVE
SHARP EDGES.
CAUTION: DO NOT REMOVE THE PROTECTIVE PLASTIC FILM COVERING THE DECORATIVE CHIMNEY AT
THIS STAGE.
INSTALLING THE UNIT
Secure the hood to the recommended height of 26 "above the electrical cooking surface and 30" above the
gas cooking surface.
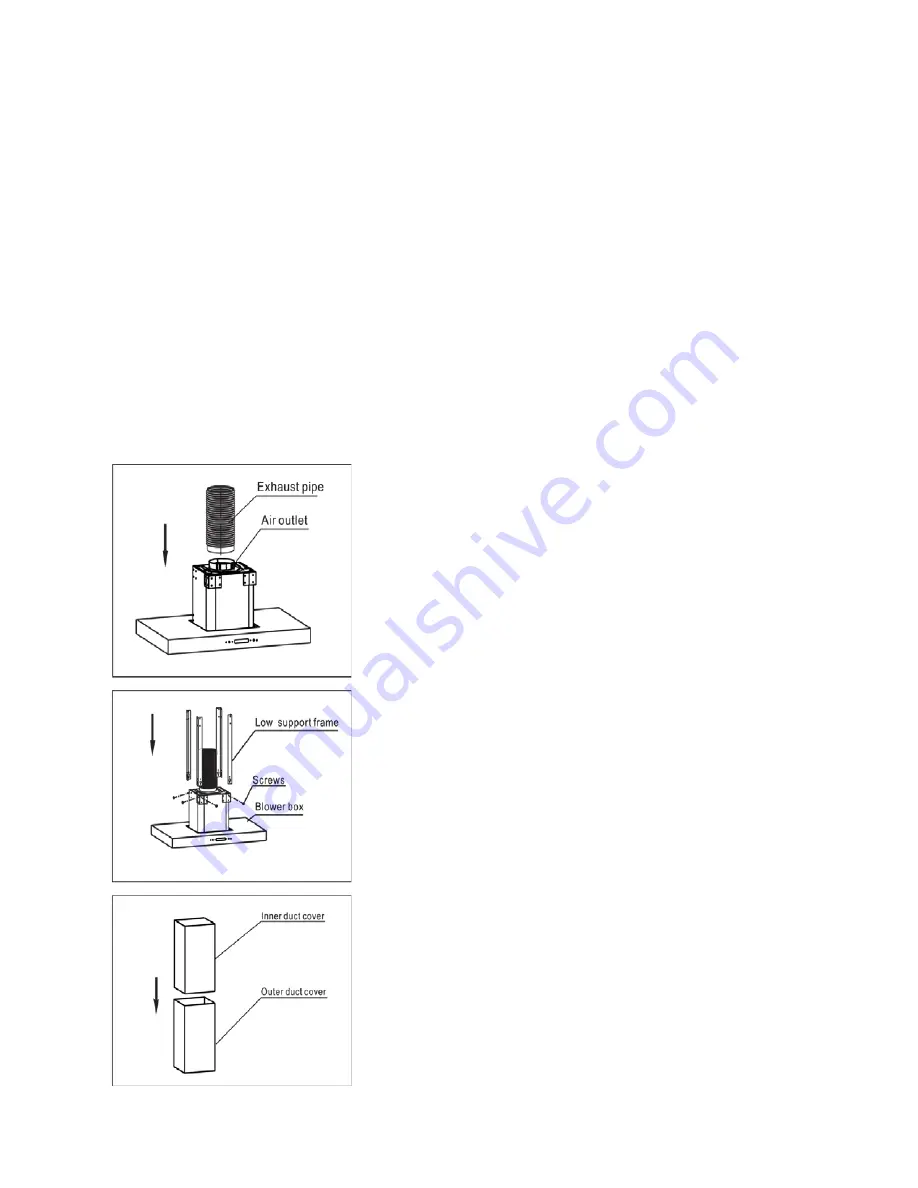
Step 1
:
Remove the hood from its packaging and place it gently on a
horizontal work surface. Attach the exhaust pipe to the air outlet
with 2 screws, use tape to seal the joints between the pipe sections,
making sure it is properly connected, as in Fig. 1
Figure 1
Step 2
:
By aligning the bottom support frame with the holes in the hood
box, use 4 M4X10 screws to attach each bottom support frame to
the hood.
Figure 2
Step 3
:
Insert the inner duct cover into the outer duct cover, as shown in
Fig. 3.
Figure 3
20


