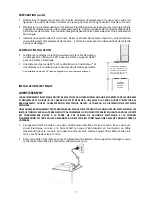


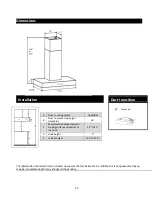

INSTALLING
THE
HOOD
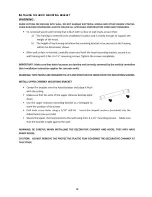
MOUNTING
BRACKET
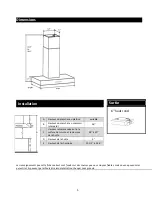
The
minimum
hood
distance
above
cooktop
must
not
be
less
than
28”
for
an
electric
cooking
surface
and
no
less
than
30"
for
a
gas
cooking
surface.
Distances
over
30"
are
at
the
installer’s
and
users’
discretion,
providing
that
ceiling
height
permits.
**installation
over
30’’
may
reduce
efficiency
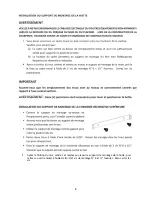
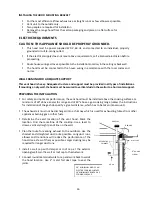
ELECTRICAL
INSTALLATION
WARNING
THIS
RANGE
HOOD
MUST
BE
PROPERLY
GROUNDED.
TURN
OFF
ELECTRICAL
POWER
AT
SERVICE
ENTRANCE
BEFORE
WIRING.
CHECK
TO
MAKE
SURE
THAT
THE
ELECTRIC
CHORD
IS
NOT
IN
CONTACT
WITH
THEE
SHARP
EDGES
OF
THE
APPLIANCE.
IMPROPER
GROUNDING
CAN
RESULT
IN
A
RISK
OF
ELECTRIC
SHOCK.
CONSULT
A
QUALIFIED
ELECTRICIAN
IF
THE
GROUNDING
INSTRUCTIONS
ARE
NOT
COMPLETELY
UNDERSTOOD
OR
IF
THERE
IS
DOUBT
AS
TO
WHETHER
THE
APPLIANCE
IS
PROPERLY
GROUNDED.
DO
NOT
USE
AN
EXTENSION
CORD.
IF
THE
POWER
SUPPLY
CORD
IS
TOO
SHORT,
HAVE
A
QUALIFIED
ELECTRICIAN
INSTALL
AN
OUTLET
NEAR
THE
APPLIANCE.
This
appliance
must
be
plugged
into
an
outlet
that
is
properly
installed
and
grounded.
In
the
event
of
an
electrical
short
circuit,
grounding
reduces
the
risk
of
electric
shock
by
providing
an
escape
wire
for
the
electric
current.
This
appliance
is
equipped
with
a
cord
having
a
grounding
wire
with
a
grounding
plug.
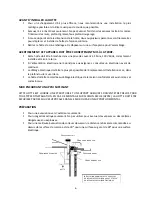
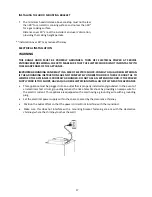
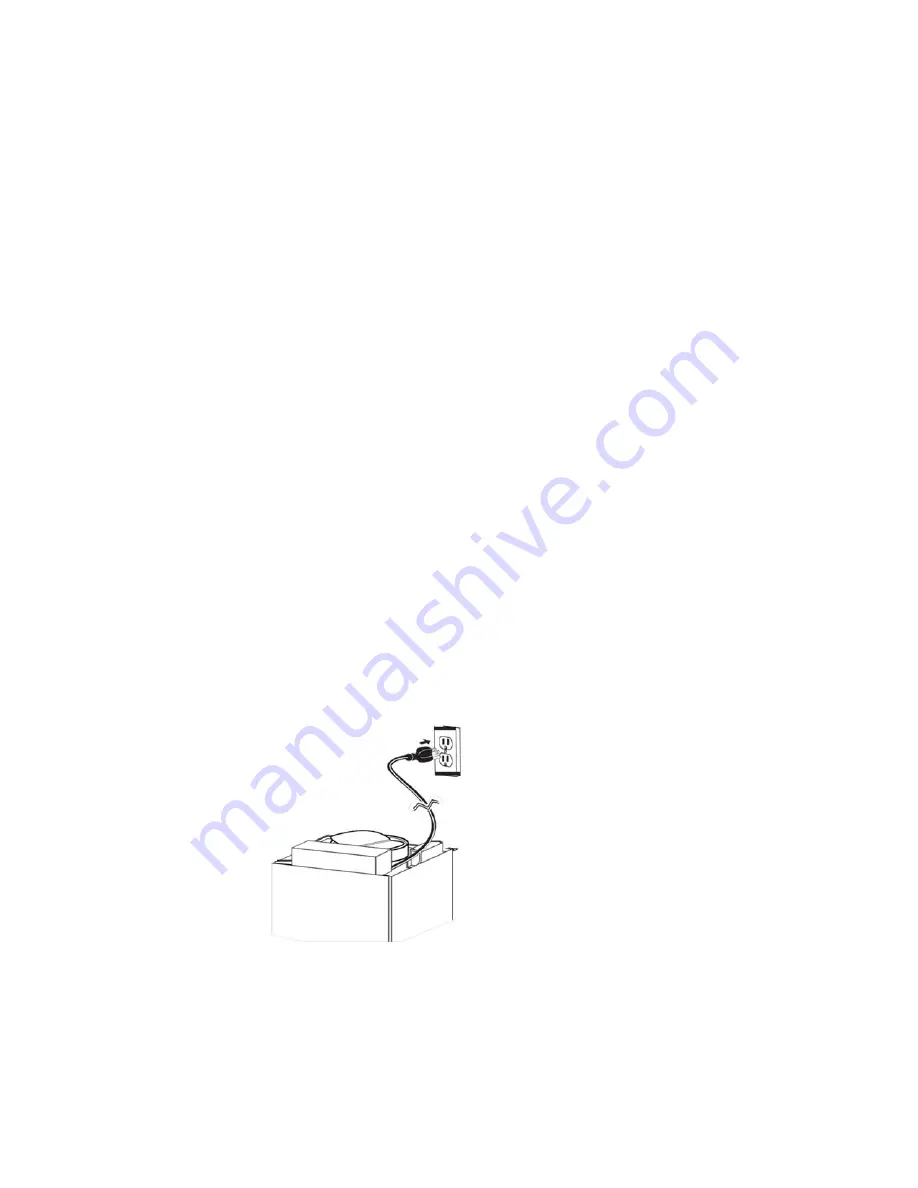
Set
the
electrical
power
supply
within
the
space
covered
by
the
decorative
chimney.
Position
the
outlet
offset
so
that
the
power
cord
will
not
interfere
with
the
round
duct.
Make
sure
this
does
not
interfere
with
a
mounting
bracket
fastening
area
or
with
the
decorative
chimney
(where
the
chimney
touches
the
wall)
17


