Puma 13.5
Owner’s Manual
Washout at the tips
The washout at the tips can also be altered symmetrically, that is increase or reduce the washout on both
wings. Only small changes are needed and large changes are counterproductive. A small reduction in the
washout (2mm) will make the glider feel slightly lighter in pitch and show perhaps a slight increase in glide
performance. In smooth air the glider handling will probably appear much the same but if a wing is lifted it
will be more difficult to get down.
Movement in the opposite direction will have the opposite effect. However it should be emphasised that large
movements are not beneficial.
To check the ideal tip cap setting. The glider should be flown clear of the ground and all other aircraft with
the
VG
on. The under surface at the extreme tip of the sail should be just tight. (See Initial factory set up
STANDARD TIP CAP SETTINGS page 34.)
Washout rod adjustment
The washout in the wing of the Puma 13.5 provides pitch stability and should NEVER be reduced beyond
the C of A lower limit.
(See CHECKING WASHOUT page 35.)
However sometimes the rod heights are not quite symmetrical and the glider has a turn. (If your glider had a
bad turn when you last flew it, but in previous flights flew straight it was probably miss rigged prior to your
last flight. See: pre-flight checks.)
A turn caused by washout rods tends to be much worse with the VG on full. It may be possible to see
asymmetry but it is best to check the batten profile, batten tension and the washout heights before changing
the washout rods. The glider will turn towards a high washout rod. (I.e. if a left washout rod is high the
glider will turn left.)
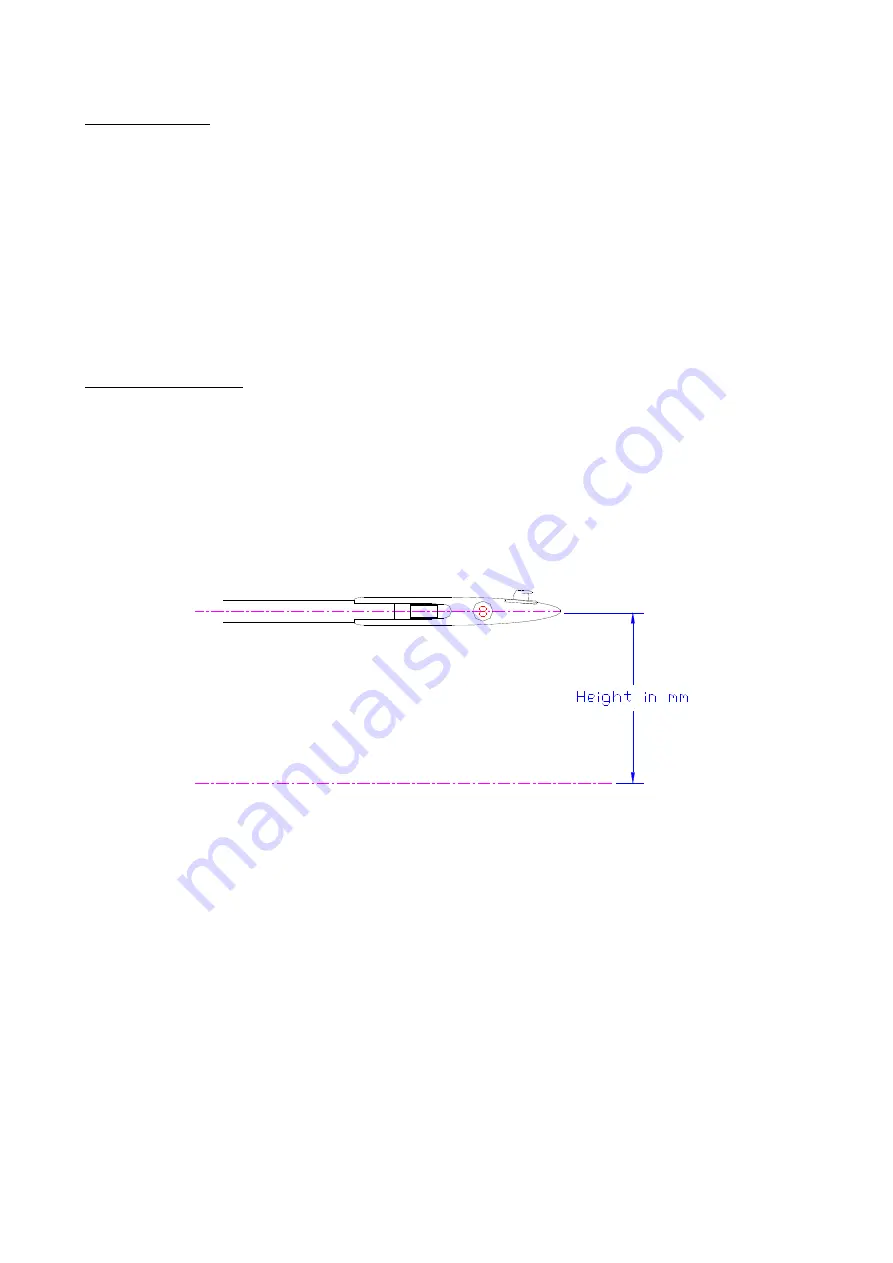
Figure 3: Measuring washout height to batten
Checking washout is outlined in the Technical Details section of this manual. (See page 35.) The easiest way
is to rig the glider flat on a very flat surface
without
the speed bar. Check that the washout rods are correctly
positioned. With the glider tensioned, but the VG fully OFF, the heights of the batten ends can be checked.
(The nose of the glider should be flat on the ground. Make sure that nothing is lifting the keel front or rear
as this will effect the readings. (e.g. The glider may be balance on a zip slider.))
The heights of appropriate battens can be measured with a tape measure and recorded. Check the heights for
symmetry and with those in the technical details. Is the No 8 left batten the same as the No 8 right batten?
Due to the flexibility of the glider if you push the battens and washout rods down on one wing then the rods
will rise on the other side of the glider. Thus it is difficult to get precise symmetry and that is why an average
washout height of both sides is more relevant. A hang glider is fundamentally flexible so precision
measurements are difficult, it is a good idea to measure several times, pressing down the washout rod each
time. The glider should be laid as symmetrically as possible, for example the keel should be centred in its
pocket.
If the washout rod heights are within specification and appear roughly symmetrical but the glider still has a
turn, when flown, it is possible to alter the rods: Lower the rods on one side of the glider while increasing the
height on the other side of the glider by the same amount. In this way the average washout rod height
remains within limits.
Puma 13.5 hand book-Rev-02
19
Summary of Contents for PUMA 13.5
Page 1: ...PUMA 13 5...
Page 21: ...Puma 13 5 Owner s Manual Figure 4 Checking batten tension Puma 13 5 hand book Rev 02 21...
Page 38: ...Puma 13 5 Owner s Manual Section 3 Assembly Drawings Puma 13 5 hand book Rev 02 38...
Page 39: ...Puma 13 5 Owner s Manual NOSE ASSEMBLY Figure 10 Nose assembly Puma 13 5 hand book Rev 02 39...


