4
Configuring the Software in a Workgroup Environment
140
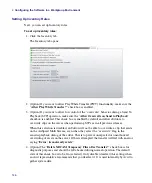
5. Select the user by doing the following:
a.
Click the Add button.
The text “NewUser” appears in the Name field.
b.
In the Name field, select the user name for which you want to assign Inventory and
Channel privileges.
c.
(Optional) In the Description field, type a title or description pertaining to the user.
d.
Select the Inventory and Channel privileges that you want to assign to the user you
are adding.
e.
Click Apply.
6. (Optional) If you want to assign similar Inventory and Channel privileges to another
user that you have created in Interplay, do the following:
a.
Select (to highlight) an existing user from the User Profile list
b.
Click the Copy button.
The text “NewUser” appears in the Name field and the Inventory and Channel
privileges are the same as the user you had selected.
c.
In the Name field, select the name of the user that you want to assign Inventory and
Channel privileges to.
d.
(Optional) In the Description field, type a title or description pertaining to the new
user.
e.
(Optional) If you want to change the Inventory and Channel privileges for this user,
select the desired privileges that you want to assign to the user.
f.
Click Apply.
7. Repeat Steps 6 or 7 for each additional user that you want to create.
8. The next step is to set up Record templates. For more information, see
Record and Destination Templates” on page 140
Setting Up Record and Destination Templates
Once you have set up your credentials for connection to Interplay, you must set up your
Record and Destination templates for your AirSpeed Multi Stream capture and playback.
The Record and Destination Templates tabs are also used to specify the audio settings for
each template that you use to record a high-res resolution and H.264 proxy resolution.
n
Set up for Record templates can only be done through the Avid Service Configuration.
Summary of Contents for AirSpeed Multi Stream
Page 1: ...Avid AirSpeed Multi Stream Installation and User s Guide...
Page 6: ...6...
Page 22: ...22...
Page 178: ...5 Configuring the Software with a Standalone Transfer Manager 178...
Page 326: ...10 Working with the Remote Console 326...
Page 344: ...11 Maintaining Your AirSpeed Multi Stream 344...
Page 362: ...A Specifications 362...
Page 380: ...C Network Teaming 380...
Page 390: ...390 Taiwan EMC Regulations Taiwan EMC Regulations BSMI Class A EMC Warning...
Page 397: ...Index 397...

