HDX-192 DSP Expansion Card Installation Guide 1
HDX-192 DSP Expansion Card Installation Guide
HDX-192 DSP Expansion Cards add mixer and plug-in process-
ing capacity to a VENUE | S6L system. HDX cards are installed
in the VENUE | E6L engine.
Important: HDX-192 Cooling Kits
All HDX-192 cards must have a Fan assembly. Depending on
when your purchased your HDX-192 card(s) the Cooling Kit
(Avid Part Number 9900-71328-01, HDX Shroud Upgrade)
might already be installed. If any of your HDX-192 card(s) do not
have a Fan assembly, contact Avid support at the following link
to obtain the Cooling Kit (free of charge) and follow the included
instructions to install. The Cooling Kit also requires VENUE
software version 5.7 or higher.
https://www.research.net/r/HDXCoolingKitForm
Required Materials
• HDX-192 DSP Expansion Card package, which includes:
• (1) HDX-192 DSP Card
• (1) HDX TDM Flex Cable
• Phillips #1 screwdriver (not included)
• Anti-Static wrist strap (not included)
• Foam or other soft surface to place the card on (not included)
Installing the DSP Card
Installing a DSP card in E6L consists of the following steps:
• Removing the E6L engine core
• Installing the card
• Connecting the HDX TDM cable between HDX cards
• Replacing hardware
• Confirming Installation
Removing the E6L Engine Core
HDX cards are installed in the E6L engine core, which slides out
of the E6L chassis.
To remove the E6L engine core:
1
Put on your anti-static wrist band and configure according to
its instructions.
2
Shut down your system, and disconnect any cables connected
to your E6L engine.
3
Place your E6L on a table or other flat surface that provides
enough room for the E6L engine core to be removed comfort-
ably. Make sure your surface is clear of any debris.
4
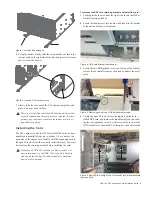
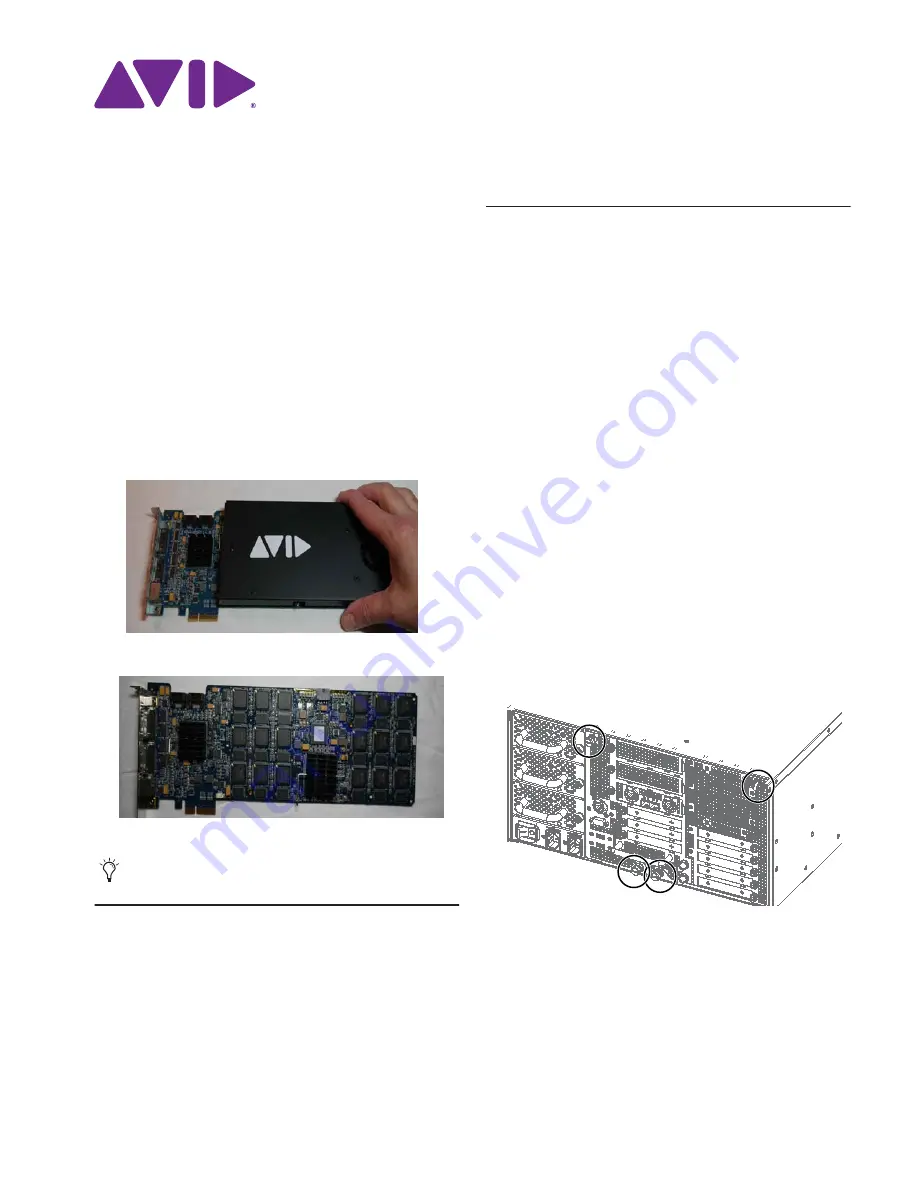
On the back of the E6L, loosen the four thumbscrews that se-
cure the core to the engine chassis.
5
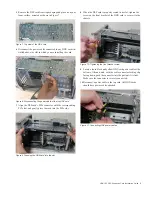
Simultaneously pull the two bottom thumbscrews outward so
the latches they are attached to are fully extended, as shown in
Figure 2.
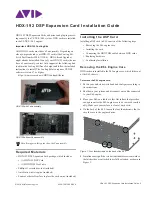
HDX-192 with Fan assembly
HDX-192 without Fan assembly
Not all images in this guide show the Fan assembly.
Figure 1. Four thumbscrews on the back of the E6L
© 2018 Avid Technology, Inc
9320-70072-00 REV A

