background image


CRANE


CO.


280


N.


MIDLAND


AVE.,


STE


258,


SADDLE


BROOK,


NJ


07663


WWW.AVIDCONTROLS.COM


12/17/12 

TECH-440/D.W.O. 23135 

   Page 40 of 55 

Appendix A 

Procedure to Adjust the Error 3 Setting (or Low input pressure) 


Note: The error 3 message threshold is pre-set from the factory. For a low 

pressure positioner it is set to 15 psi and for a high pressure positioner it is 
set at 55 psi. If these settings come out of calibration or if it is necessary to 
change these settings, the following instructions can be followed. 


1. Before adjusting the Error 3 threshold setting the positioner must be mounted and 

set-up. See section 3 of this manual.


2. To adjust the setting of the Error 3 threshold message to indicate low input pressure, 

there is an adjustment screw located on the top of the pneumatic transducer (see 
figure below).


3. To set the Error 3 threshold for an explicit pressure value, loosen the lock nut on 

the adjustment screw and 

gently

 turn the screw clockwise as far as it will go. Do 

not force the screw past its limit or diaphragm assembly may be damaged. 


4. Regulate the supply pressure to the pressure you would like to set as a low input 

pressure flag. 


5. Turn the adjustment screw slowly counter-clockwise to the point where the Err 3 

message appears on the LCD. 


6. Set this point by tightening the lock nut. Be careful not to affect the adjustment 

screw setting. 


7. Re-regulate the supply air to the normal operating pressure. 


Error 3

Adjustment Screw

(With Locknut)

Transducer


Summary of Contents for SMARTCAL

Page 1: ...Prepared By M Twardowski Date 12 17 12 Drafting Work Order 23135 ECN 13247 Reviewed By C Irwin Date 3 14 18 Approved By T Paolini Date 10 18 18 This IOM contains confidential information and is issue...

Page 2: ...7663 WWW AVIDCONTROLS COM 12 17 12 TECH 440 D W O 23135 Page 2 of 55 Revision History Revision Sept 3 2014 Initial release October 24 2017 Revision A Crane Co Americas 1 201 794 7650 Europe Middle Eas...

Page 3: ...Level 21 4 2 Automatic Calibration 22 4 3 Proceed to Exiting Calibration or Perform Advanced Calibration 23 4 4 Exiting Calibration 24 4 5 Configure the Positioners Parameters 24 4 6 Manual Override...

Page 4: ...Schematic for Wiring of Intrinsically safe SmartCal for ATEX IECEX 47 Appendix H 49 Control Schematic for Wiring of Intrinsically safe SmartCal WD 10836 for US CANADA 49 Appendix I 53 Procedure to Re...

Page 5: ...oop The instrument senses valve position via a non contact Hall Effect sensor and controls valve position through a current to pressure transducer The SmartCal is available in two versions HART and no...
Page 6: ...and other algorithms By the integration of multiple components into a singular cost efficient unit microprocessor based intelligence can now be used to implement advanced functions such as early warn...

Page 7: ...Contact Position Feedback To provide consistently accurate performance information all linkages levers and connecting rods from the positioner to the control valve have been eliminated from the design...

Page 8: ...peration If an error or failure condition occurs it will be displayed on the local LCD or if the positioner is supplied with a HART interface the error codes will be displayed on a hand held terminal...

Page 9: ...2 TECH 440 D W O 23135 Page 9 of 55 2 Ordering The SmartCal positioner is designed to handle a wide range of control valve applications Please use the following ordering guide to help choose the Smart...

Page 10: ...LS COM 12 17 12 TECH 440 D W O 23135 Page 10 of 55 3 Initial Setup 3 1 Mounting Positioner on a Rotary Actuator Step 1 Figure 1 shows typical direct mounting of positioner to an actuator Mount the mod...

Page 11: ...cator to mount as shown in Condition 1 or Condition 2 see figure 3 2 Condition 1 and Condition 2 show the placement of the indicator with respect to the positioner housing while the actuator is in the...

Page 12: ...eds to be properly oriented Use the symbols on the bottom of the indicator to mount as shown in Condition 1 or Condition 2 see figure 3 3 Condition 1 and Condition 2 show the placement of the indicato...

Page 13: ...p 5 Remove the electronic canister cover by unscrewing 2 mounting screws Appendix B Procedure to Remove Electronics Cover and Electronic Canister Step 6 If necessary cut remote cable to required lengt...

Page 14: ...r Step 3 Mount the positioner to the mounting bracket The positioner should be mounted so the magnetic pick up unit of the positioner is centered between the limits of the magnetic assembly s stroke A...

Page 15: ...he red arrow on the magnet assembly 2 Stroke the actuator to its lower limit and place a mark on the actuator s yoke that lines up with the red arrow on the magnet assembly 3 Place a third mark on the...

Page 16: ...nsor housing so that the conduit entry faces away from the diaphragm or cylinder See Figure 3 7 Figure 3 7 Note For Fisher actuators model 657 667 sizes 34 thru 70 a slotted mounting kit design can be...

Page 17: ...nic canister cover by unscrewing 2 mounting screws Appendix B Procedure to Remove Electronics Cover and Electronic Canister Step 5 If necessary cut remote cable to required length making sure to cut e...

Page 18: ...uator away from the fail position increasing set point signal causes pressure to increase in Outlet Port 1 of the positioner and pressure to decrease in Outlet Port 2 of the positioner Note Air supply...

Page 19: ...C and above 60 C use field wiring suitable for both minimum and maximum ambient temperatures E Electromagnetic compatibility emissions and susceptibility is guaranteed only if the unit and all cables...

Page 20: ...CRANE CO 280 N MIDLAND AVE STE 258 SADDLE BROOK NJ 07663 WWW AVIDCONTROLS COM 12 17 12 TECH 440 D W O 23135 Page 20 of 55 Figure3 10...

Page 21: ...anytime during calibration 4 1 Enter Calibration Menu Level Enter the calibration menu by pushing the CAL button ACAL Auto Cal Menu is the first of four menus By pressing the CAL button again you ente...

Page 22: ...0 65 liters to a maximum of 600 inch3 9 80 liters for proper Auto Calibration functionality It should also be noted that this is to be used as a general guideline only The actuator valve package dyna...

Page 23: ...ete The Automatic Calibration that was performed in Section 3 is adequate for most applications If no advanced calibration is required proceed to Section 5 to exit calibration If the user requires usi...

Page 24: ...L Lo etc press the up arrow key once to enter the Menu level and once more to exit CAL mode If the positioner is performing any calibration function e g ACAL Trnd press up and down key simultaneously...

Page 25: ...7 Description of Menus The calibration functions of the positioner are organized into the following four menus Menus Menu 1 ACAL Automatic Calibration Menu 2 MCAL Manual Calibration Menu 3 Cofg Confi...

Page 26: ...tings Menu 4 Stro Manual Override of Input Signal Entering this menu allows you access to the following three stroking functions via the keypad 1 Adjs Adjustment of Positioner to Any Position Using K...

Page 27: ...CAL and Integral ICAL gain settings can be varied incrementally on a scale from 1 255 The fine tuning values are directly related to the actual time constant values Ti or Td and the Proportional gain...

Page 28: ...output typically 4 0 mA for zero and 20 0 mA for span The positioner then calculates the difference between the present and the desired output currents for zero and span and uses the differential to a...

Page 29: ...es LCD menu timeout The range is 1 to 60 minutes It measures the amount of time there is no activity on the keypad and returns the system to the main screen after the configured timeout The default va...

Page 30: ...ON I 20 5 ON ON ON 5 1 2 Electrical Connection Check the polarity of the 4 20 mA loop current loop The SmartCal terminal strip visually designates the positive and negative terminal points for connect...

Page 31: ...tCal positioner must be used If the supply pressure is below 40 PSI a low pressure SmartCal positioner must be used See Ordering Guide Section 2 1 5 2 FAQ s Listed here are some FAQ s encountered with...

Page 32: ...5 2 4 After removing power to the positioner there is full pressure to output port 1 and zero pressure to output port 2 On loss of power the positioner fails full air pressure to output port 2 If thi...

Page 33: ...itch Maximum voltage 35VDC Maximum load impedance 1 KOhm Performance Resolution 0 2 Full Travel Linearity 0 5 Full Scale Rotary 1 0 Full Scale Linear Hysteresis 0 2 Full Scale Repeatability 0 2 Full S...

Page 34: ...fully perform calibration ALR Alert 3 Valve position is not being maintained within the dead band range The dead band range EDb is set from the configuration menu during calibration Section 4 The EDb...

Page 35: ...n Check Hall sensor connector and cable especially if remote see Figure 3 4 connector J8 Pressure supply stability Actuator and tubing leaks Perform a full auto CAL Remove power for at least 1 minute...

Page 36: ...nd is properly connected to a clean ground reference Sources of electromagnetic noise too close to the sensor or to the positioner cables like AC cables for motors inverters etc Try to replace the Hal...

Page 37: ...connected Actuator Valve assembly integrity Try to repeat a full auto CAL Call factory for additional support Not possible to set down gain The calibration of the position sensor could not find a pro...

Page 38: ...or and cable especially if remote see Figure 3 4 connector J8 Magnet assembly For rotary magnets check if it is not rotated 90 degrees see figures 3 2 3 3 and 3 4 For linear magnets check if the magne...

Page 39: ...additional support Service not implemented An unknown service was request via HART communication Check Remove power for at least 1 minute and retry Remove power for at least 1 minute perform a factory...

Page 40: ...t the setting of the Error 3 threshold message to indicate low input pressure there is an adjustment screw located on the top of the pneumatic transducer see figure below 3 To set the Error 3 threshol...

Page 41: ...om electronics canister make sure to note connector locations Remove the screw that secures canister housing and ground cable Remove the screw that secures ground cable see figures below 3 Remove the...

Page 42: ...utput current to go to a fail state is whenever the onboard microcontroller gets reset by the internal or external watchdog circuits A third event that causes the transmitter output to go to the fail...

Page 43: ...ore connecting it to the pins Make sure the two leads are not shorting by both coming in contact with Pin 3 5 Turn the 4 20 mA generator on a Note the transducer operates between 0 and 3 3 mA Therefor...

Page 44: ...ent just prior to the positioner is therefore recommended Spool valve cleaning In favorable conditions i e high quality supply air healthy actuator there will be minimal if any maintenance necessary o...

Page 45: ...amage the spool assembly and will affect the fit and action of the spool sleeve assembly Important the spool and sleeve assembly are sold as a precision matched set Spools are not interchangeable To p...

Page 46: ...CRANE CO 280 N MIDLAND AVE STE 258 SADDLE BROOK NJ 07663 WWW AVIDCONTROLS COM 12 17 12 TECH 440 D W O 23135 Page 46 of 55 Appendix F Grounding Schematic...

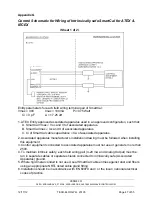
Page 47: ...d apparatus C Ci of SmartCal cable capacitance Ca of associated apparatus 2 Associated apparatus manufacturer s installation drawing must be followed when installing this equipment 3 Control equipment...

Page 48: ...h combined entity parameters The following conditions must be satisfied Voc or Vo Vmax or Ui Ca Ci Ccable Isc or Io Imax or Ii La Li Lcable 2 Associated apparatus manufacturer s installation drawing m...

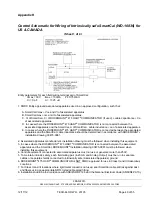
Page 49: ...ed apparatus and the SmartCal cable inductance should be determined in accordance with ROSEMOUNT installation drawing 00475 0081 2 Associated apparatus manufacturer s installation drawing must be foll...

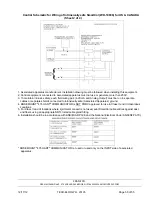
Page 50: ...fety each field wiring pair 4 20 mA and Analog Output must be run in separate cables or separate shields connected to intrinsically safe Associated Apparatus ground 4 ROSEMOUNT 475 HART COMMUNICATOR i...

Page 51: ...fety each field wiring pair 4 20 mA and Analog Output must be run in separate cables or separate shields connected to intrinsically safe Associated Apparatus ground 4 ROSEMOUNT 475 HART COMMUNICATOR i...

Page 52: ...Ci C Cable Isc or Io Imax or Ii La Li L Cable 2 Associated apparatus manufacturer s installation drawing must be followed when installing this equipment 3 Control equipment connected to associated ap...

Page 53: ...row to select Yes or press once more to select All Then press the CAL button to begin the factory default procedure a Yes option resets all non volatile data to default with exception of the position...

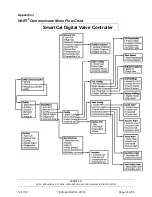
Page 54: ...CRANE CO 280 N MIDLAND AVE STE 258 SADDLE BROOK NJ 07663 WWW AVIDCONTROLS COM 12 17 12 TECH 440 D W O 23135 Page 54 of 55 Appendix J HART Communicator Menu Flow Chart SmartCal Digital Valve Controller...

Page 55: ...s control systems and asset management systems in the market Crane Co provides DD files and DTM for this integration DD files can be downloaded from http www hartcommproduct com inventory2 index php a...

Reviews: