
VENUE MADI Card
2
System Requirements
The following elements are required to use the MADI card:
• A qualified VENUE system running VENUE software 2.8.5 or
higher.
• To enable redundant outputs, a qualified VENUE system
running VENUE software 2.9 or higher. Go to our website,
www.avid.com, for more information.
• An available expansion slot in your FOH Rack or Mix Rack.
• (FOH Rack only) A second Snake card if installing two MADI
cards, or installing a MADI card and an HDx card.
• (Mix Rack only) To enable the redundant output configura-
tion in a Mix Rack, installation of the clock source jumper
cable if installing two MADI cards, or installing a MADI card
and an HDx card.
• The following cables (purchased separately), depending on
the format of your external MADI devices:
• 75 Ohm coaxial (BNC) cable (Belden 1855 or 1694 type)
for an audio connection of 100 meters (328 feet) maxi-
mum.
• SC FDDI fiber-optic cable for an audio connection of
2,000 meters (6,562 feet) maximum.
• Depending on your system configuration, a 75 Ohm coaxial
(BNC) cable (Belden 1855 and 1694 type, purchased sepa-
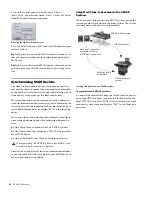
rately) for synchronization. For more information on syn-
chronization, see “Synchronizing MADI Devices” on
page 12.
For complete system requirements and software upgrade in-
formation, visit the Avid website (www.avid.com).
Compatibility Information
Avid can only assure compatibility and provide support for
hardware and software it has tested and approved.
For a list of Avid-qualified computers, operating systems, hard
drives, and third-party devices, refer to the latest compatibility
information on the website (www.avid.com), click on the
Products and Services menu at the top of the page, and choose
the product you are interested in from the menu.
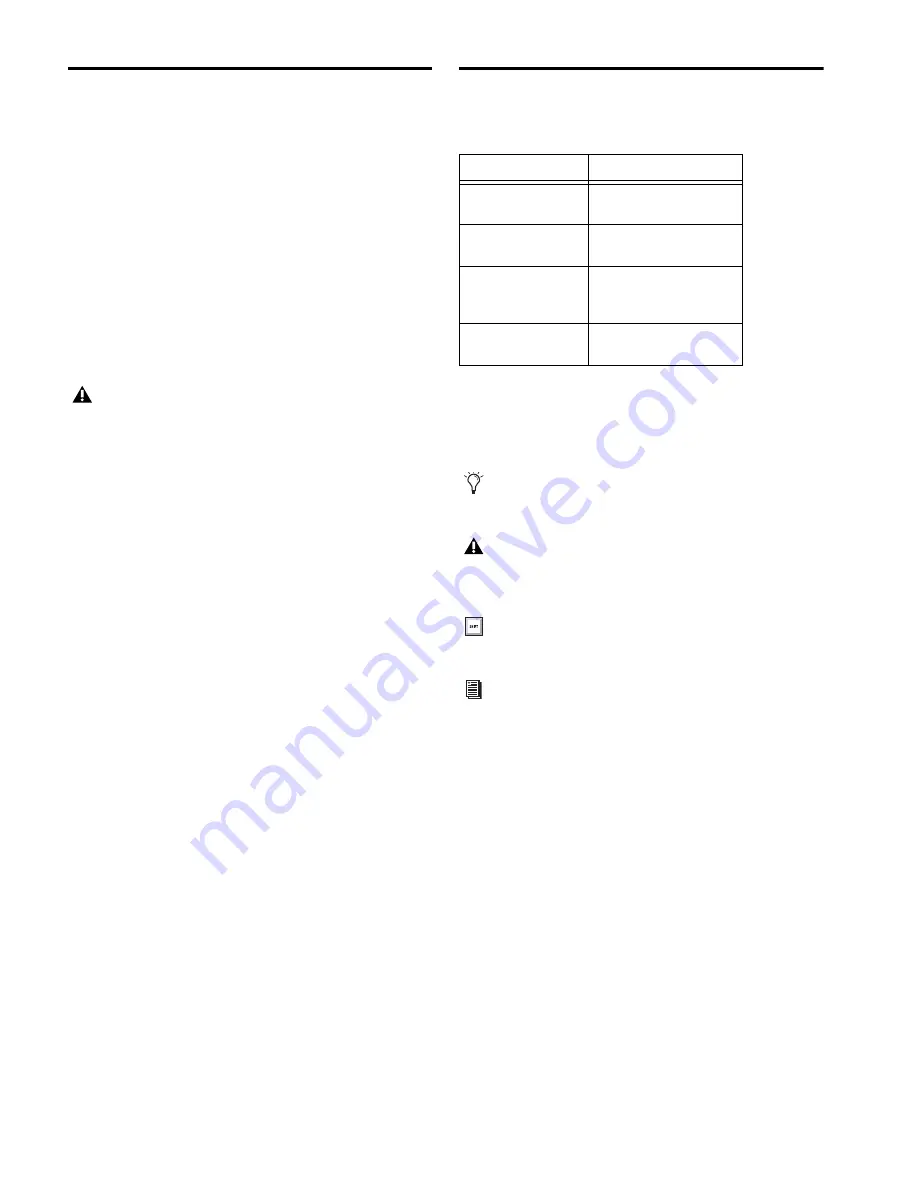
Conventions Used in This Guide
Our guides use the following conventions to indicate menu
choices and key commands:
The names of
Commands
,
Options
, and
Settings
that appear
on-screen are in a different font.
The following symbols are used to highlight important infor-
mation:
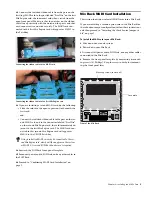
The clock source jumper cable is included with–but not in-
stalled in–the Mix Rack. See “Installing the Clock Source
Jumper Cable” on page 7 for installation instructions.
Convention
Action
File > Save
Choose Save from the File
menu
N
Hold down the Control key
and press the N key
Control-click
Hold down the Control key
and click the mouse but-
ton
Right-click
Click with the right mouse
button
User Tips are helpful hints for getting the
most from your VENUE system.
Important Notices include information that
could affect your data or the performance of
your system.
Shortcuts show you useful keyboard or
mouse shortcuts.
Cross References point to related sections in
this guide and other guides.