2
Replacing the Chassis
When replacing drives in the Avid VideoRAID ST chassis, the positioning of the 5
individual drives is allowed to change. However, drives sets cannot be mixed between
VideoRAID ST chassis. Each drive set of 5, must stay as a complete 5-drive set when moved
from one chassis to another.
n
If more details are needed with these instructions, see the
Avid VideoRAID ST Setup and
User’s Guide
that came with the unit.
To replace the VideoRAID ST chassis:
1. Shut down your workstation host that is connected to the VideoRAID ST.
2. Power down the VideoRAID ST.
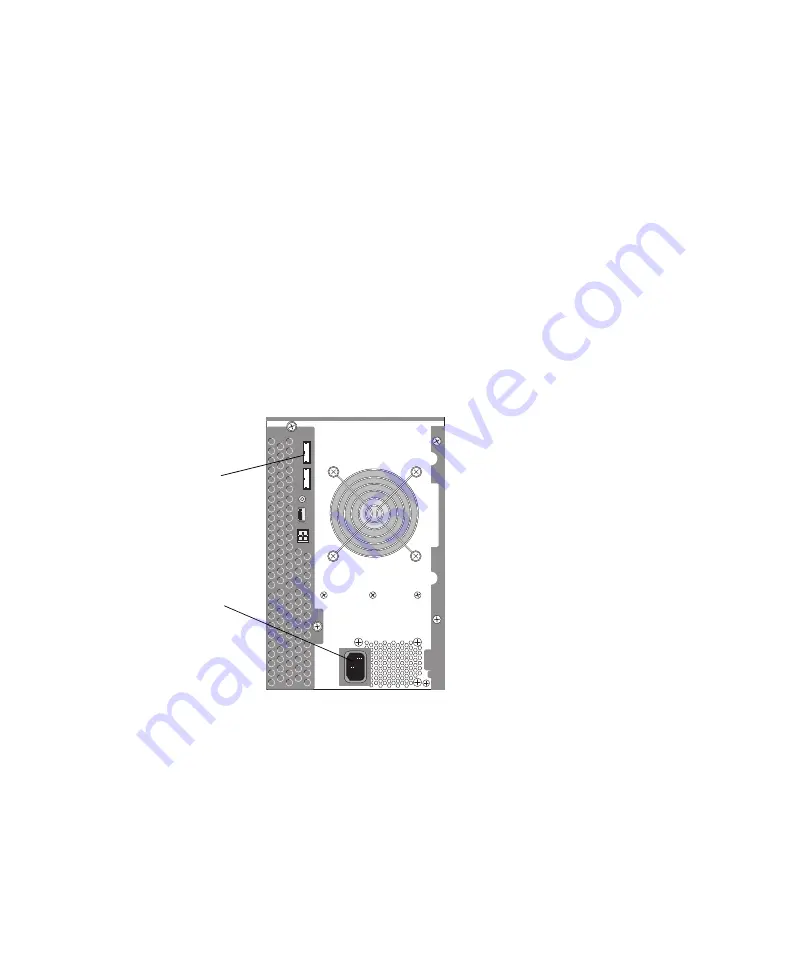
3. Unplug the miniSAS cable from the top SAS connector on the rear of the
Avid VideoRAID ST chassis.
4. Unplug the power cord from the power connector on the Avid VideoRAID ST.
5. Ensure that you are using the appropriate antistatic precautions.
c
Never touch any exposed electrical connectors or components without using antistatic
precautions, as they can be damaged by electrostatic discharge (ESD).
6. Place the replacement chassis beside the original chassis.
Avid recommends you pull the drives out of the original chassis and insert them into the
replacement chassis in one action. Doing this reduces:
-
Static damage from other surfaces and handing the drive carrier more than once.
-
Physical damage to components caused by stacking the drives on each other or on
hard surfaces.
miniSAS
connector
Power
connector


