Replacing the Chassis
3
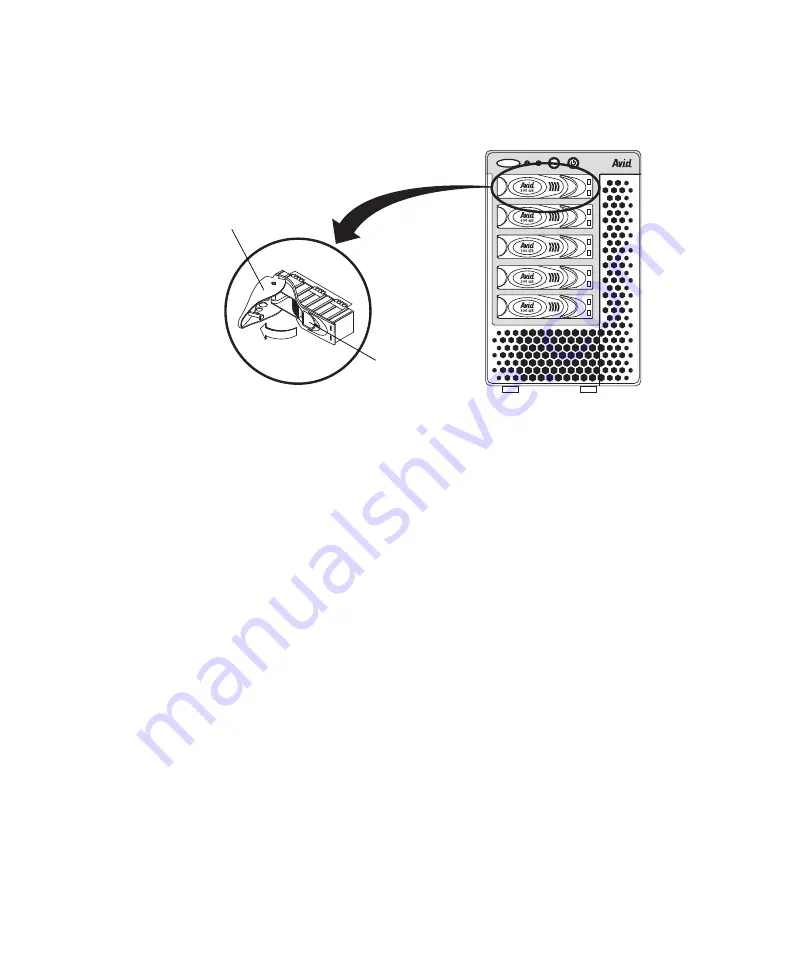
7. Slide the drive carrier latch on the front of the disk drive to the right.
8. Pull open the drive carrier handle on the front of the disk drive.
9. Removed the disk drive carrier from the VideoRAID ST chassis.
10. Insert the removed disk drive carrier into an empty slot in the replacement
Avid VideoRAID ST chassis. The carrier snaps into place.
11. Close the handle on the disk drive carrier to secure the drive in the chassis.
12. Repeat Steps 7 and 11 for each of the remaining disk drive carriers.
13. Reconnect the miniSAS cable into the top SAS connector on the rear of the
Avid VideoRAID ST chassis.
n
The bottom SAS connector on the Avid VideoRAID ST enclosure is not used.
14. Plug the power cord into the power connector on the rear of the Avid VideoRAID ST.
15. Power on your Avid VideoRAID ST and wait till all the blue LEDs on the drives are lit
in a steady blue state (typically about 30 seconds).
16. Power on your host workstation.
The storage is recognized by the host workstation as originally configured with all data
intact.
17. Return the original chassis to Avid.
COPYRIGHT © 2008 Avid Technology, Inc. and its licensors. All rights reserved. Avid and Avid VideoRAID are either
registered trademarks or trademarks of Avid Technology, Inc. in the United States and/or other countries. All other trademarks
contained herein are the property of their respective owners.
Avid VideoRAID ST Chassis Replacement Instructions • 0130-30100-01 Rev. A • October 2008
VideoRAID ST
Drive carrier
latch
Drive carrier
handle


